
Das Werk 16001 1:16 Scale Sturmgeschutz III G Stug III
This is a 1/16 scale Stug tank. About god damn time, I will say.
The Stug tank is an iconic World war era tank.
Now, I ordered this from US, and it took 2 MONTHS to get here. I don’t blame the seller because they used USPS Priority Mail International Parcels which is a decent shipping choice. The cause of the delay is Covid.
Well, I order regularly from Japan and they arrive in 2 or 3 days by DHL / Fedex. Shipping prices are about the same. Okay, I know the comparison is unfair. Even so, taking 2 months from USA to Canada via a decently priced expedited service is …., well, bad.
Anyway, let’s move on.
This kit was designed by Das Werk and was manufactured by Takom. I purchased this at 119 USD which is an awesome price point for a 1/16 tank kit. I expected no internals due to the low price point, and there isn’t.
About Stug tank itself. It is a tank destroyer (or self-propelled gun) and technically is not a tank. The definition of a tank requires a rotating turret, but nowadays some SPGs, like Stug, Hetzer, Soviet SU series are often called tanks because they were meant to be tanks.
Allow me to explain. the chassis of Stug is Panzer 3. The maximum caliber gun Panzer 3 could mount was 50mm which was quickly becoming obsolete. A 75mm gun was required. While Panzer 4 was able to amount 75mm gun – just barely -, Panzer 3 simply couldn’t. So, initially, Panzer 3 tanks were left in storage. However, as World war dragged on and Germany was starting to run low on resources, they saw hundreds, if not thousands, of inactive Panzer 3 chassis. They wanted to get a 75mm gun on it somehow.
Thus, Stug was born. Turret is gone because they mounted a 75mm gun directly onto its chassis. SPGs are generally artillery guns on wheels. But SPGs like Stug, Hetzer, SU series were not meant to be artilleries. They were meant to be tanks. It’s just that circumstances made them the way they were. That’s why I call them tanks.
Stug was a successful tank which gave a birth to an improved version, the Hetzer.
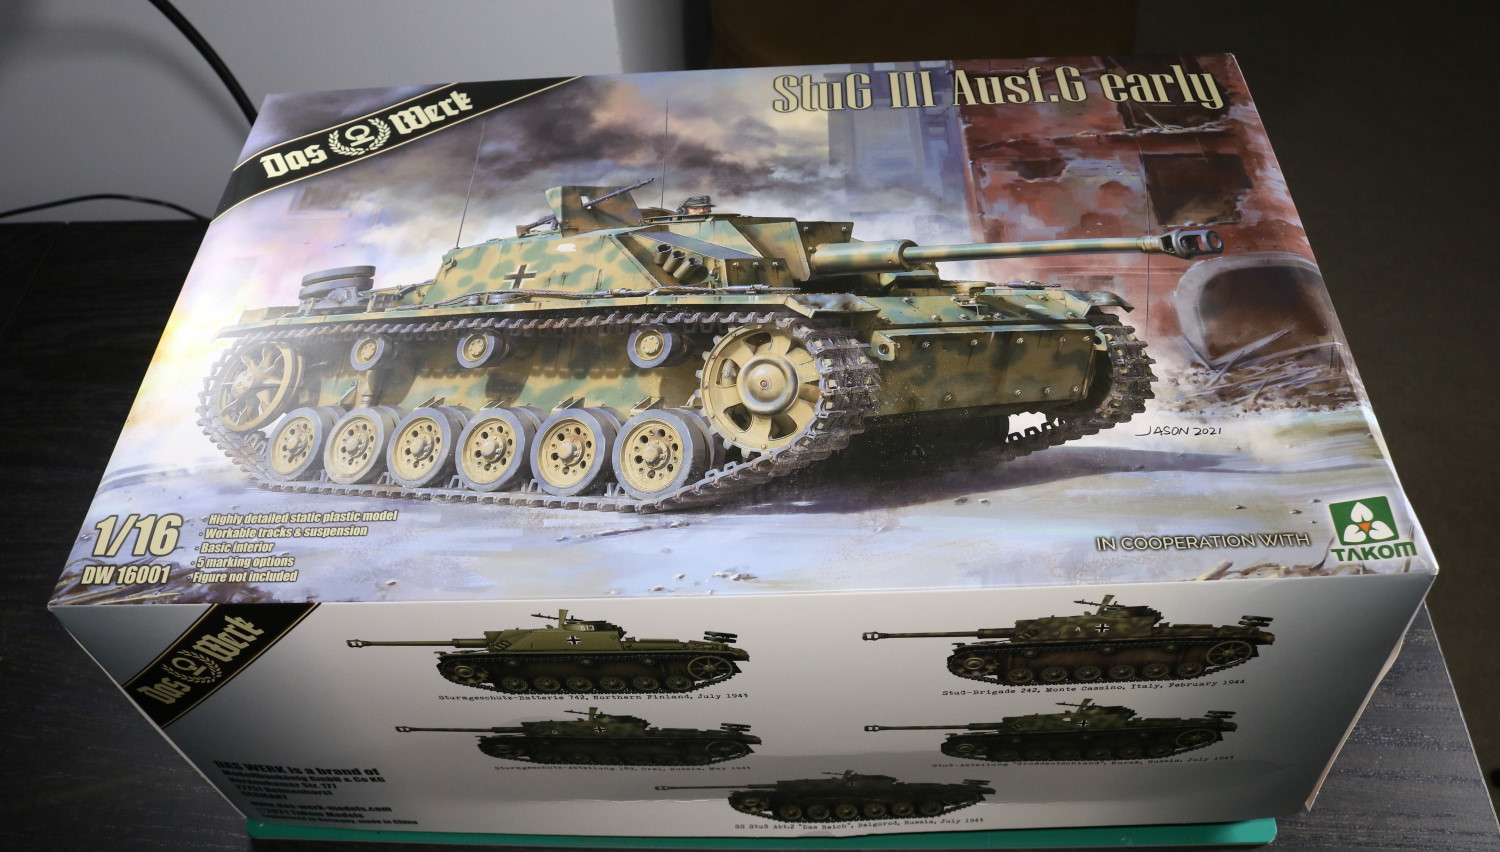
The box dimension surprised me a bit because it is very tall, very very tall indeed. Other than that, the overall dimension is ordinary for a box containing a 1/16 tank.
The box also has a matte finish which isn’t something worthy of a note in general. But this is the first time I’ve seen a tank kit box having a matte finish. It gives a premium feeling.
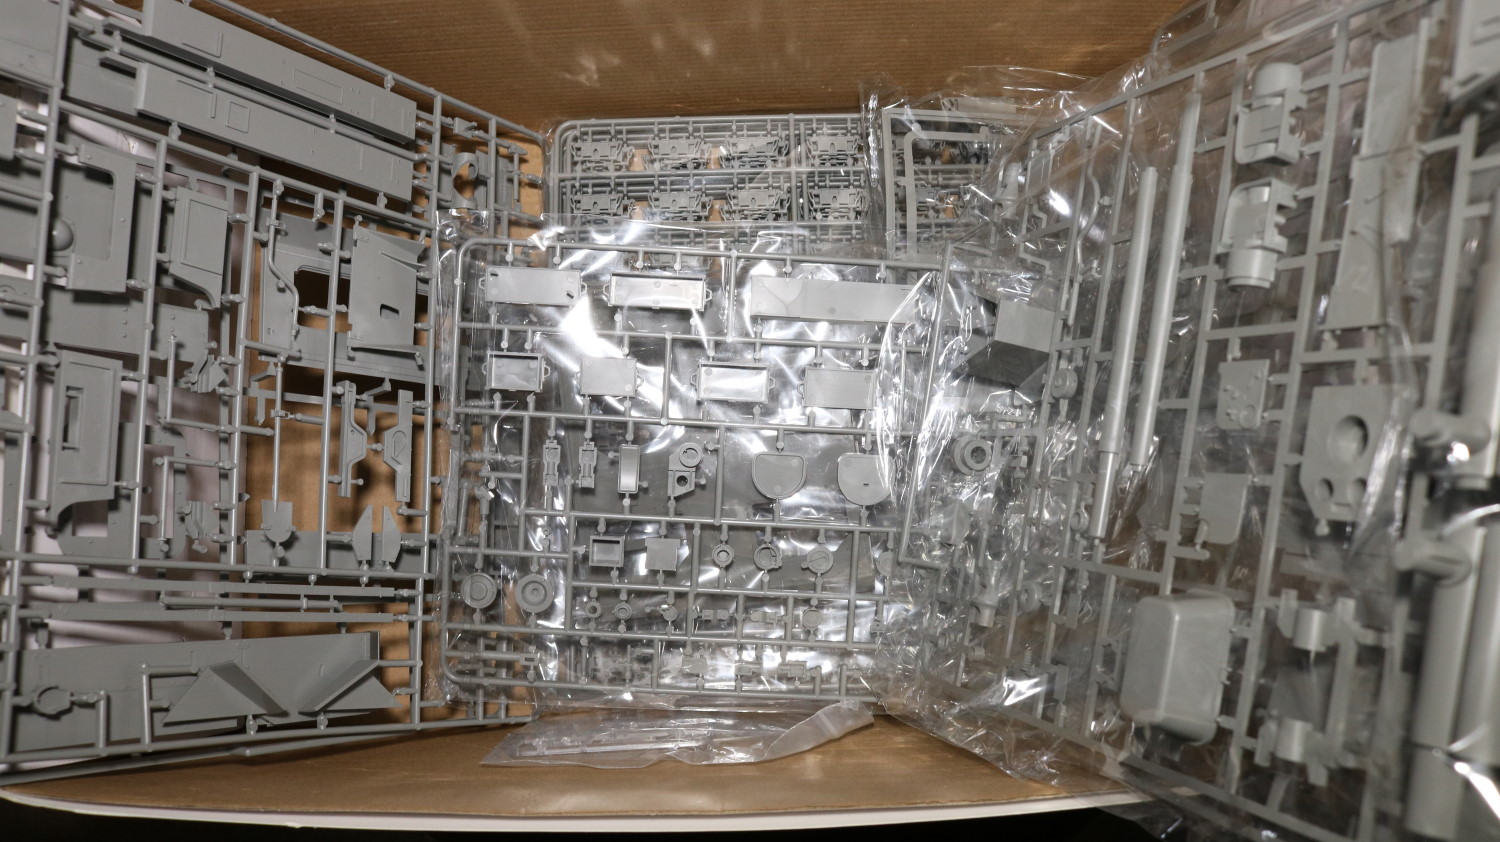
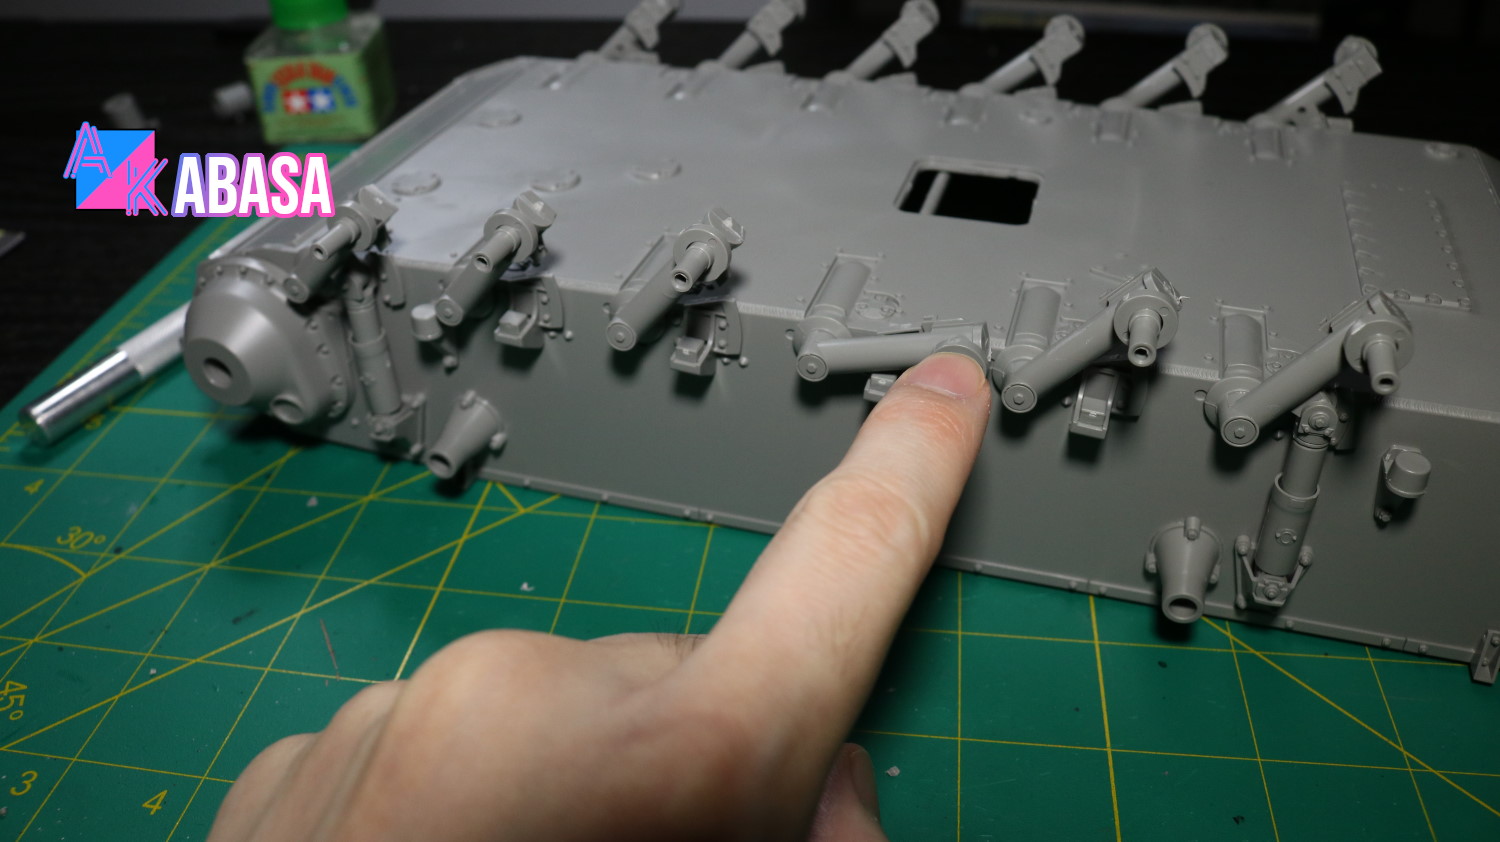
Upon opening the box, I find a lot of parts. A good portion of it is dedicated to tracks. Figures. I am probably going to have shoulder & finger breaking time assembling the tracks. Still, it is far better than assembling 1/35 scale tank tracks, which gives me nightmares.
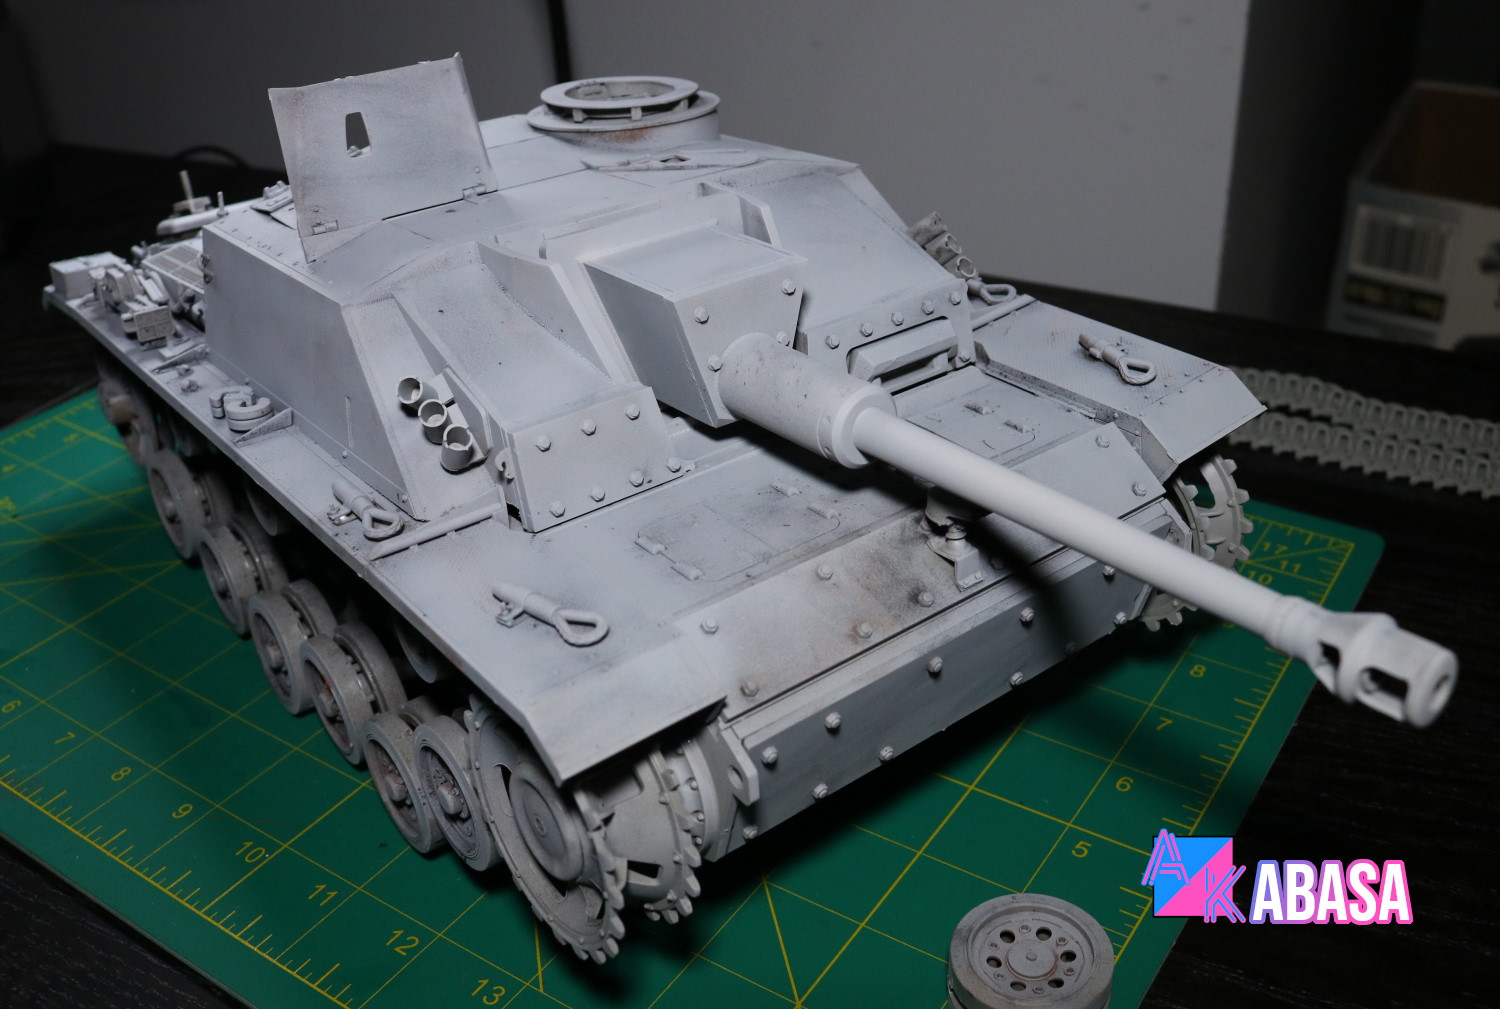
As you can see, the plastic is gray which is the color I am going to go for this Stug III tank. I may not prime this one. We will see.
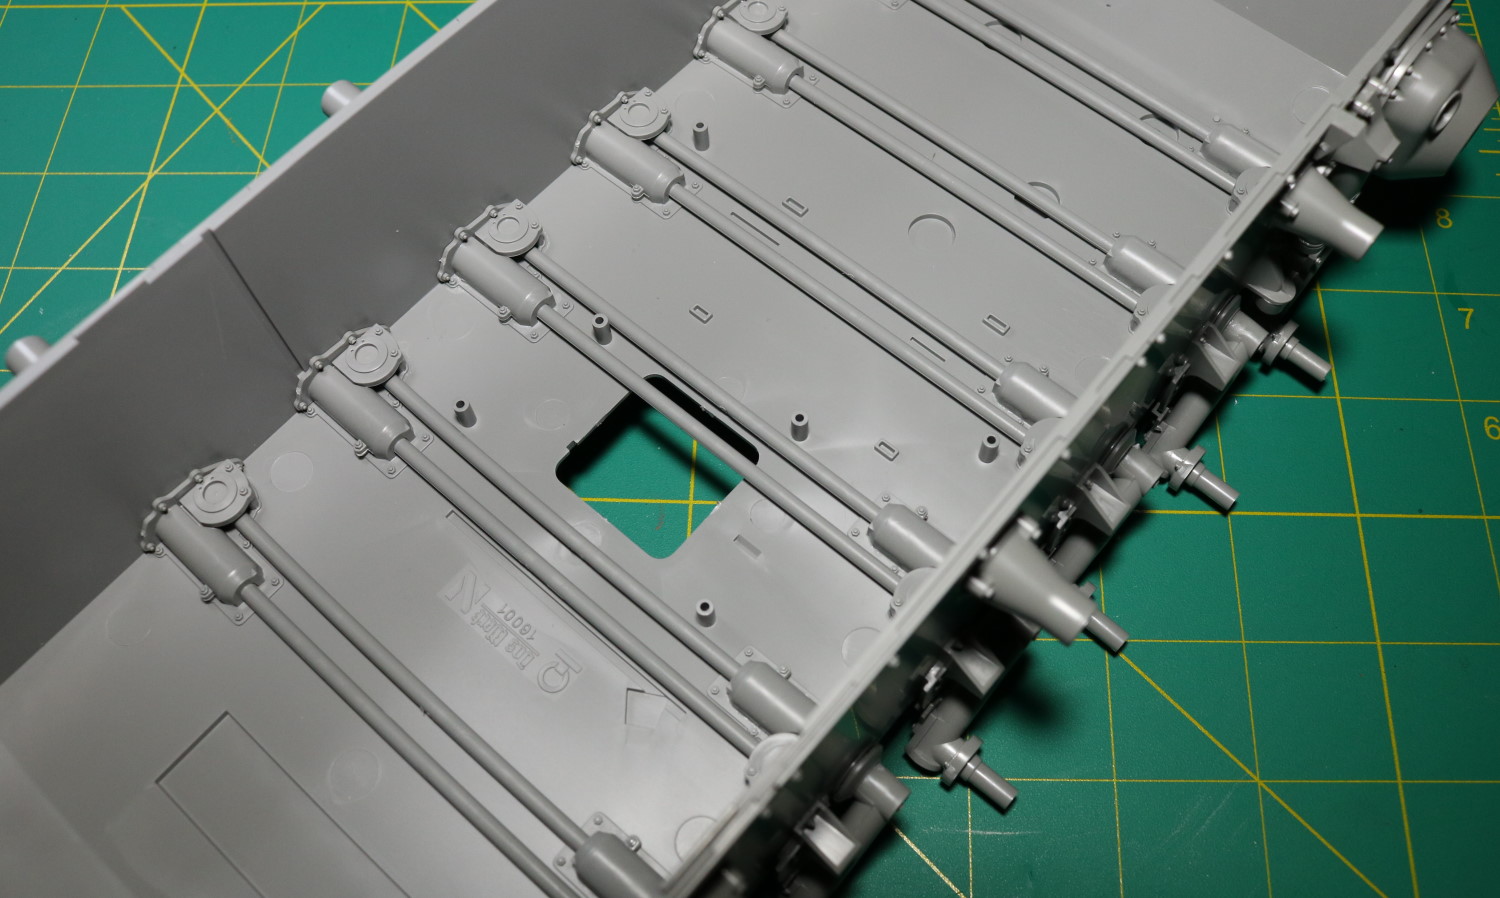
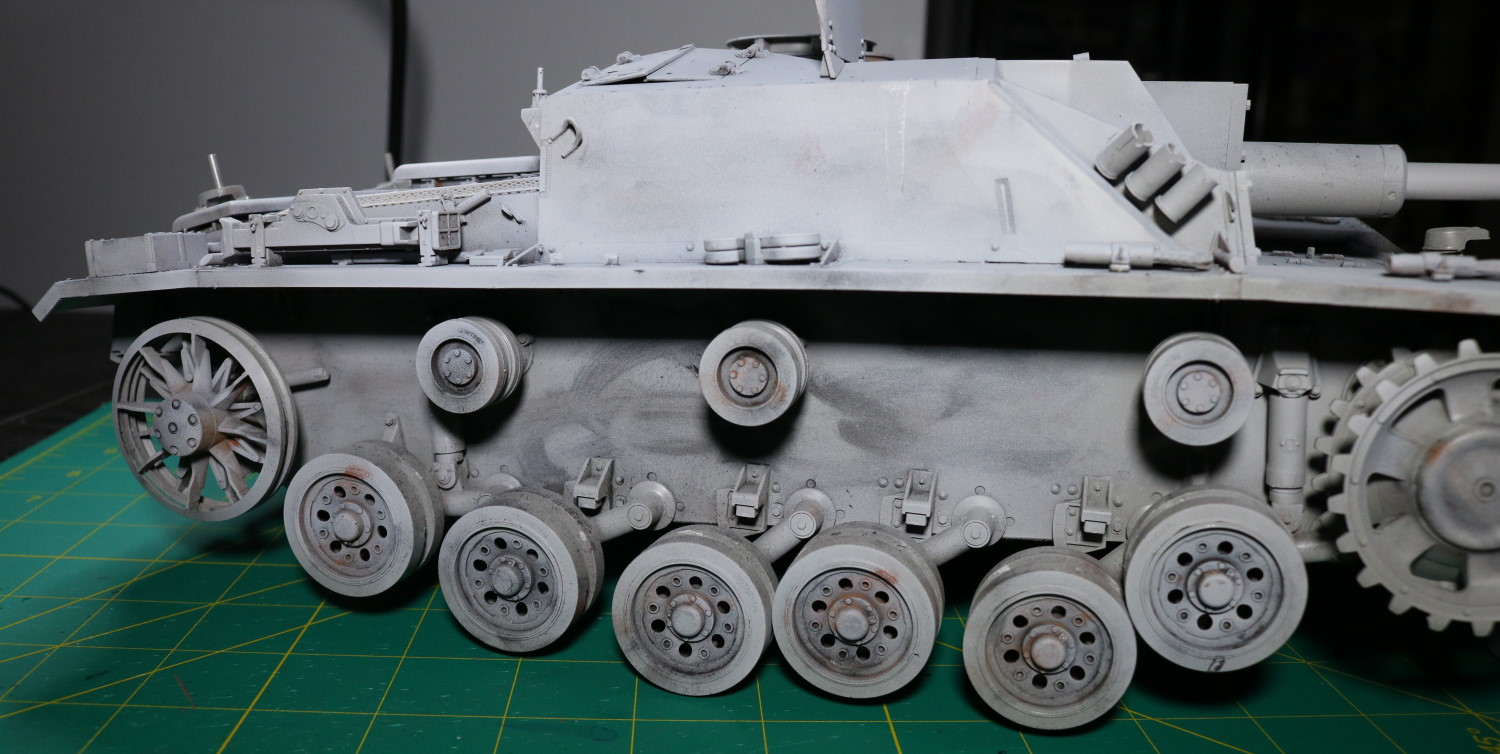
I’d like to say that the model is using a brilliant method for realistic suspension. It is using torsion. Basically, torsion is twist strength. When a semi-soft plastic rods are twisted, they want to return to the way they are. The tank is using such plastic rods to create pseudo, but quite realistic, suspension.
If you’ve ever built a rubber band helicopter, that’s one of prime examples of using torsion.
Now, historically, the hull of Stug was borrowed from Panzer 3 which actually had torsion-bar suspension. I just didn’t think that this system would be this easy to implement in a model kit.
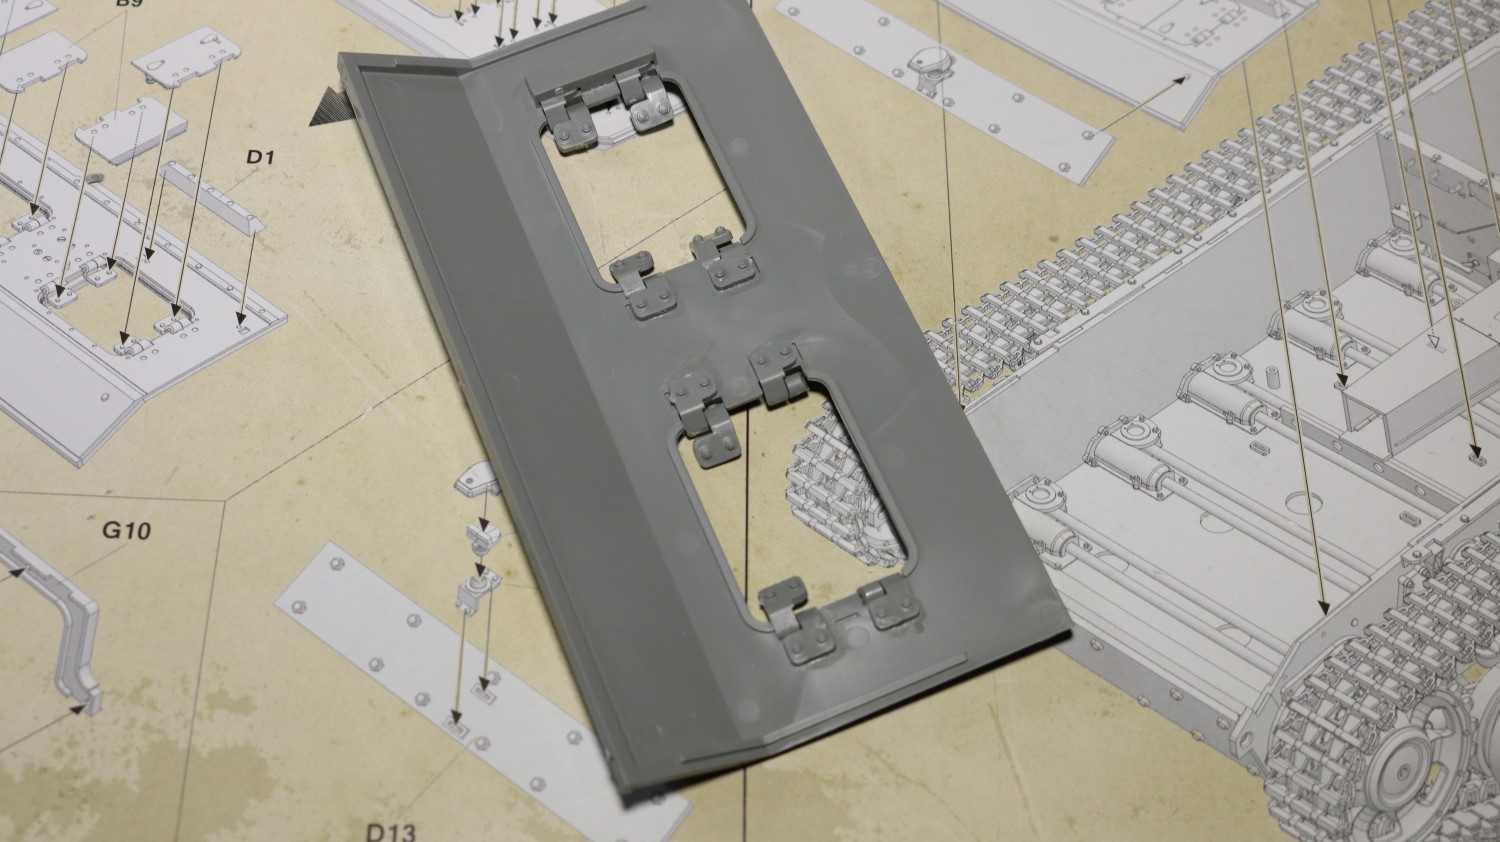
Hatches are designed to be articulated which is a good thing. This feature is not guaranteed although it seems 1/16 kits in recent years tend to let you operatable hatches. Some older 1/16 kits I’ve dealt with, hatches were meant to be glued shut. It took a lot of efforts to make them work.
In this kit though, the hinges are well designed and are easy to use.
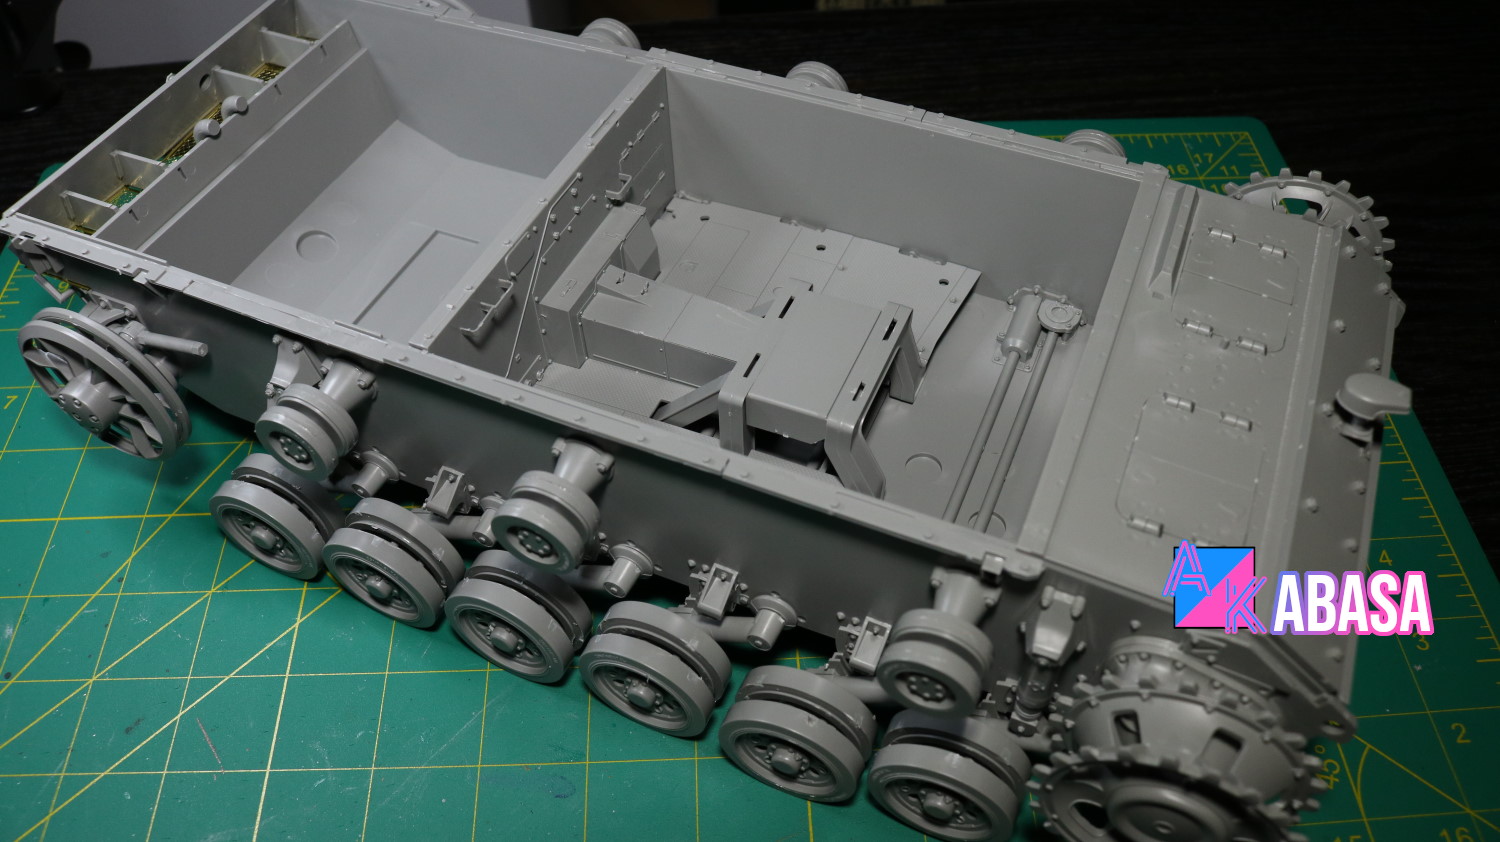
At first, the lower hull stands a bit too high, but as I assemble the tank, the extra weight starts to press the suspension and it gets down to a perfect height.
Per manual, this is where I should build its tracks, but I always build tracks much later due to a fact that you need to paint them separately. Basically, no need to spend all your strength on building the tracks right now when it can and should be done much later.
My overall experience is rather smooth. Pieces fit generally well together. You may need some improvisations here and there, but that happens with virtually every kit. The manual is only a guide in my book. You don’t have to follow it
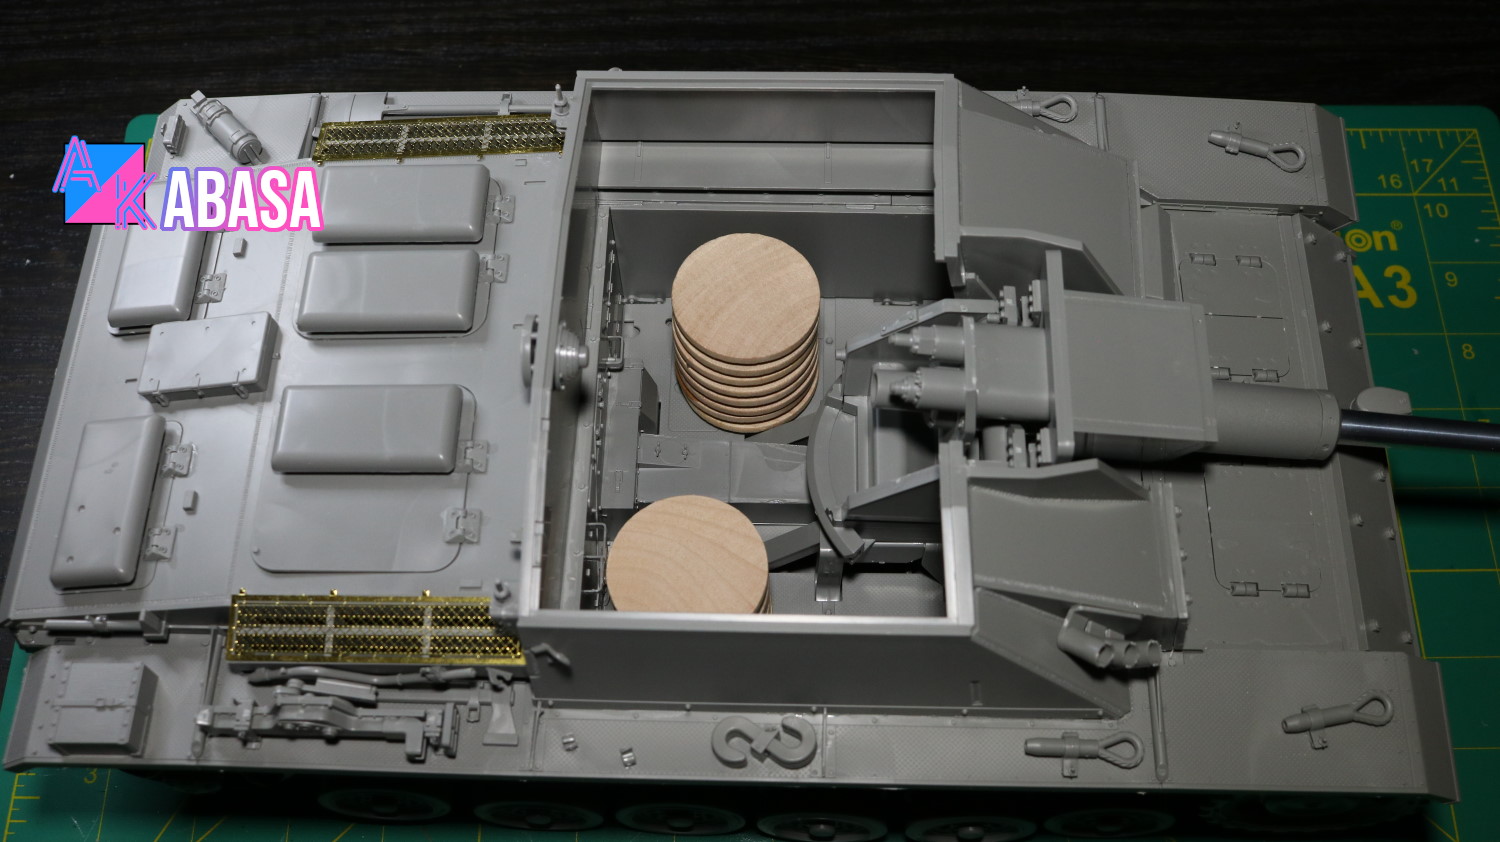
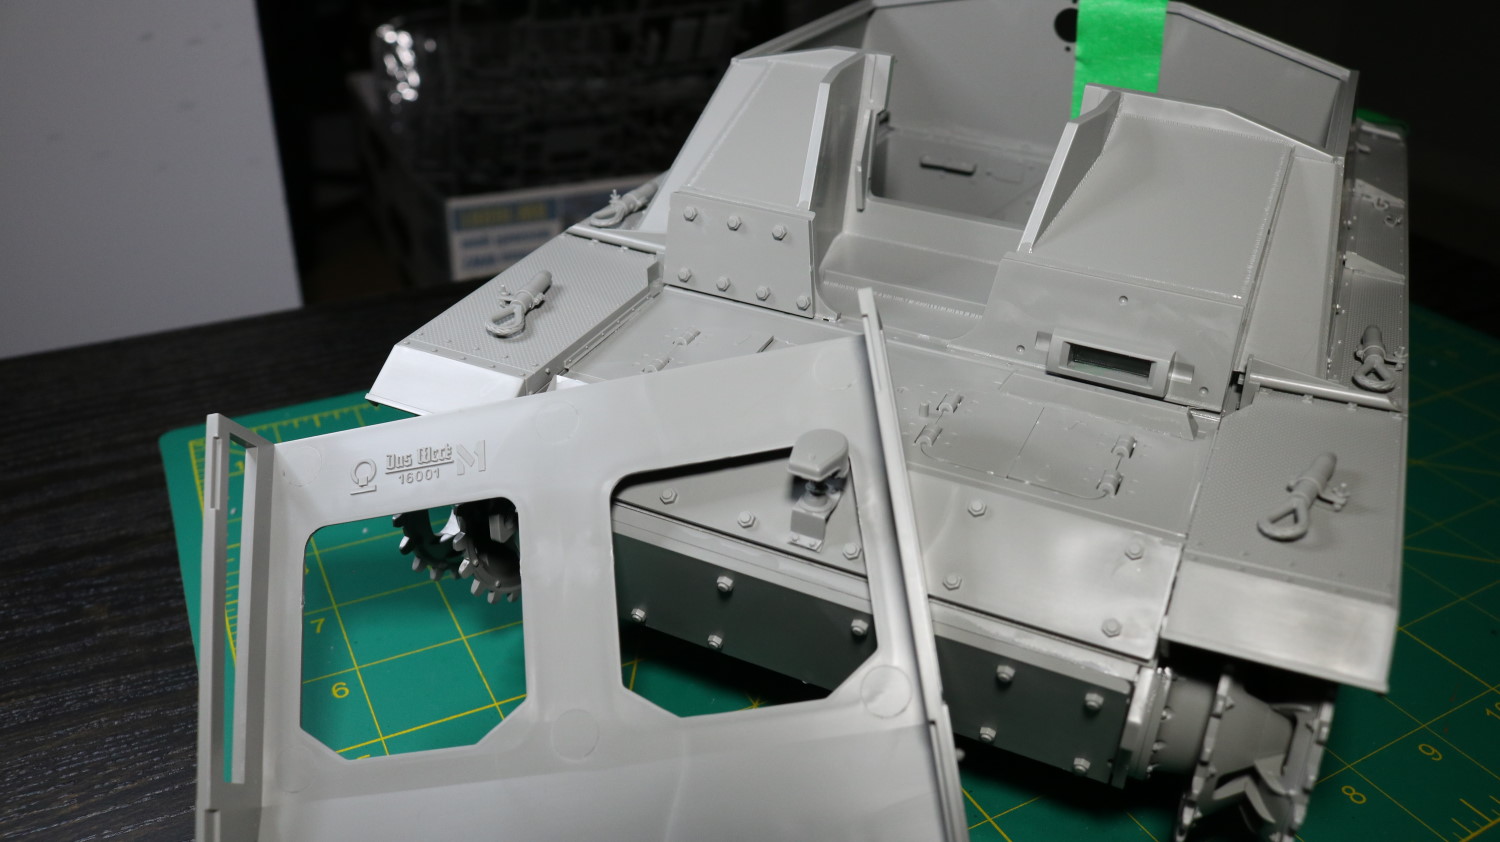
I don’t care for tank internals, and this is why. It is because I want to make figures stand above top hatches on tanks. In order to do so, tank internals get in my way.
The same case applies here. I’ve chosen to ignore virtually everything internal. Although this kit does not have full internal, it does have a fair bit of internals in the turret zone. I am basically excluding almost everything.
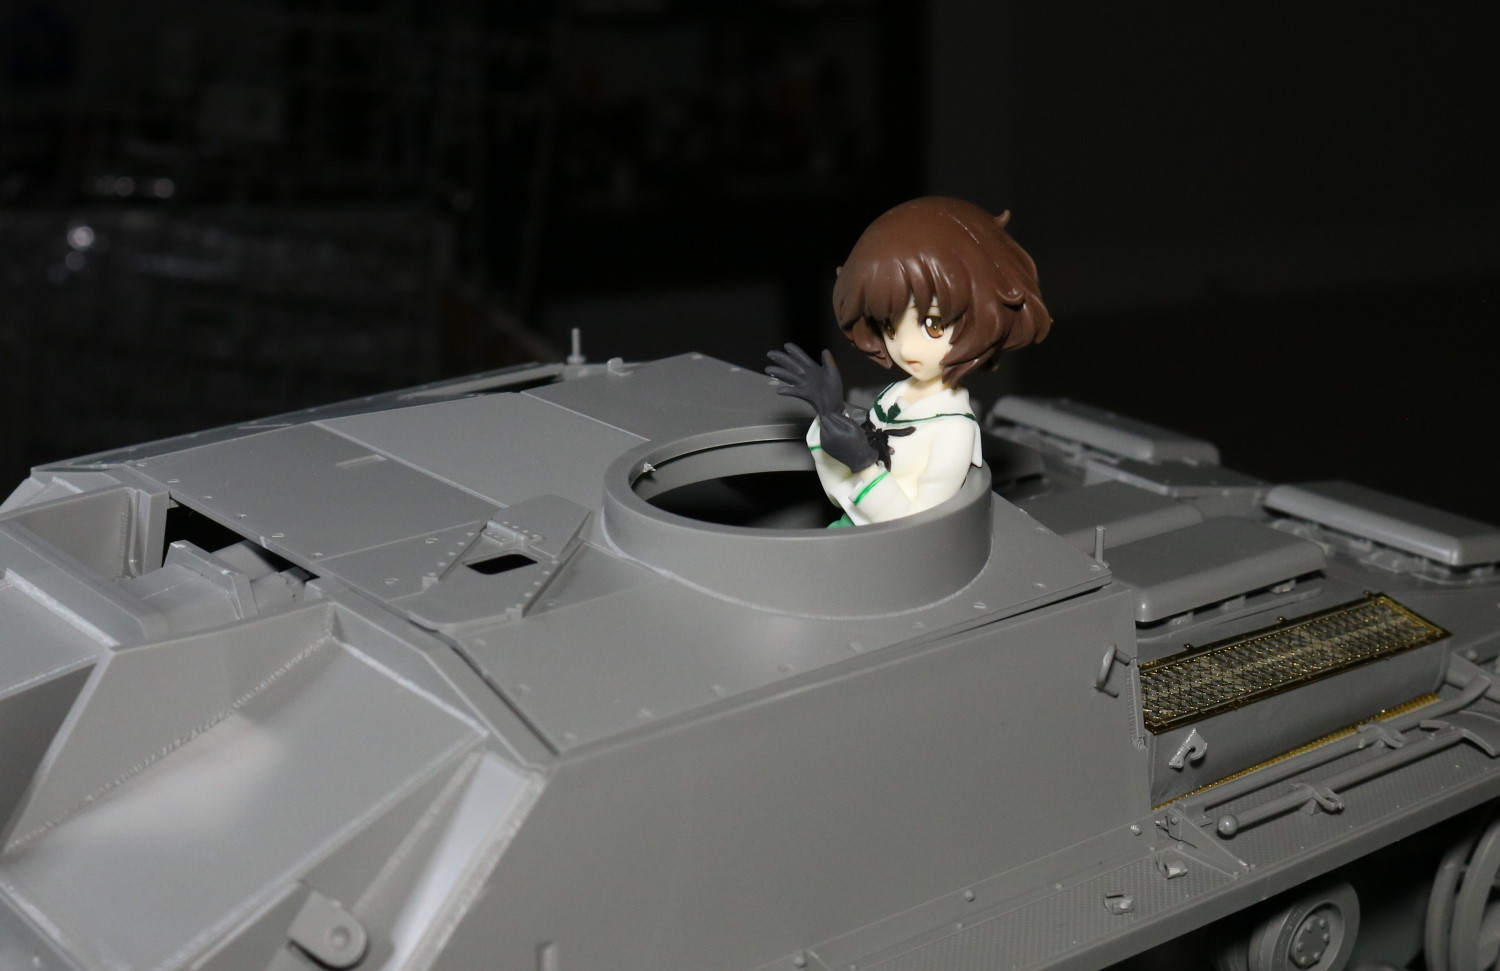
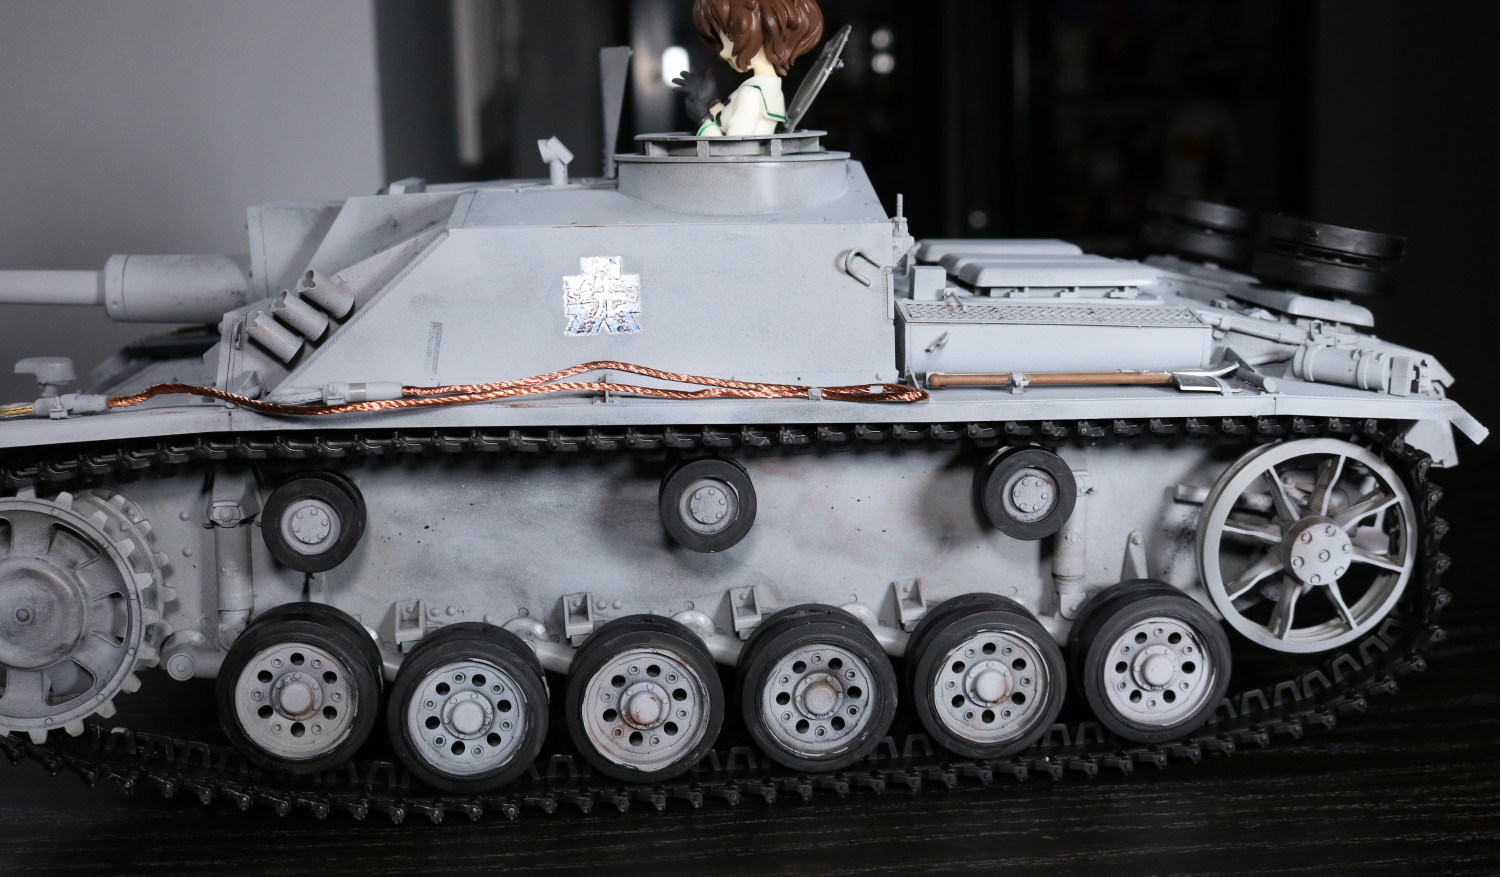
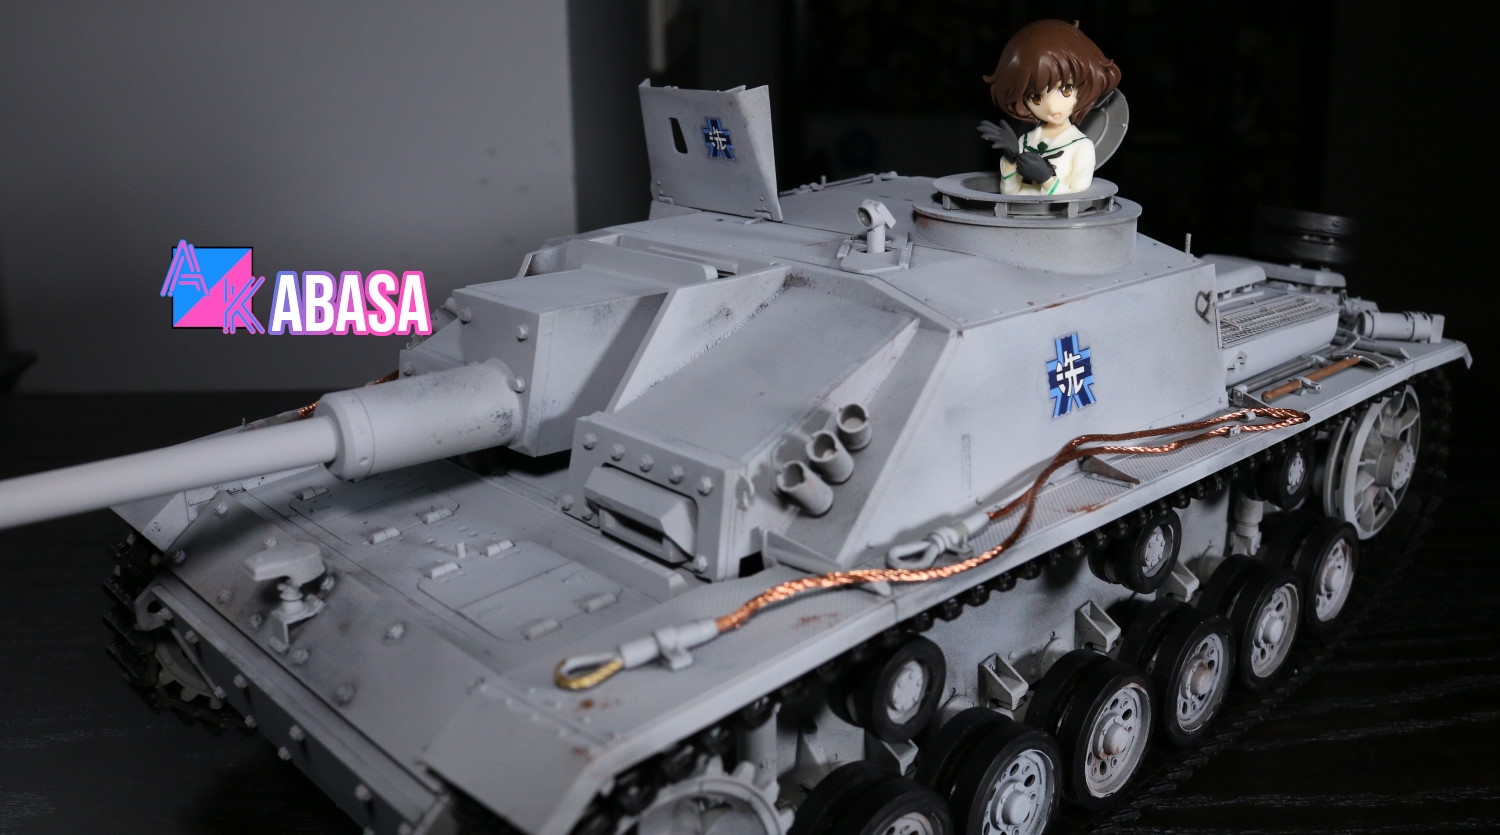
By adding the wooden platforms, I am able to do this, like above. Yukari will be the tank commander for this Stug. There is an alternative option, but his figure is yet to arrive. We will see.
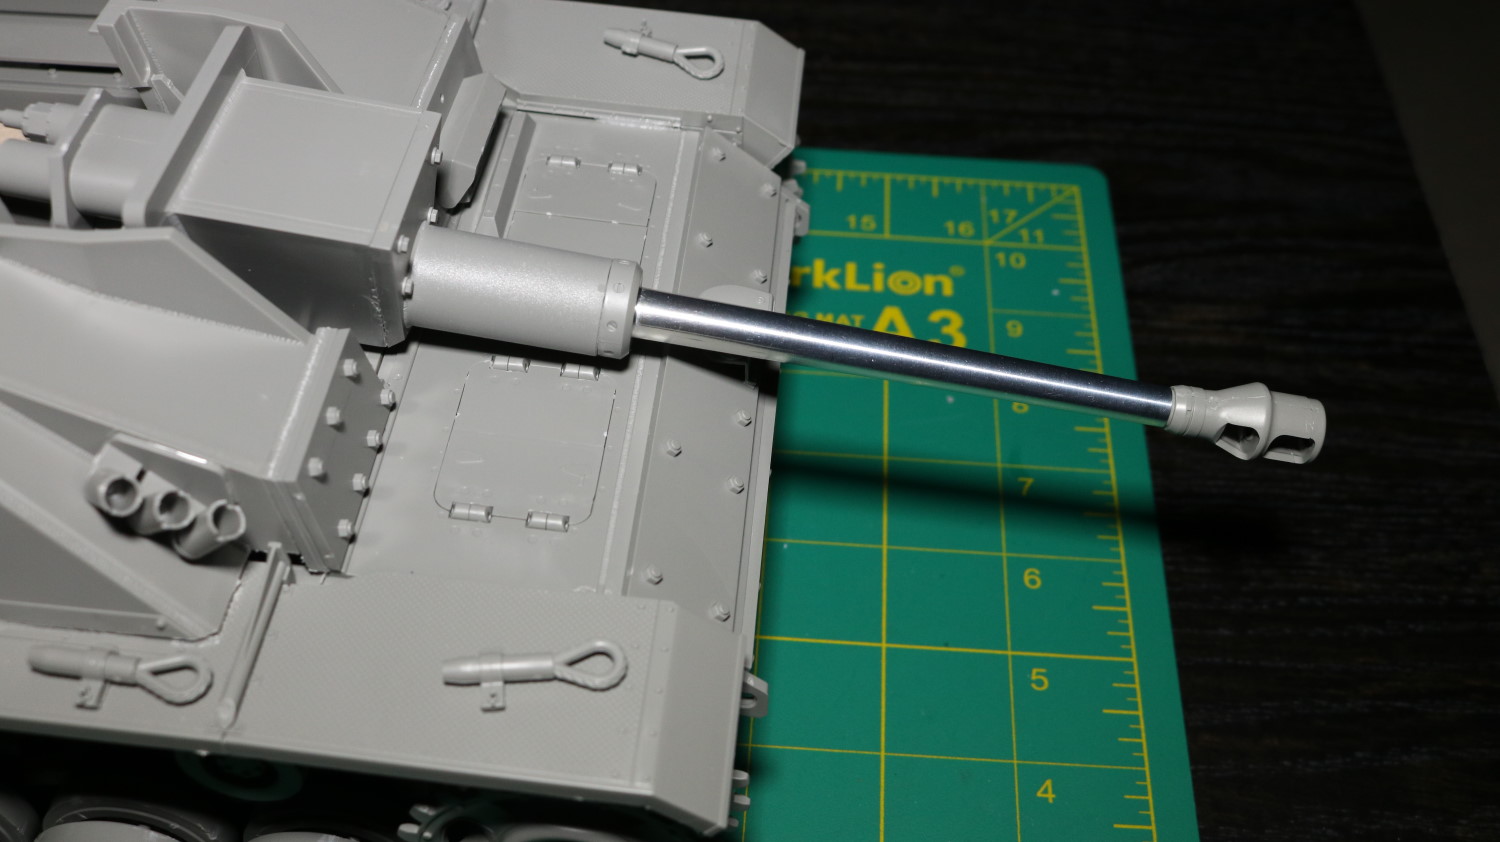
They said the first shipments would get a metal (aluminum) barrel as a bonus, and it’s true. You don’t generally get a metal barrel for a kit that cost only 119 USD. It’s usually for a limited edition or something like that.
A metal barrel is superior in every single way. The only downside is that its heavy in comparison, and if a turret mechanism is too loose, a gun will stay down. I experienced this with Trumpeter 1/16 panzer 4.
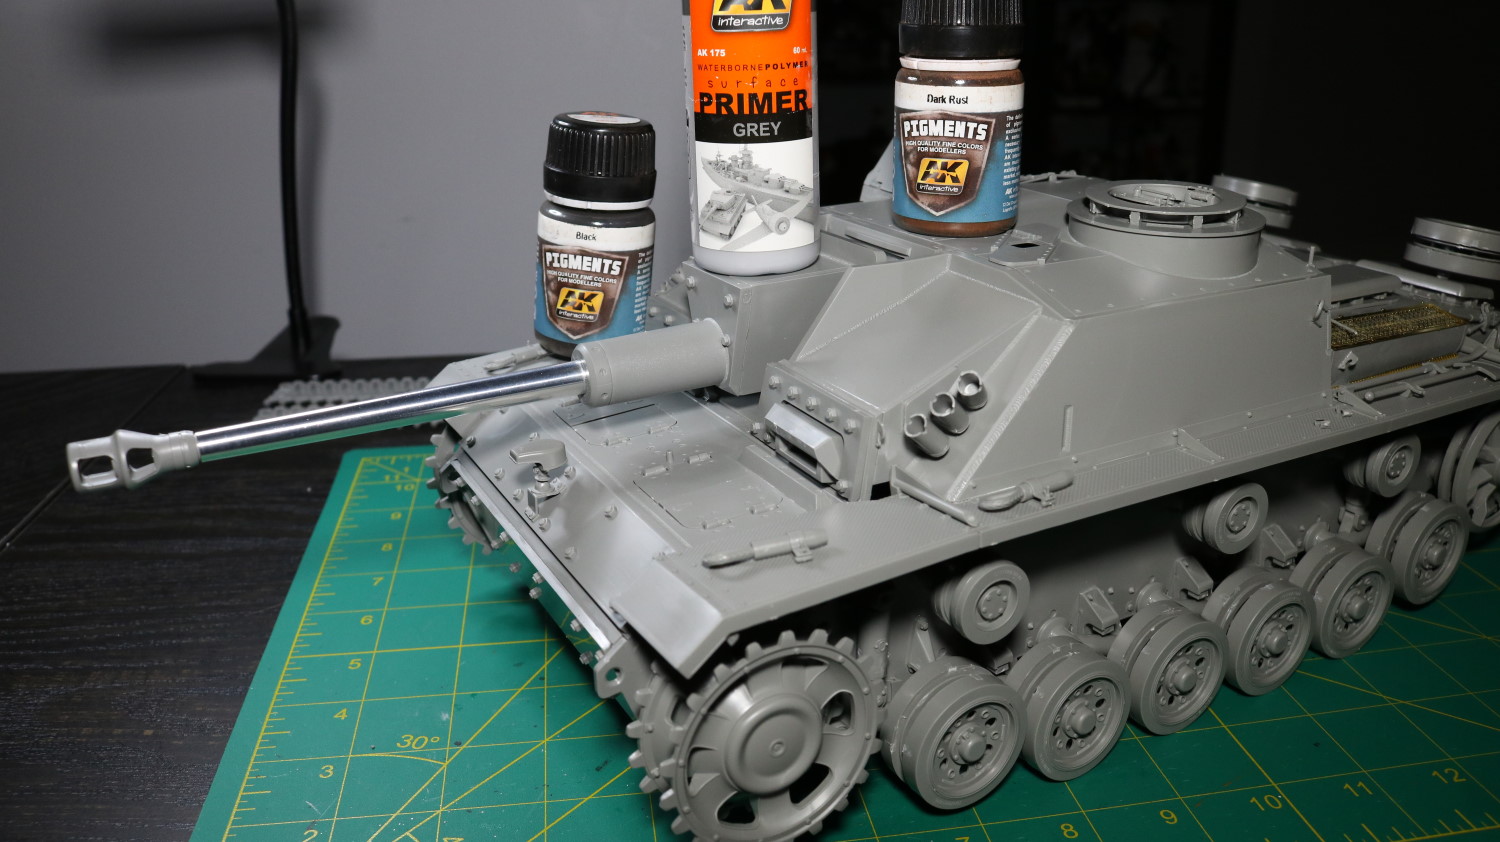
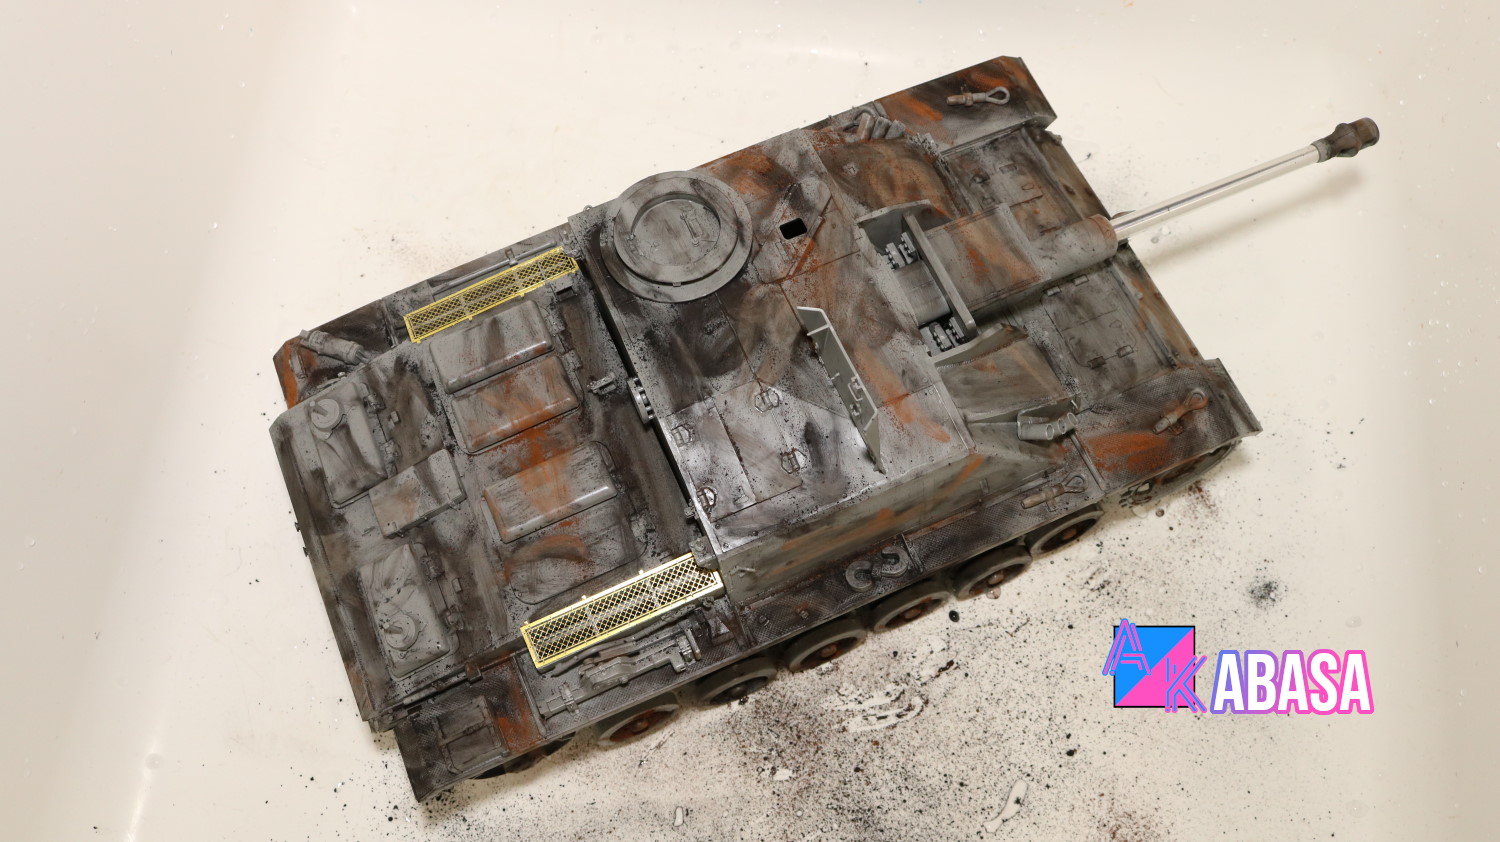
Finally, I’ve decided not to prime this in black which, so far, I’ve always done so. The reason being is that the original plastic color is what I initially planned. Instead, I am going to just paint this in gray which is a primer / paint mix. Before that though, I am going to weather this like I’ve done with the Freedom Kettenkrad.
Basically, I do not see any benefit of using the first coat in this case. If the plastic color was anything other than gray, I would have primed it in black.
Another reason to skip the black primer is that, for 1/16 tanks, any sort of airbrushing uses up a lot of paint, and I want to save some.
This is my first time not having to airbrush the first coat. So, I was afraid that the pigments might not stick but it does stick fairly well even on a plastic surface.
Again, this method is really, REALLY, messy. The fine powders will settle down on nearby surfaces. You have to clean them up afterwards. At the same time, this method has one very important advantage over other proven methods.
It is that it’s virtually impossible to make “mistakes” with this method. You simply cannot make mistakes and you control exactly how much weather you want on fly.
You want something heavily weathered? Don’t paint too much. You want just a bit of weathering? Just cover almost all pigments while airbrushing.
This piece of mind as well as the amount of control I have is what is keeping me using this method in spite of a really messy cleanup afterwards. I will continue to use this method.
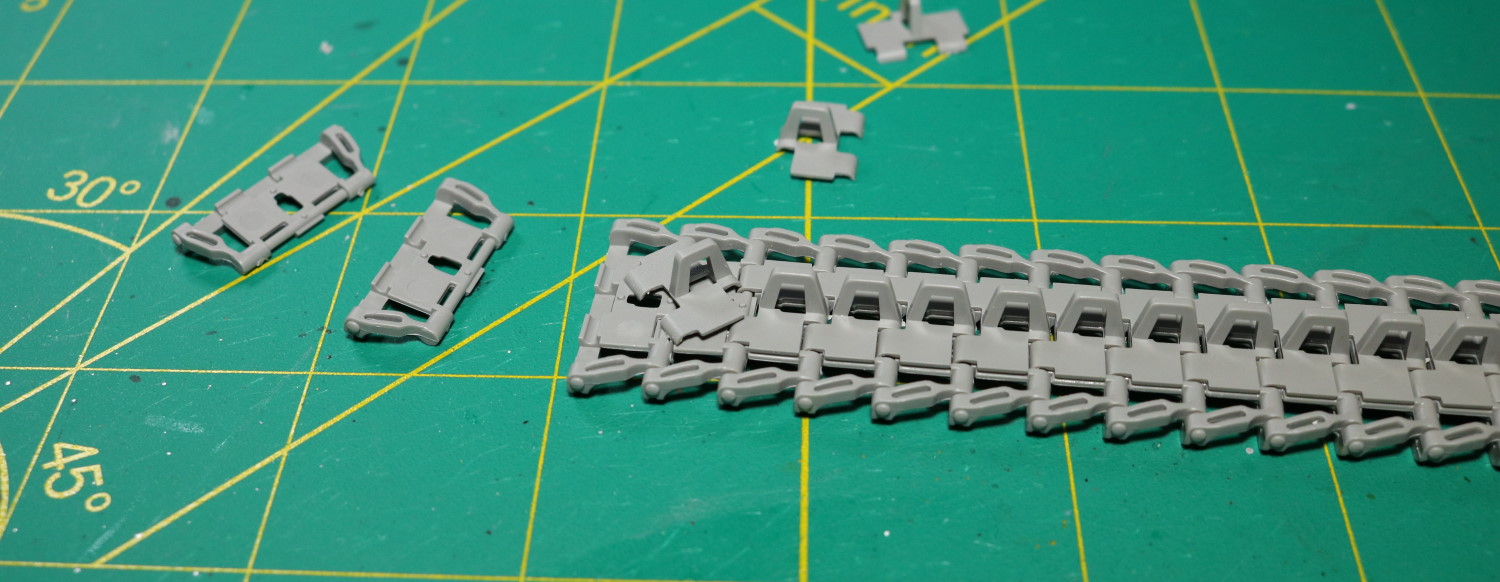
The tracks, oh yes. It’s not gruesome. They are easy to assemble. It’s just that there are lots of them. Nothing much to be said about the tracks. It took me about five straight hours to complete the pair. My tips of fingers, my neck, and my back all had a day of lingering pain in the end.
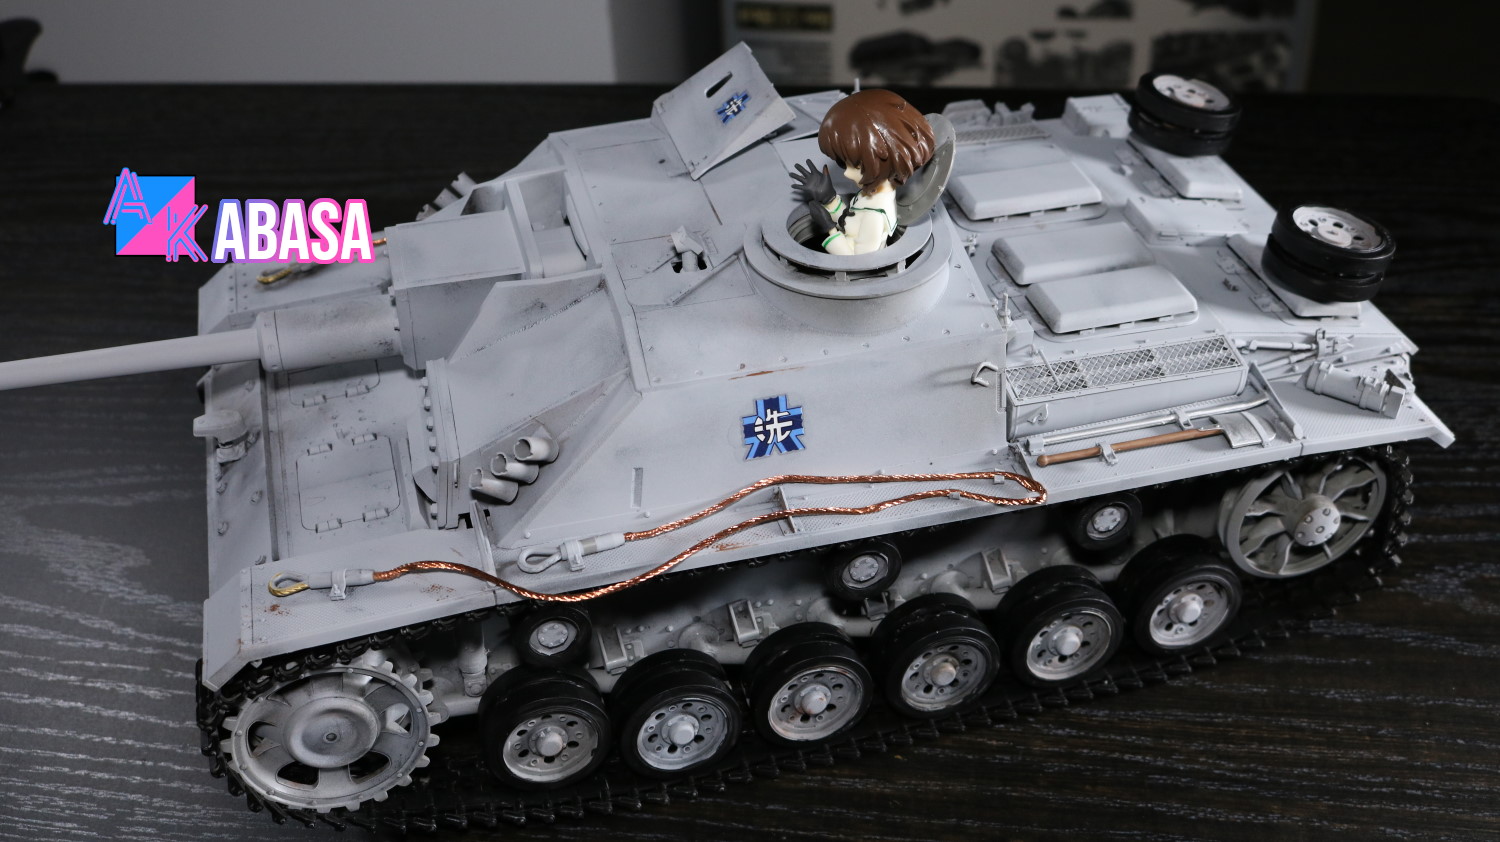
All done, bar varnishing. I’ve gone with mild weathering. I’ve also chosen not to install the machine gun on top. I generally omit any small guns on tanks I assemble. The only exceptions are the ones installed on front.
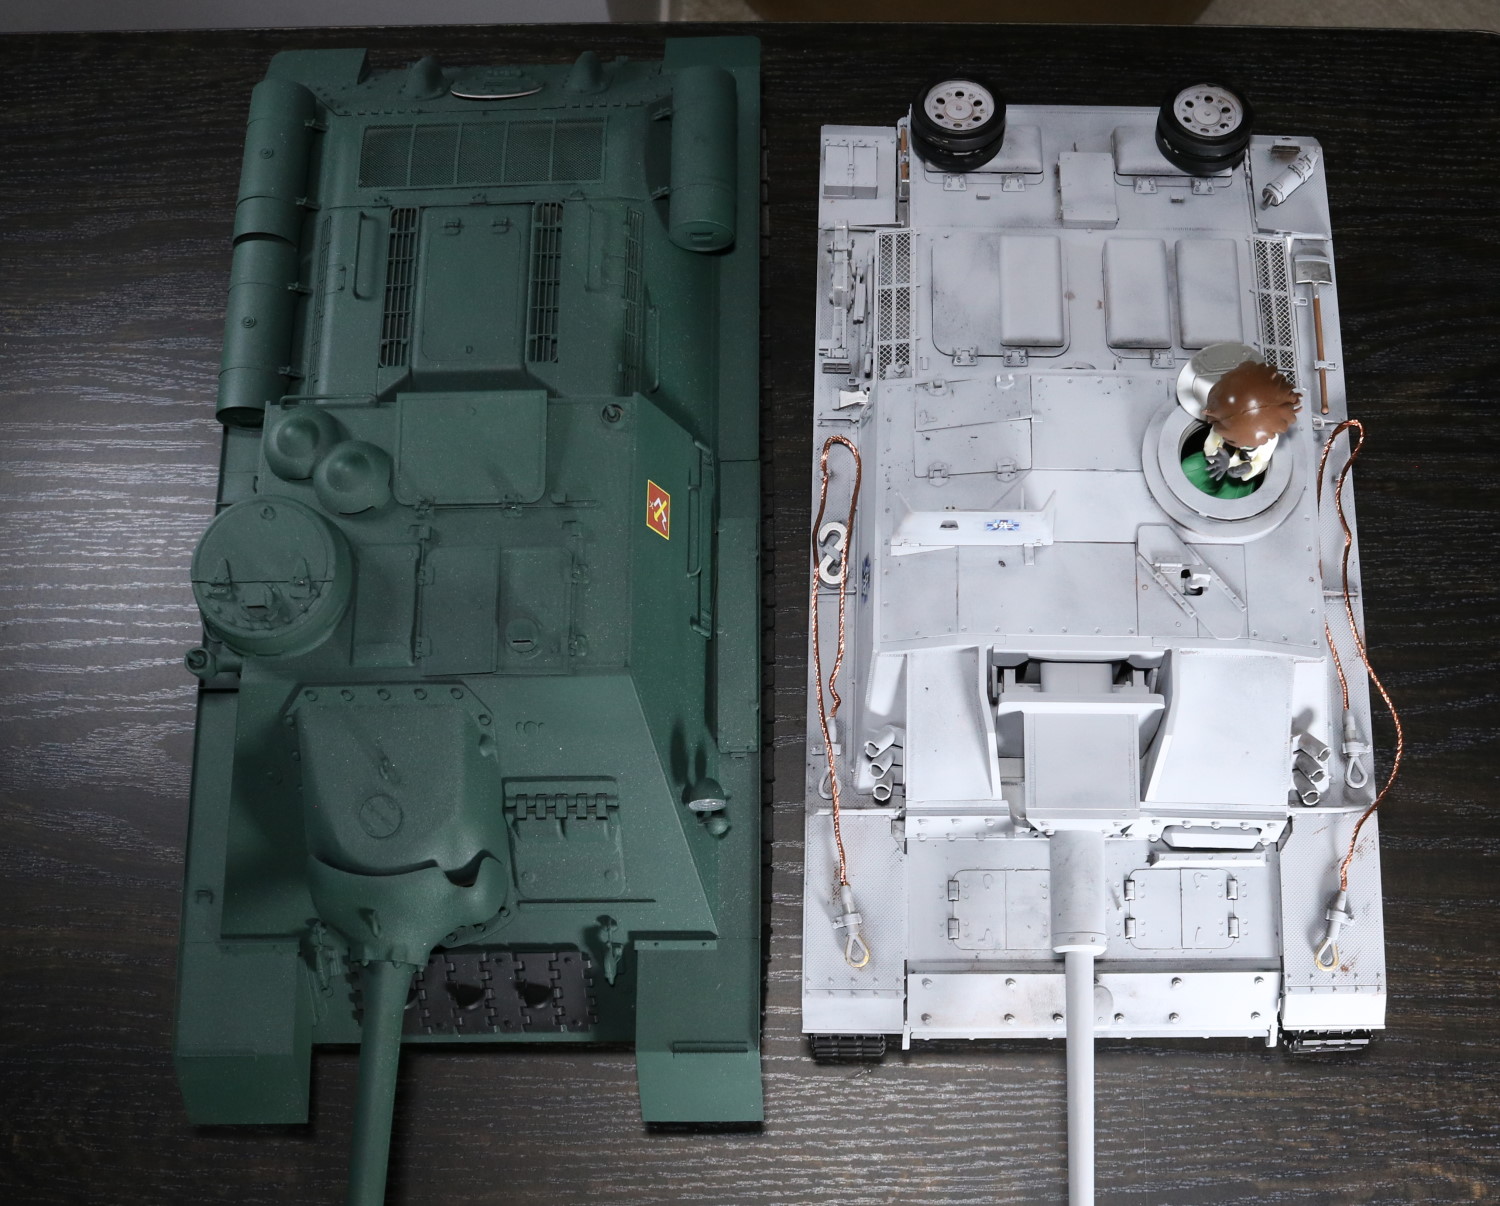
This is a comparison with Soviet SU-100. Both are SPGs, The SU-100 has got a more powerful gun. Both tanks were born out of necessity although circumstances were a bit different.
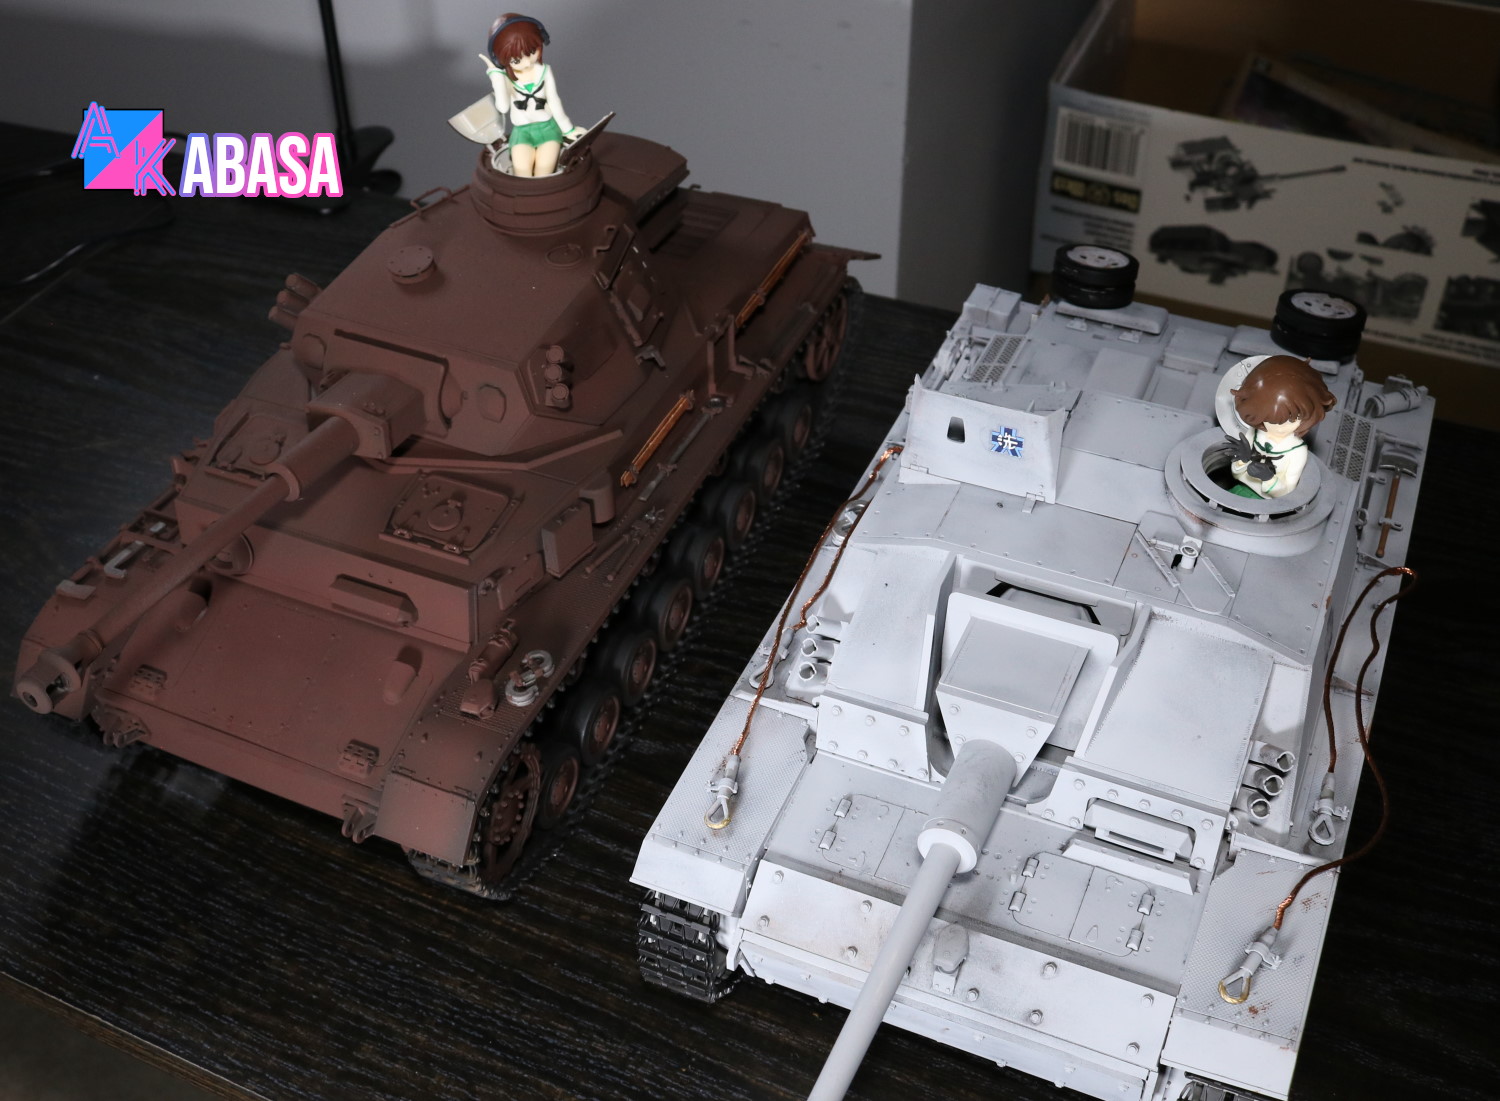
A comparison with a Panzer 4. Their hull sizes are virtually identical, but Panzer 4 has a much taller profile due to its turret. This was the advantage of a tank destroyer. Its lower profile meant it was able to camouflage far easier and land a well-aimed first shot before engaging in World war.
Additionally, a lack of sophisticated turret mechanism meant a faster production where quantity started to matter in World war. This was one of the reasons why there were a lot of tank-like SPGs in that era.
This is, by far, the best paint job I’ve done. Interestingly, it has taken the least amount of work in addition. This Stug looks pretty good. I wish I could have done a similar level of paint job on my past tank models that I’ve assembled, but having to learn everything by trials and errors means steps have been rather slow.
If this kit cost me like 400 CAD or something similar, I may have not gone this route. This is my first attempt at using this weathering method on a full scale tank. I’ve used this method on 1/35 tanks previously. It took me two attempts to feel confident enough to try it on the Stug.
My first full attempt at using this weathering method was GuP Panzer 1 Memories ver.
The second full attempt was Freedom models Ketternkard.
Conclusion
My first complaint about this kit is that parts come from everywhere from getgo. From the very start, you are forced to open up A, B, C, D, E, F bags. I dislike this because it creates a mess. A good part design is where you open as less bags as possible as you follow the manual the construct a model kit.
However, this is a highly subjective and minor complaint. Other than that, the manual is a bit lacking in a few areas where I was unable to figure out what went where by looking at the manual alone. I had to figure it out on my own.
I also lost some small parts which just flew away as I attempted to cut’em, but that’s my own rotten luck more than anything else. Sadly, I never found those parts that just flew away to the space.
Other than that, I don’t have any complaints. It’s inexpensive, fairly easy to build, and hatches are operational without any additional modifications. It’s got a brilliant pseudo suspension that just works as well.
Des Werk has a Panzer III 1/16 scale coming out real soon at the time of this entry. Originally, I didn’t plan to order it since I already have a 1/16 scale Panzer IV. III and IV are almost identical tanks. However, given how well they designed Stug III, I might order the kit to see how they do with Panzer III and replace my expensive but dud Panzer 4 with it.
Until next time.
![[Murasame] Chibi Anchovy with CV33 garage kit](https://akabasa.com/wp-content/uploads/2021/09/murasame_anchovy_cv33_1-768x1024.jpg)
![[Evil God Creation] Mikko](https://akabasa.com/wp-content/uploads/2021/09/egc_mikko_8-768x432.jpg)

![[H.D.F] Clara 1/7 scale](https://akabasa.com/wp-content/uploads/2021/09/hdf_clara_1-768x302.jpg)