GuP diorama project: Memories
This one took some time.
This diorama is based on Girls und Panzer Panzer 1 memories version by Platz. So, this is a 1/35 scale diorama.
This project begins with a 8 by 10 inch wooden painting board.

The first step is stein the wood. In doing so, it makes the wood look better, and the coat also prevents moisture getting into the wood. Moisture makes untreated wood warp. Now, the board is treated. Still, it’s better to stein regardless.
The next step is trying to make what I am trying to make more real. I know that sounds weird, but the vision in my head does not always make the perfect transition into reality. In fact, it never does.
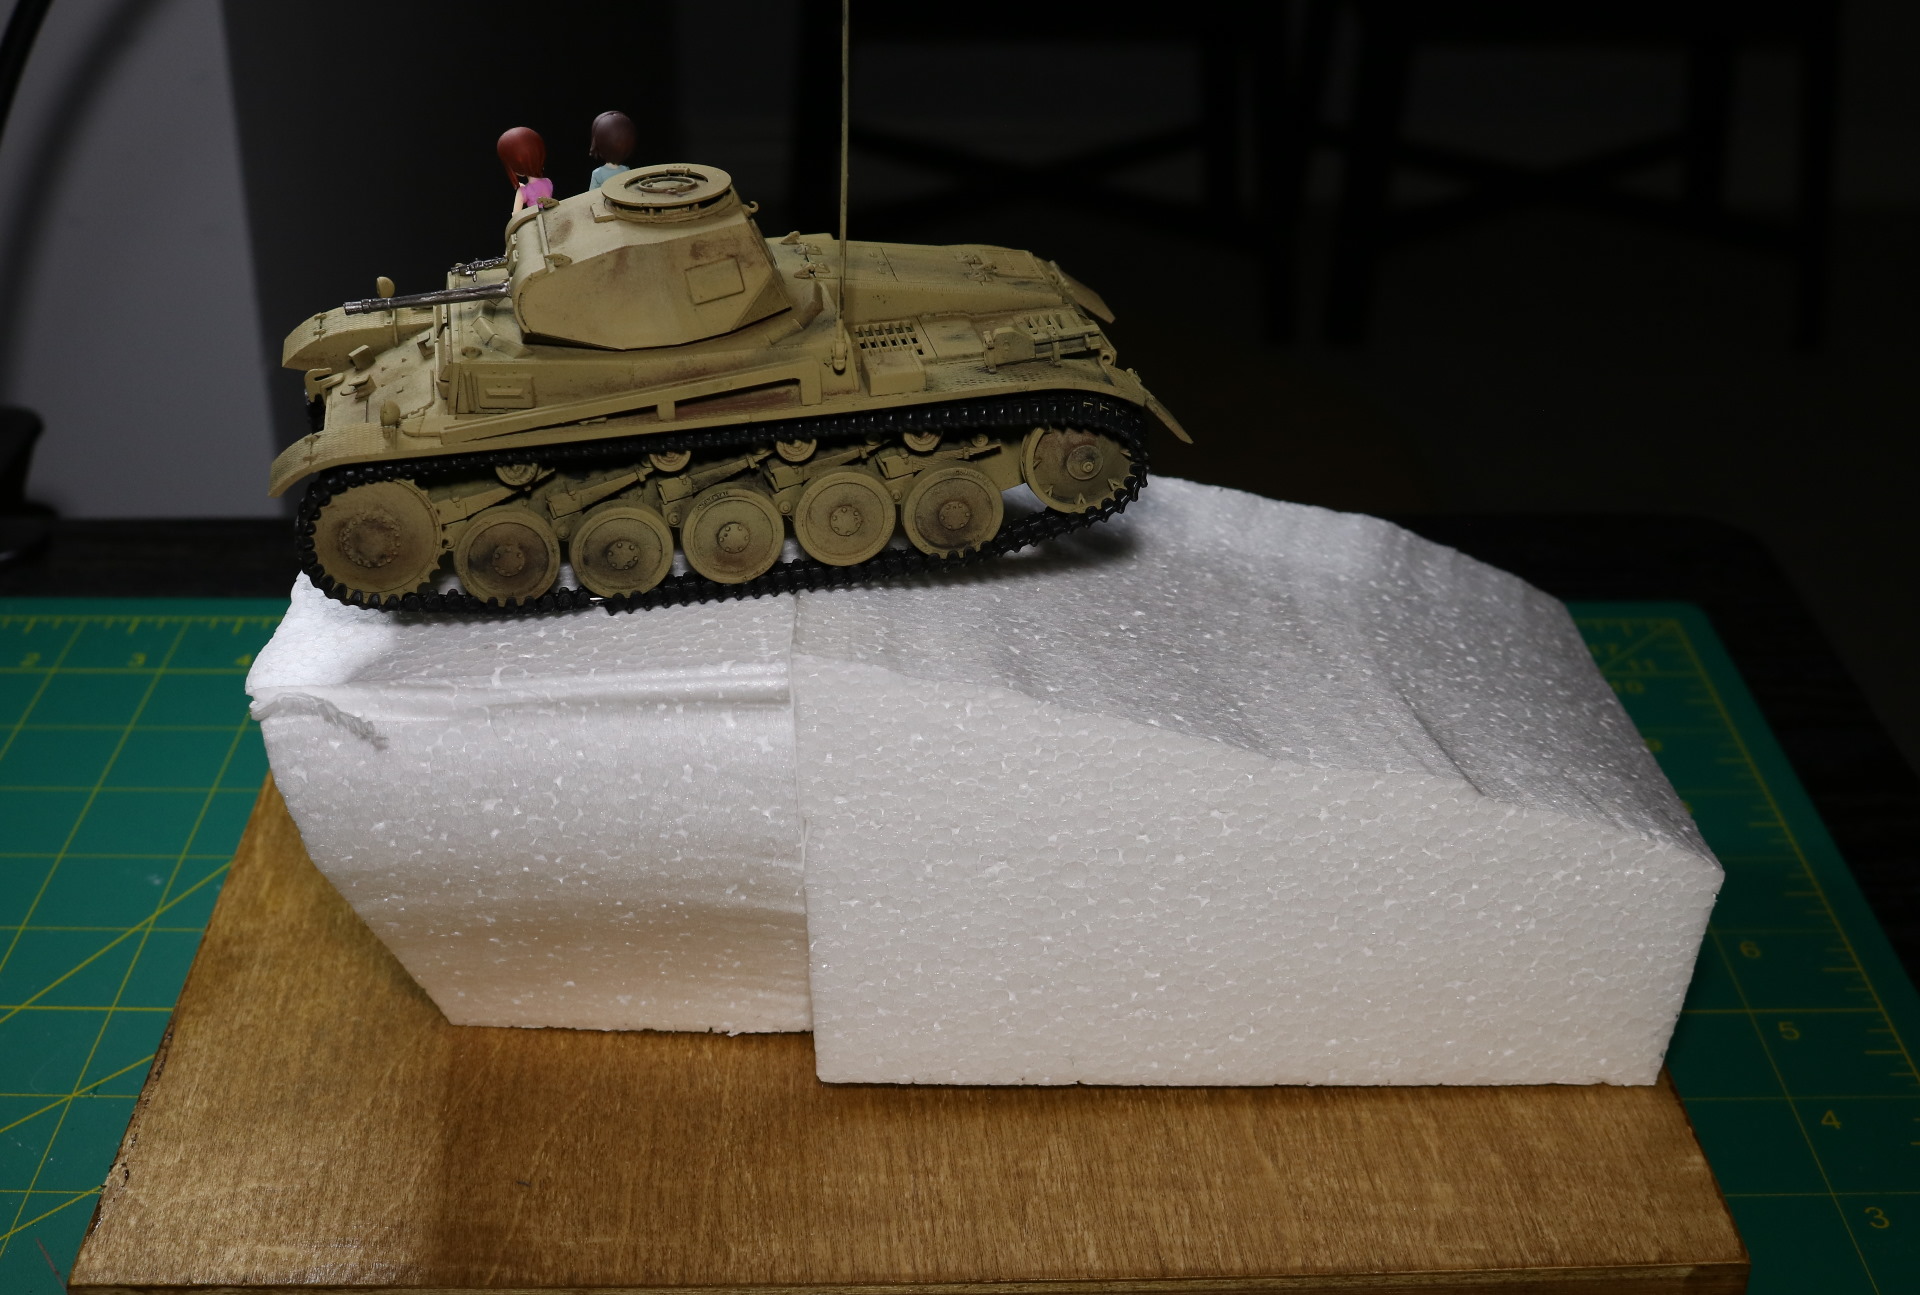
The tank is supposed to be on edge, or at least close to, of a cliff. So, that is what I am trying to replicate here. Now, the styrofoam blocks will only act as a base of a terrain. It will be covered up with stuff eventually.
One of which is –
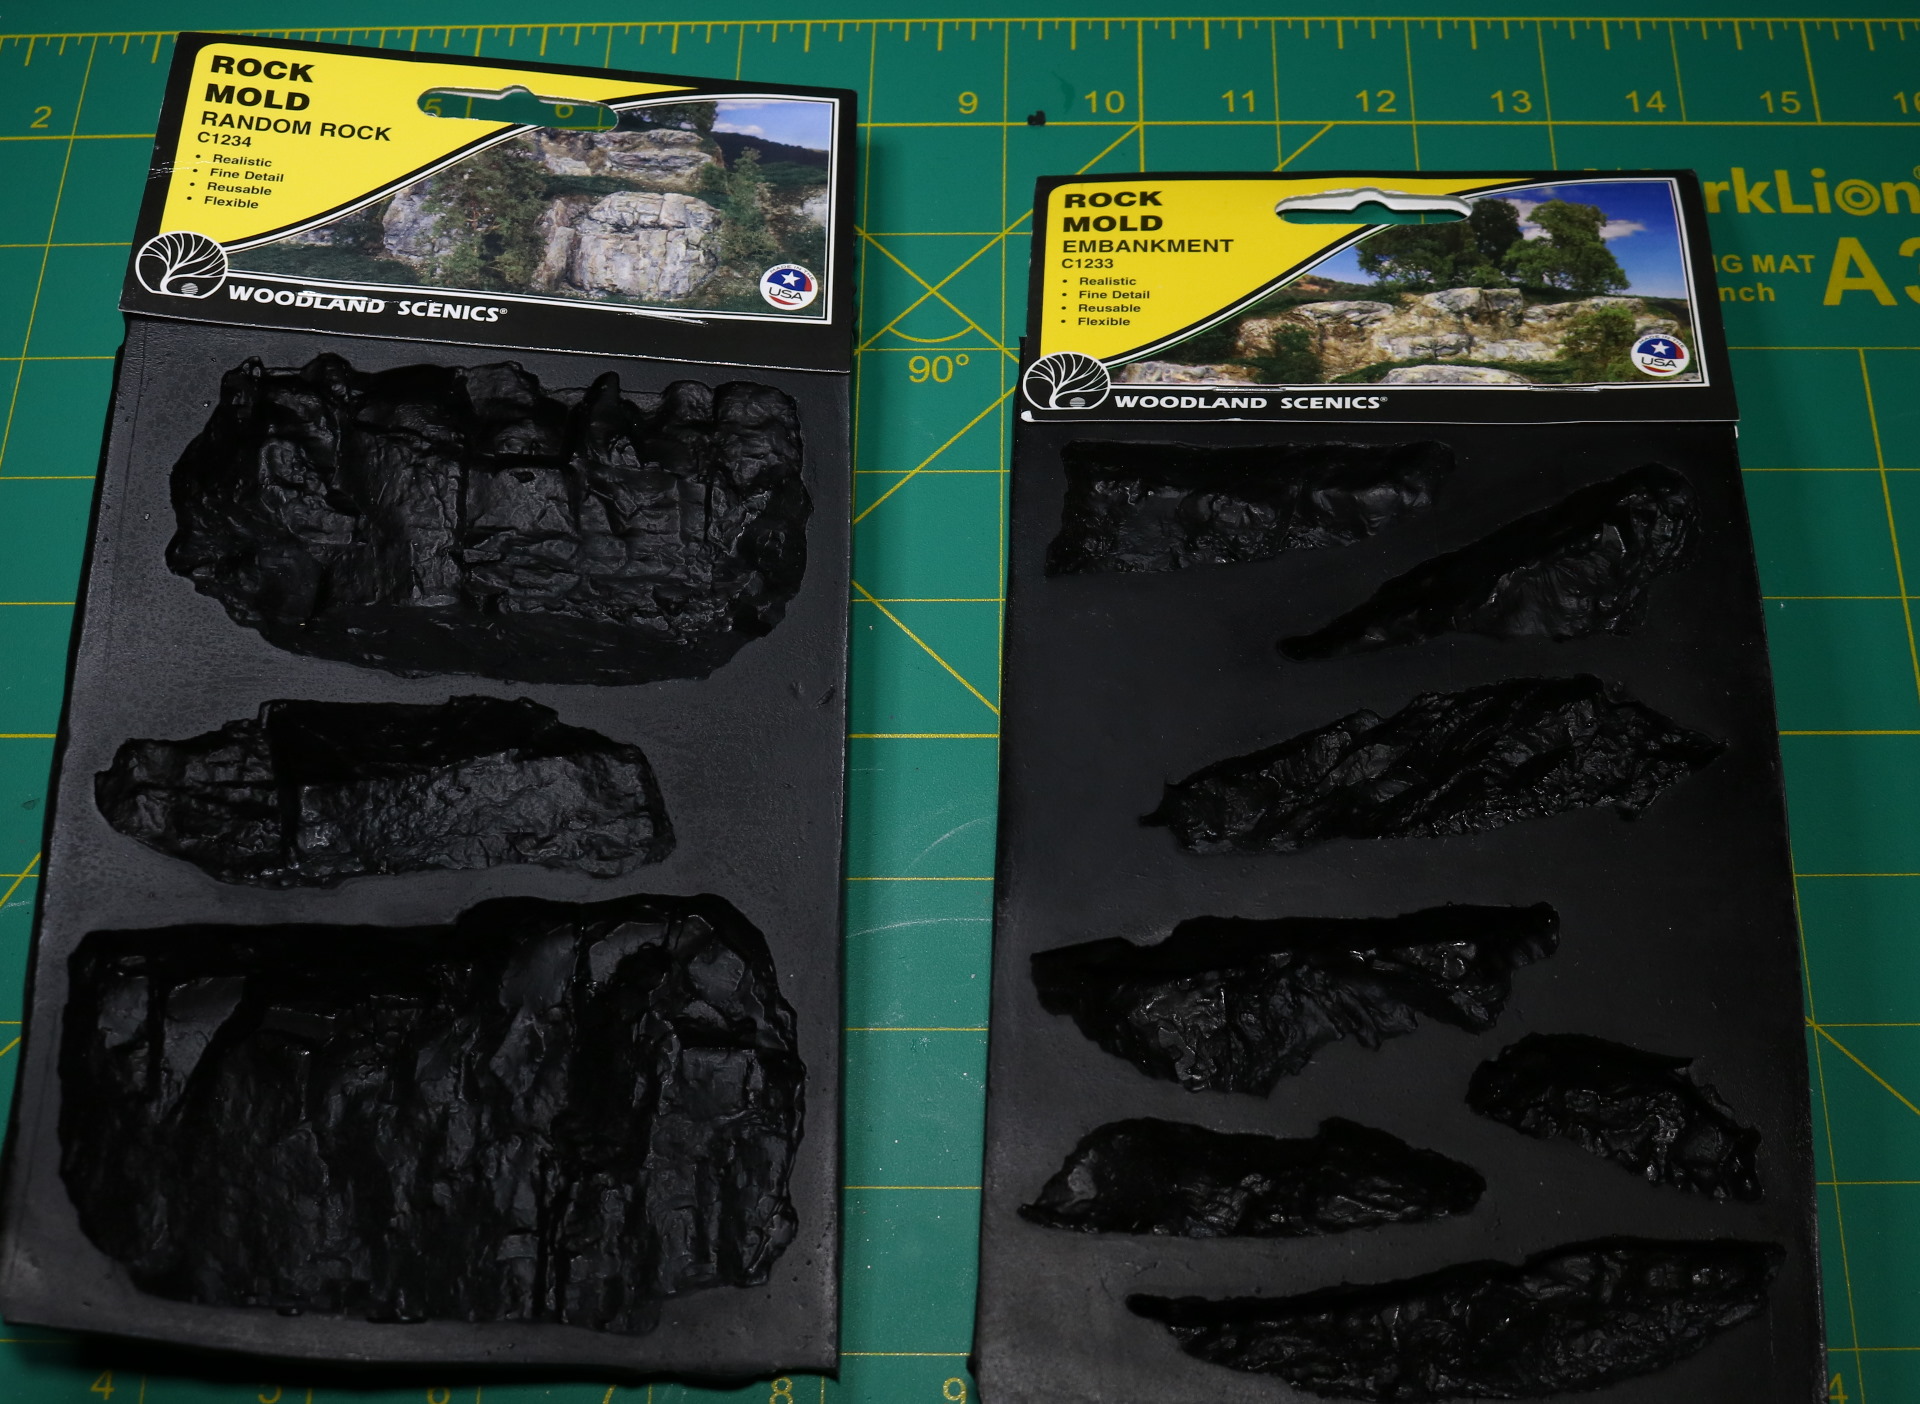
For the record, I did consider purchasing ready-made rocks, but the cost would skyrocket. Plaster of Paris is cheap enough around where I live, and the molds cost me 20 bucks in total for both, so this is the route I’ve chosen.
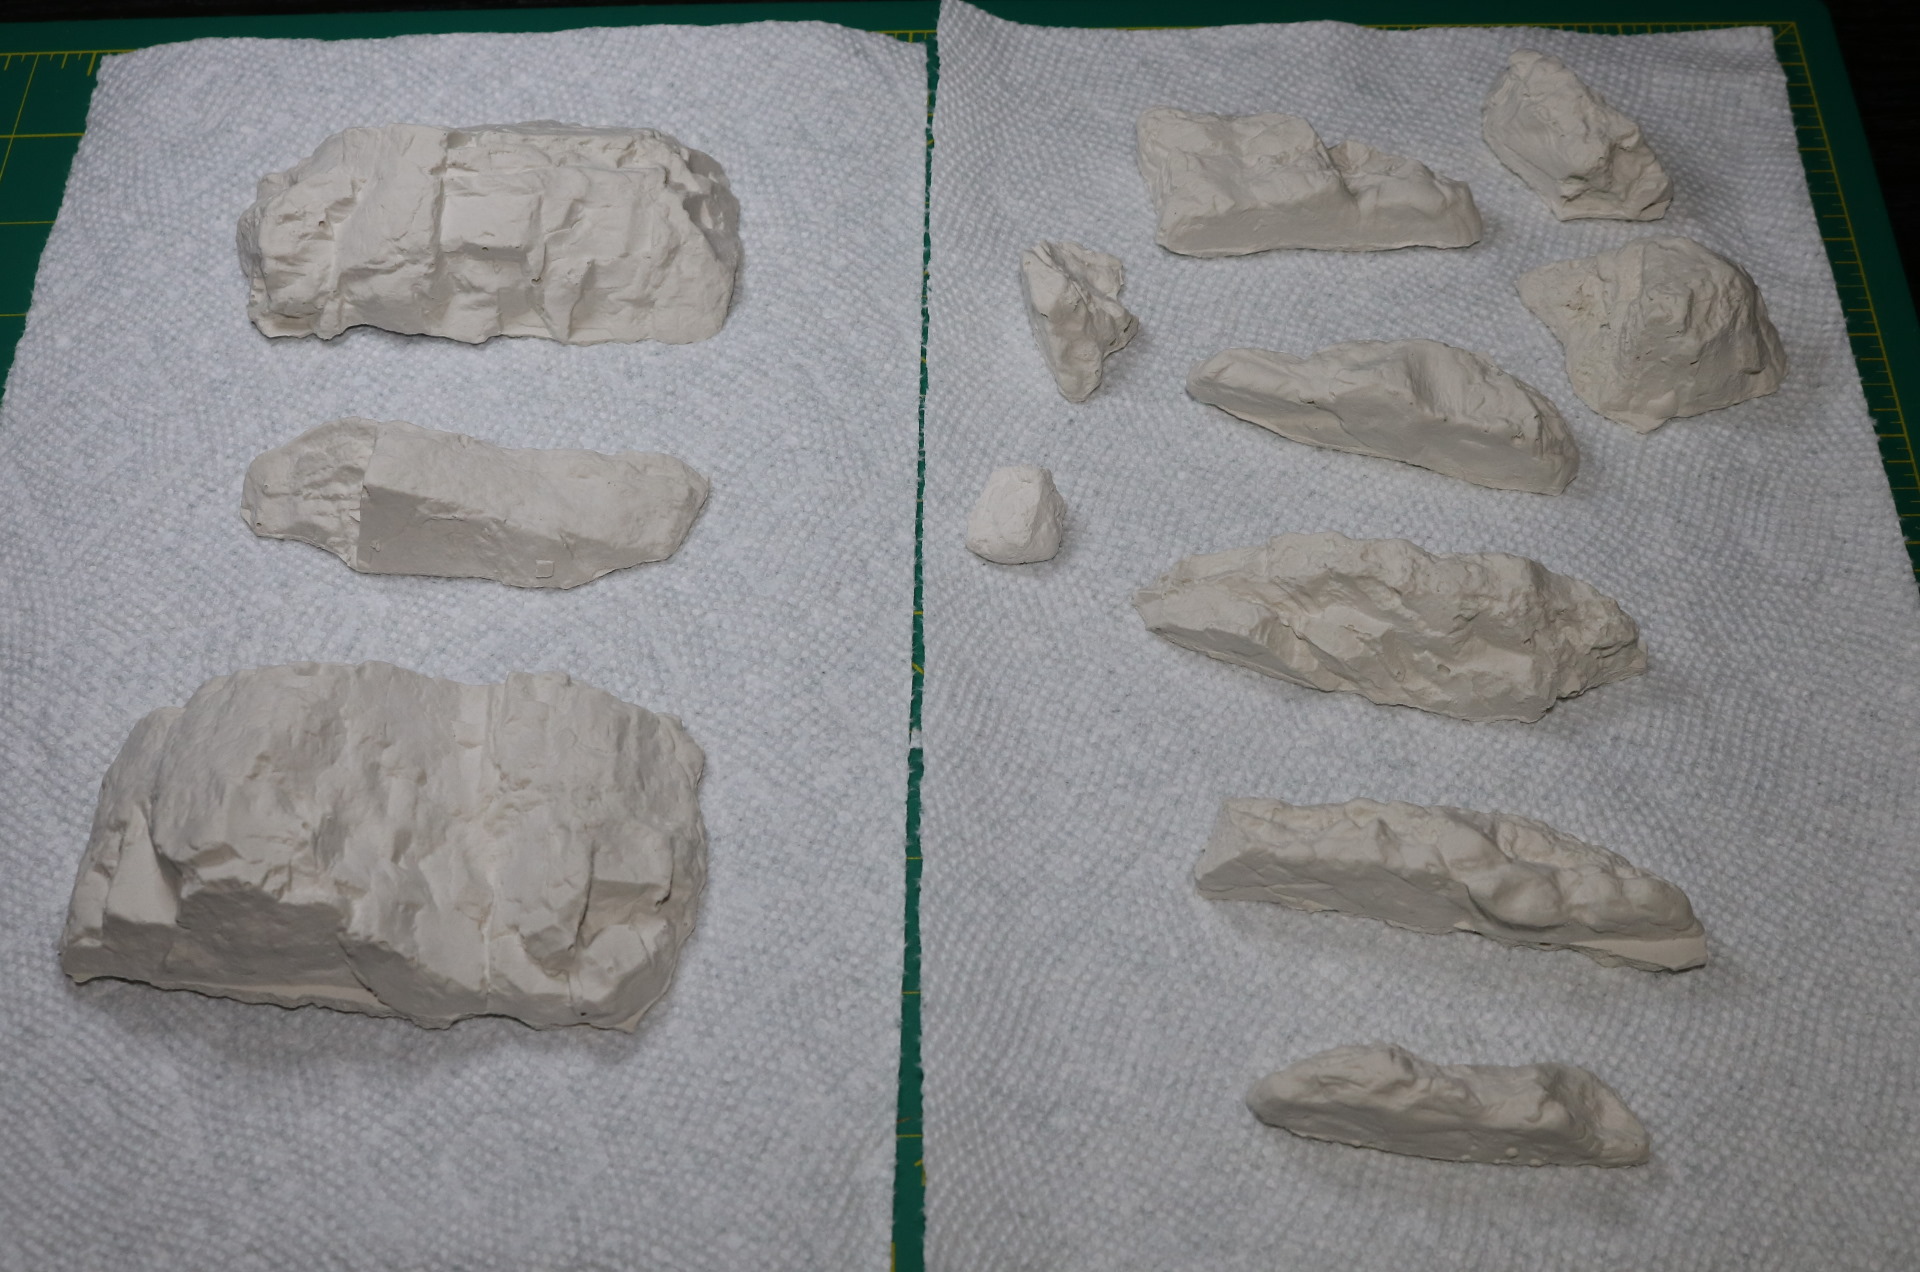
The rocks came out good. Considering this was my first attempt ever, it came out almost perfectly. I was quite surprised how fast the plaster set. It took around half an hour to harden and become completely solid after an hour.
Now, what I will do is attach those rocks onto the styrofoam base. I won’t be using glue for this. I will be using model paste which is another name for acrylic paste.
Acrylic paste has a similar consistency as Plaster of Paris but the end result is vastly different. Plaster of Paris hardens to become rock-like whereas acrylic paste hardens to become a hard rubber. It also takes a long-ass time to cure. Typically, it will take at least a day up to several days.
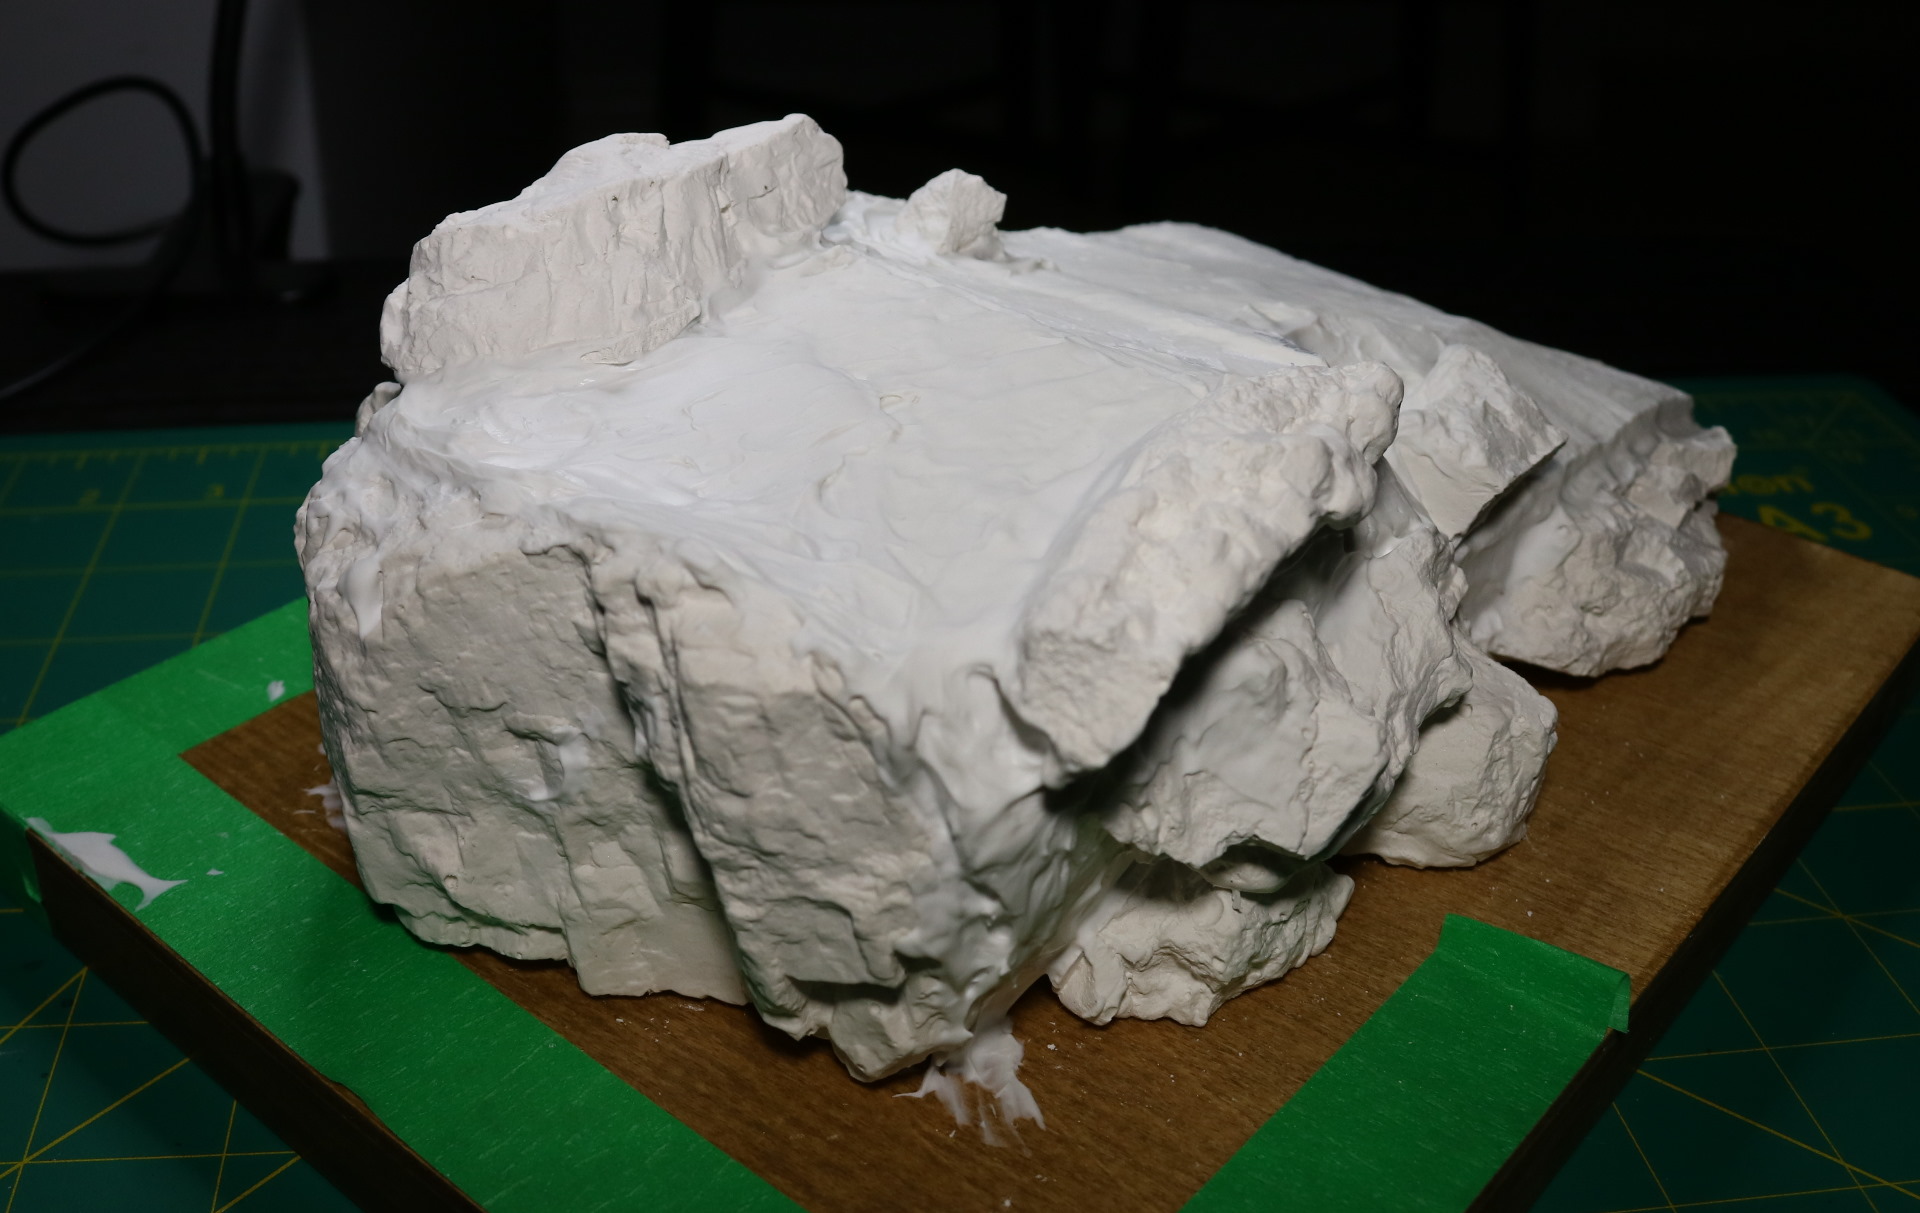
The advantage of using acrylic paste in this case is that it behaves like glue and does not become brittle in the end. Yes, it does take much longer to cure but it won’t break off. Plaster behaves more like cement.
Basically, it becomes impact resistant. The cured acrylic paste becomes water-resistant as well. The latter is pointless for this project.
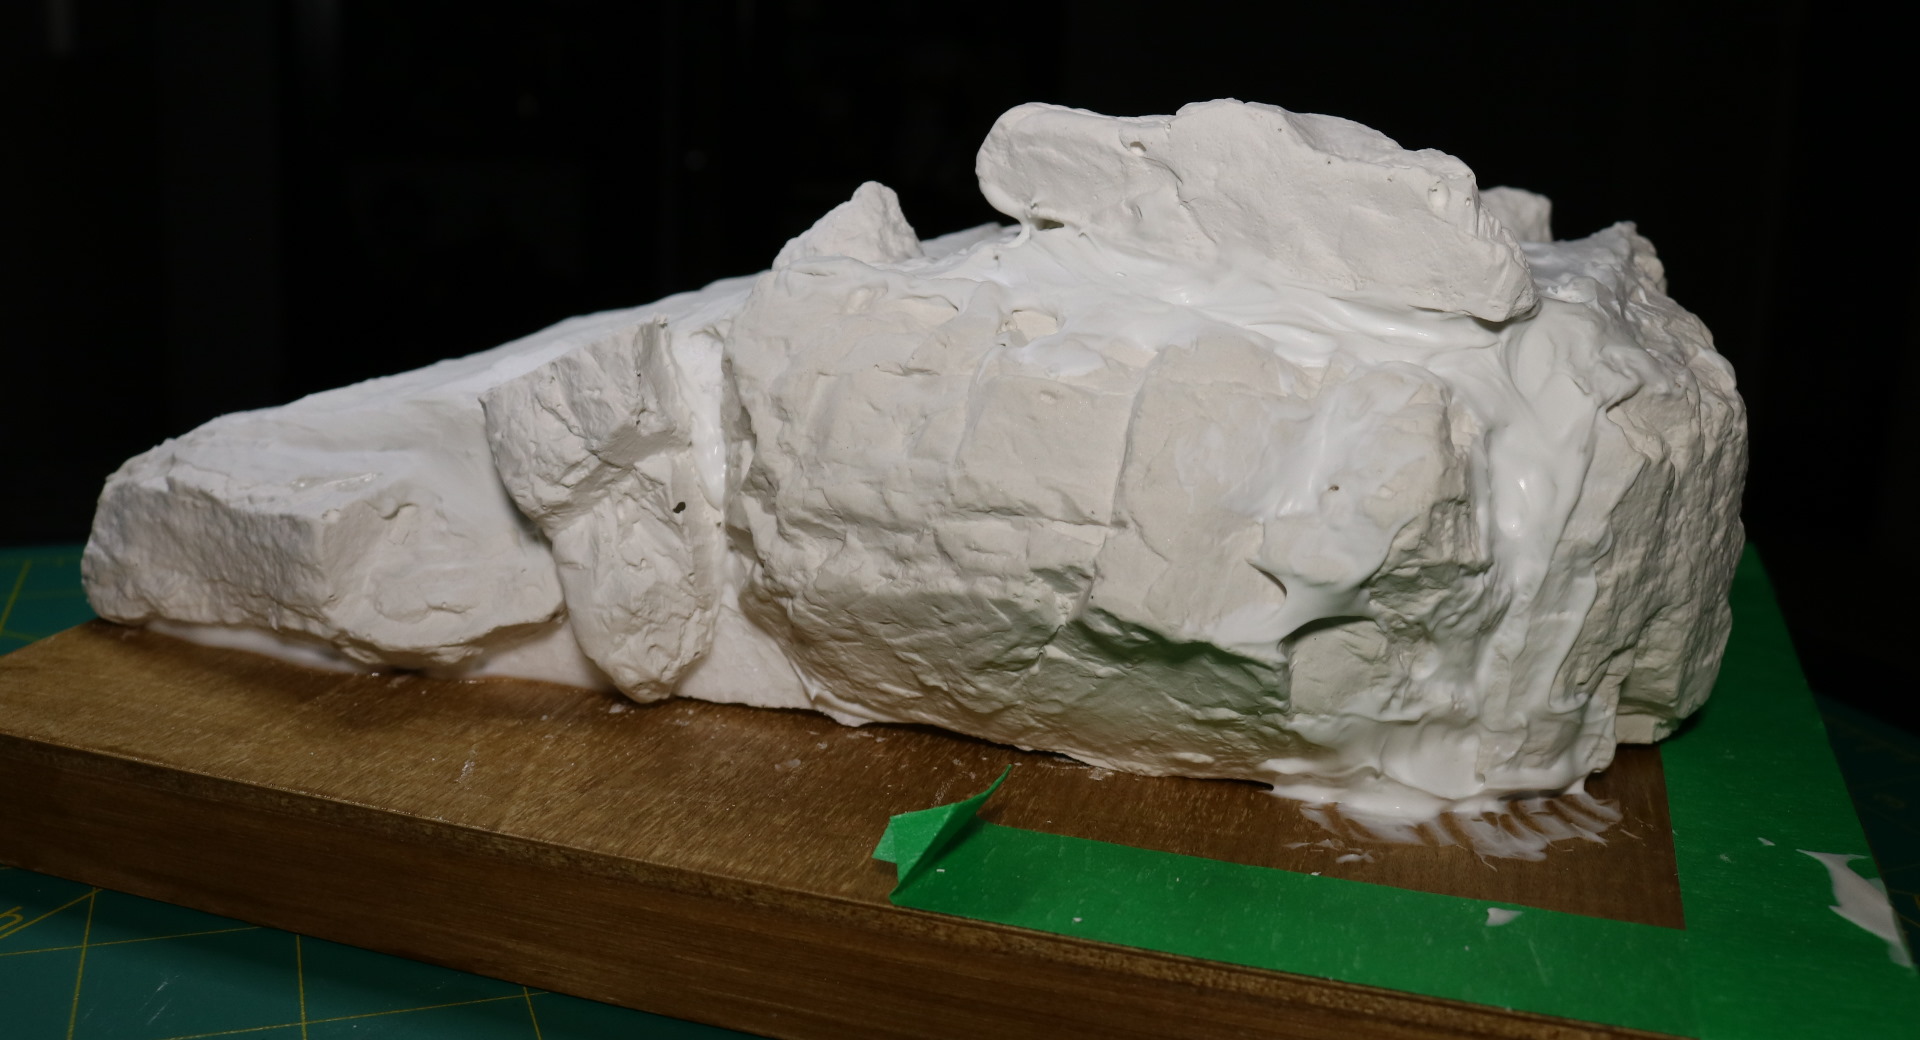
I am going to let this thing sit for a few days before moving onto the next step.
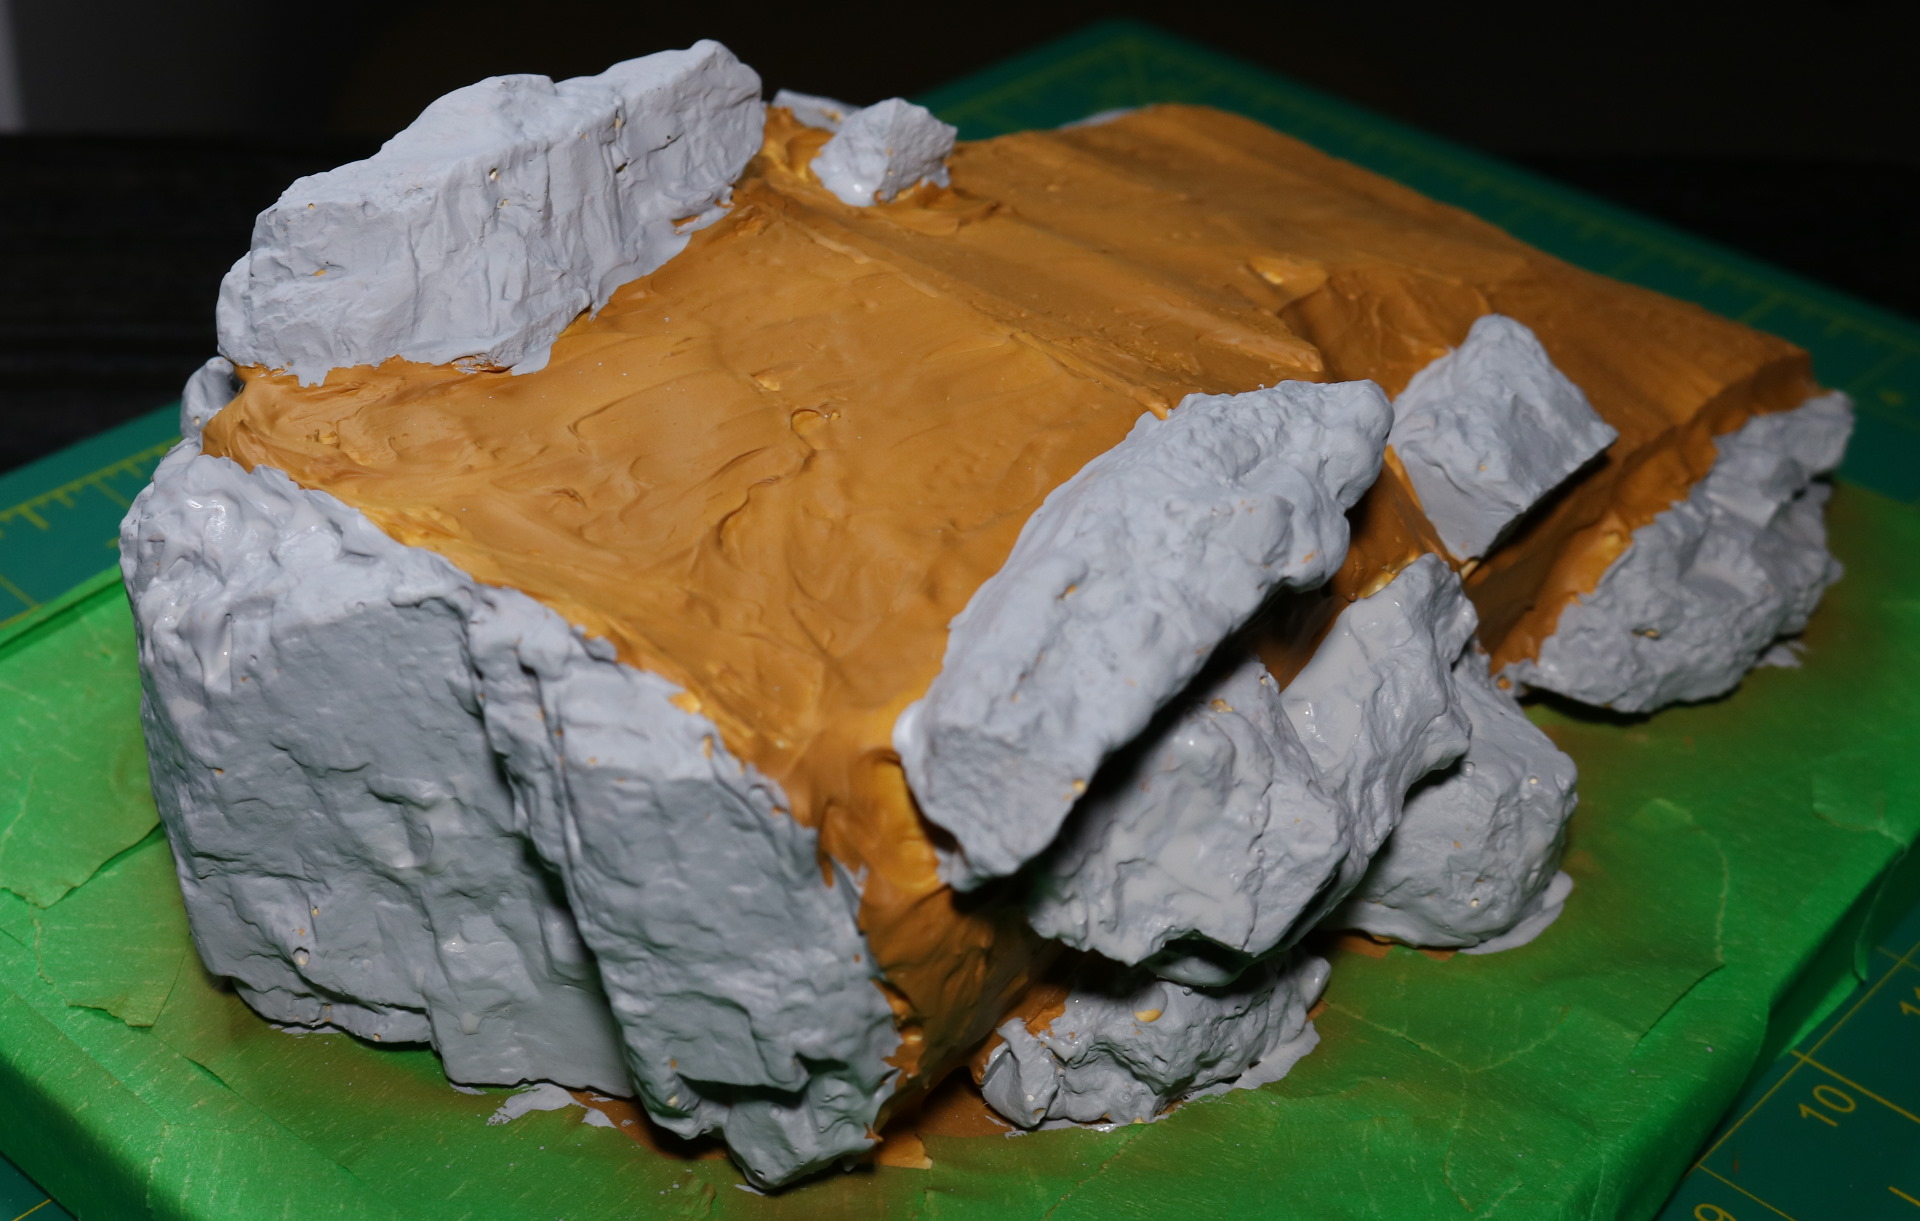
The first thing I did was airbrush with brown. It is the base color for this. And then, using a brush, I manually painted the rocks with gray. Accuracy between rock and soil is not required. You will soon see why.
I know it looks meh at this point, but this is just a beginning.

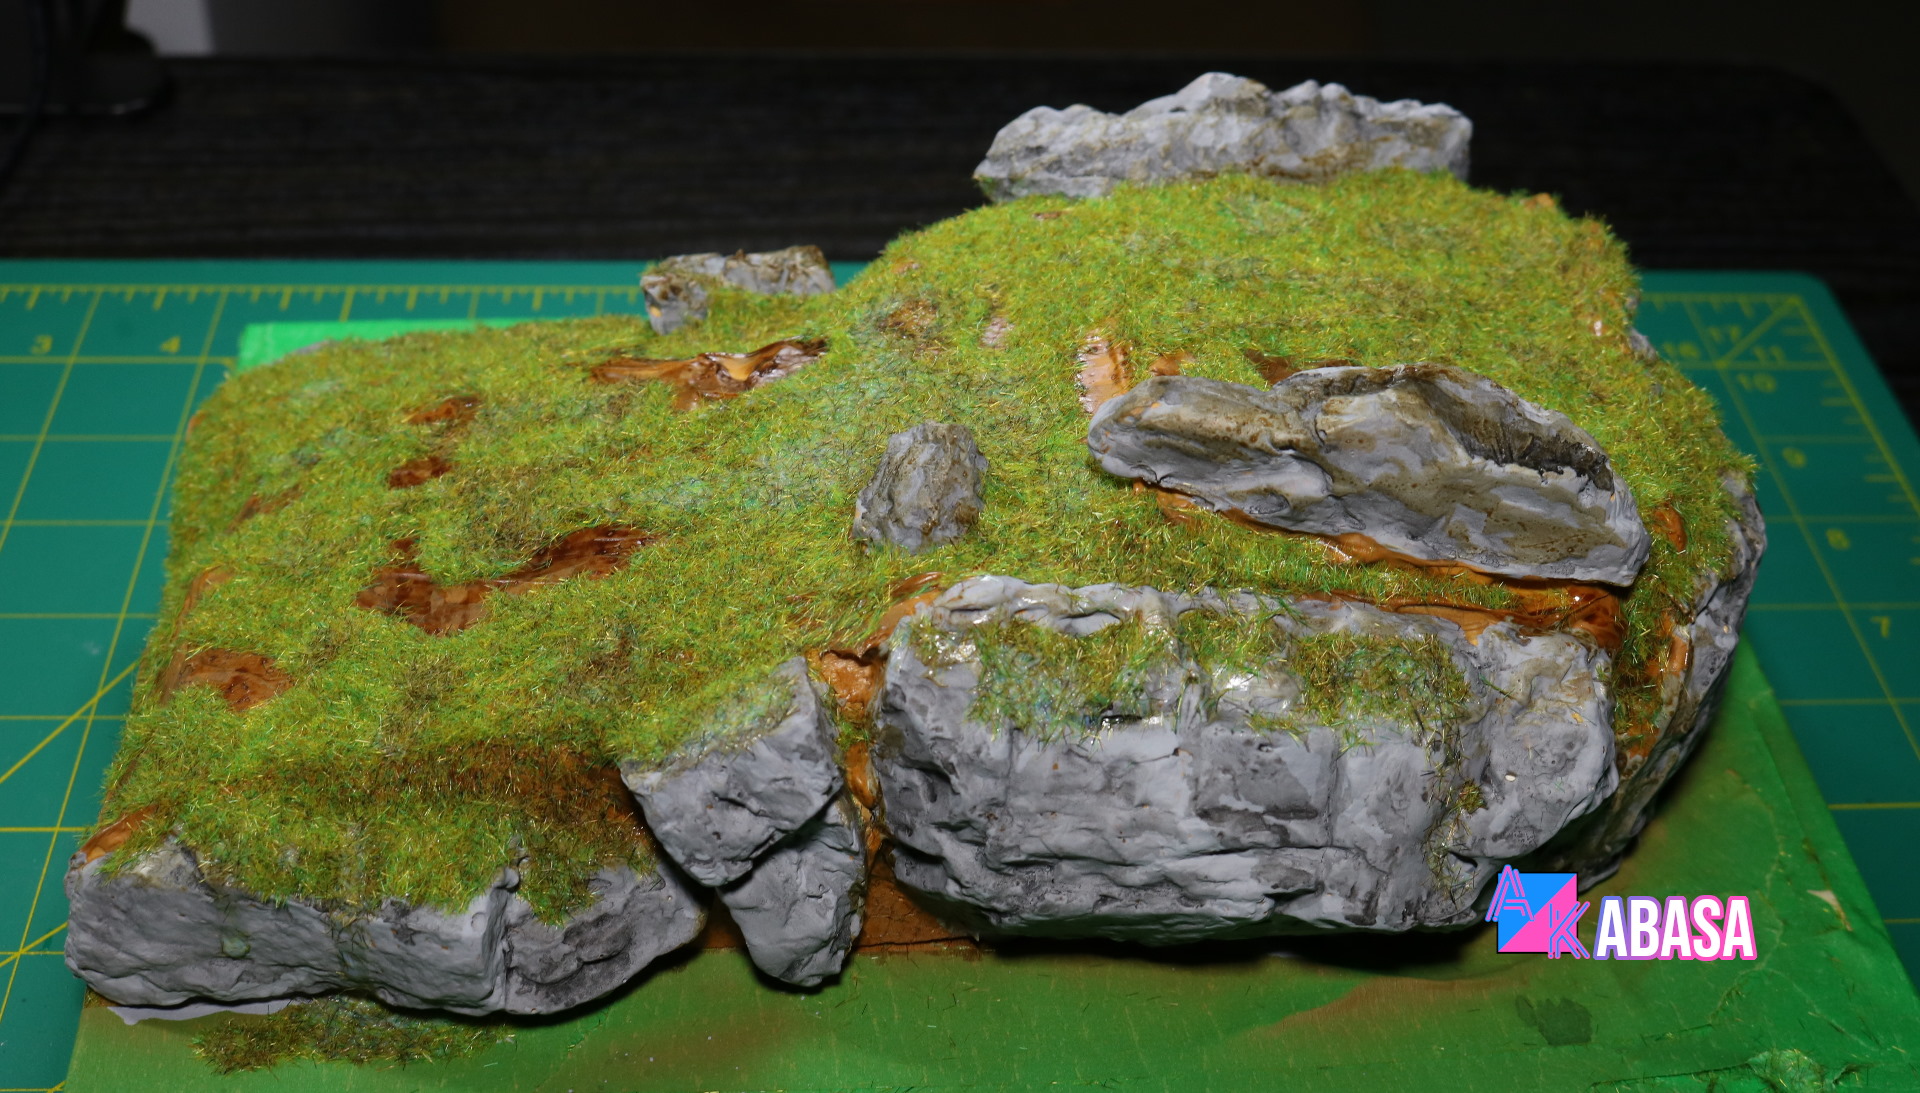
This is after weathering. I simply went nuts with thinning black and darker brown paint. Again, accuracy is not required in this step because I would drop diorama grass upon it soon enough which will cover the lines between rocks and soil.
Ta-da!
Well, not done but it’s getting there. This is the reason accuracy wasn’t required. The borders between rocks and soil is mostly covered. The bald patches are intentional.
Now, I am going to use something called diorama grass patches.
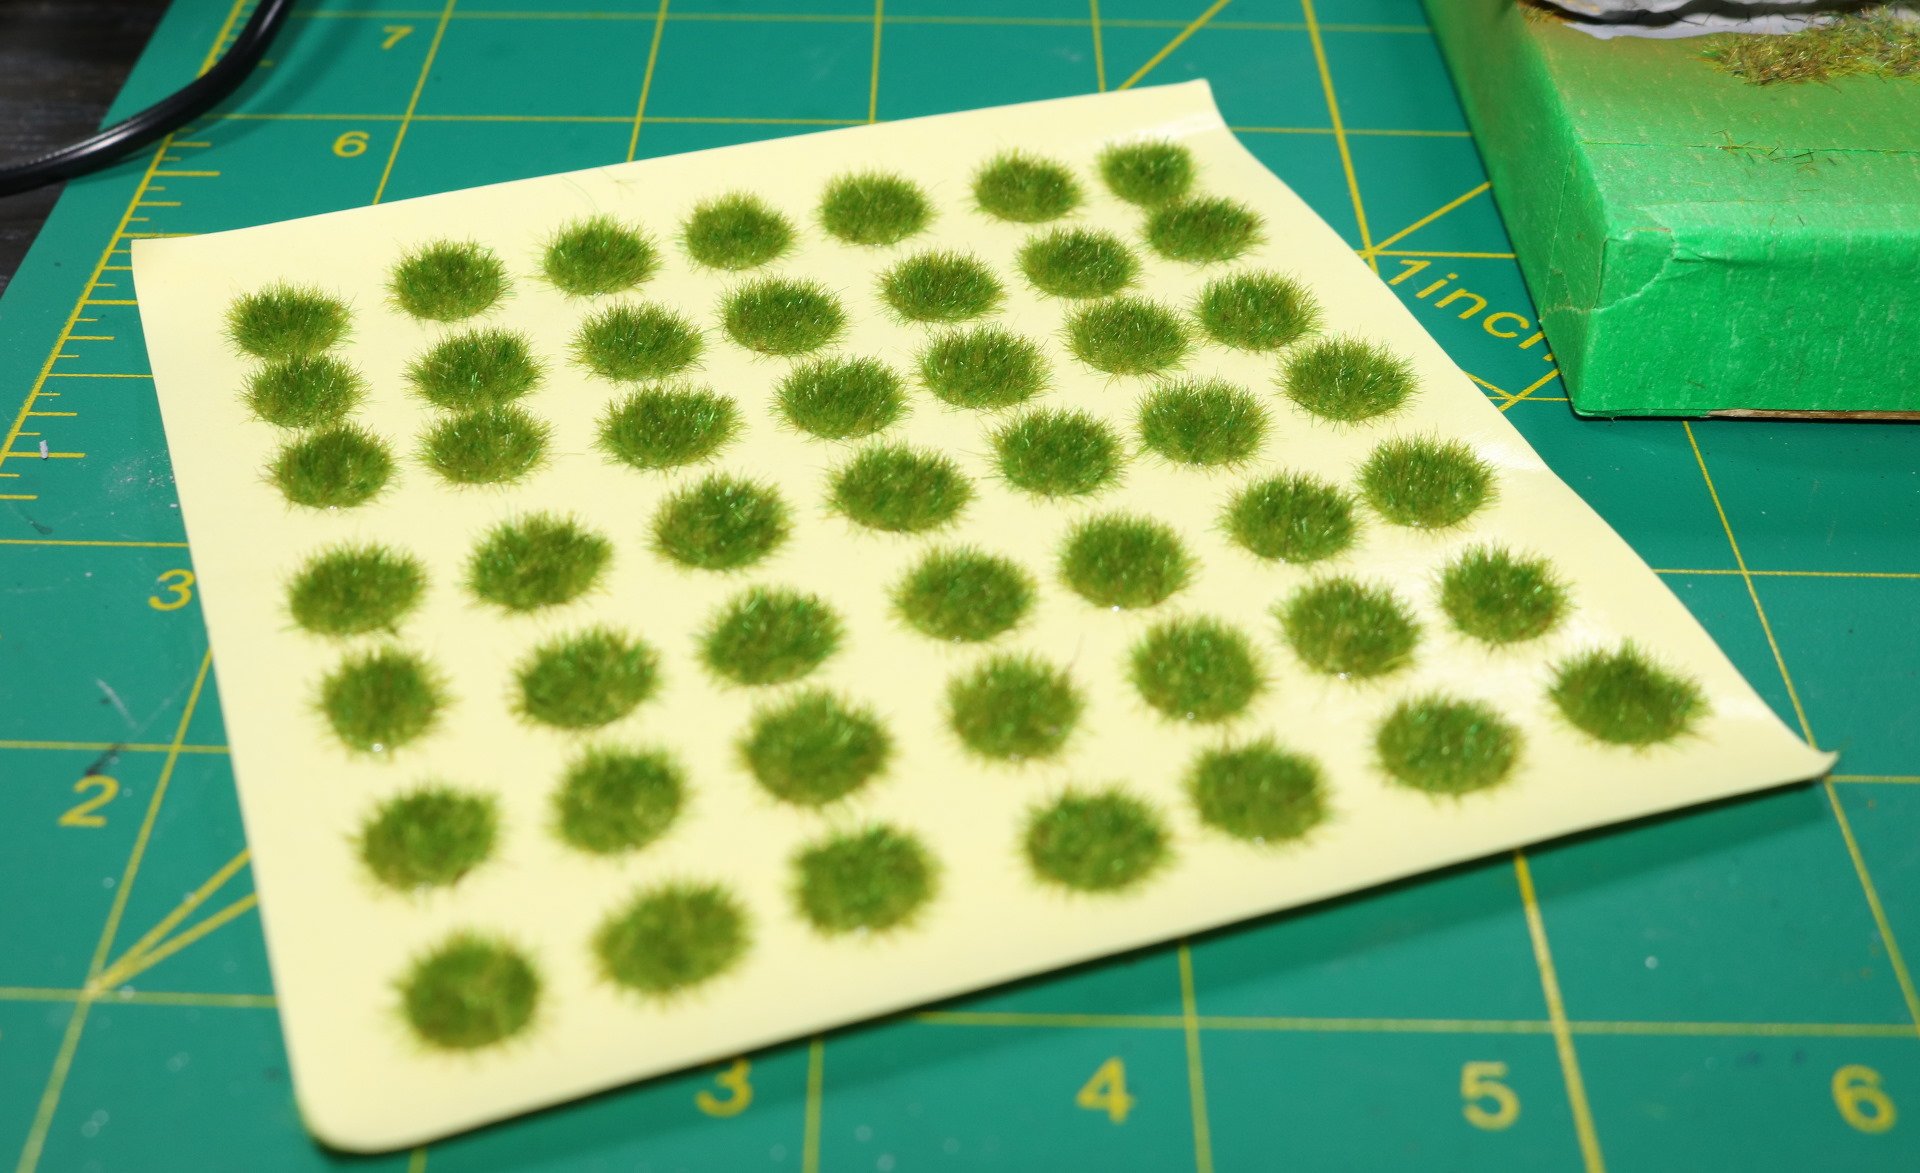
These are tiny grass patches that provide some varieties. It is also great on rocks as well. Mine appears to have sticky silicon underneath, but yours may differ.
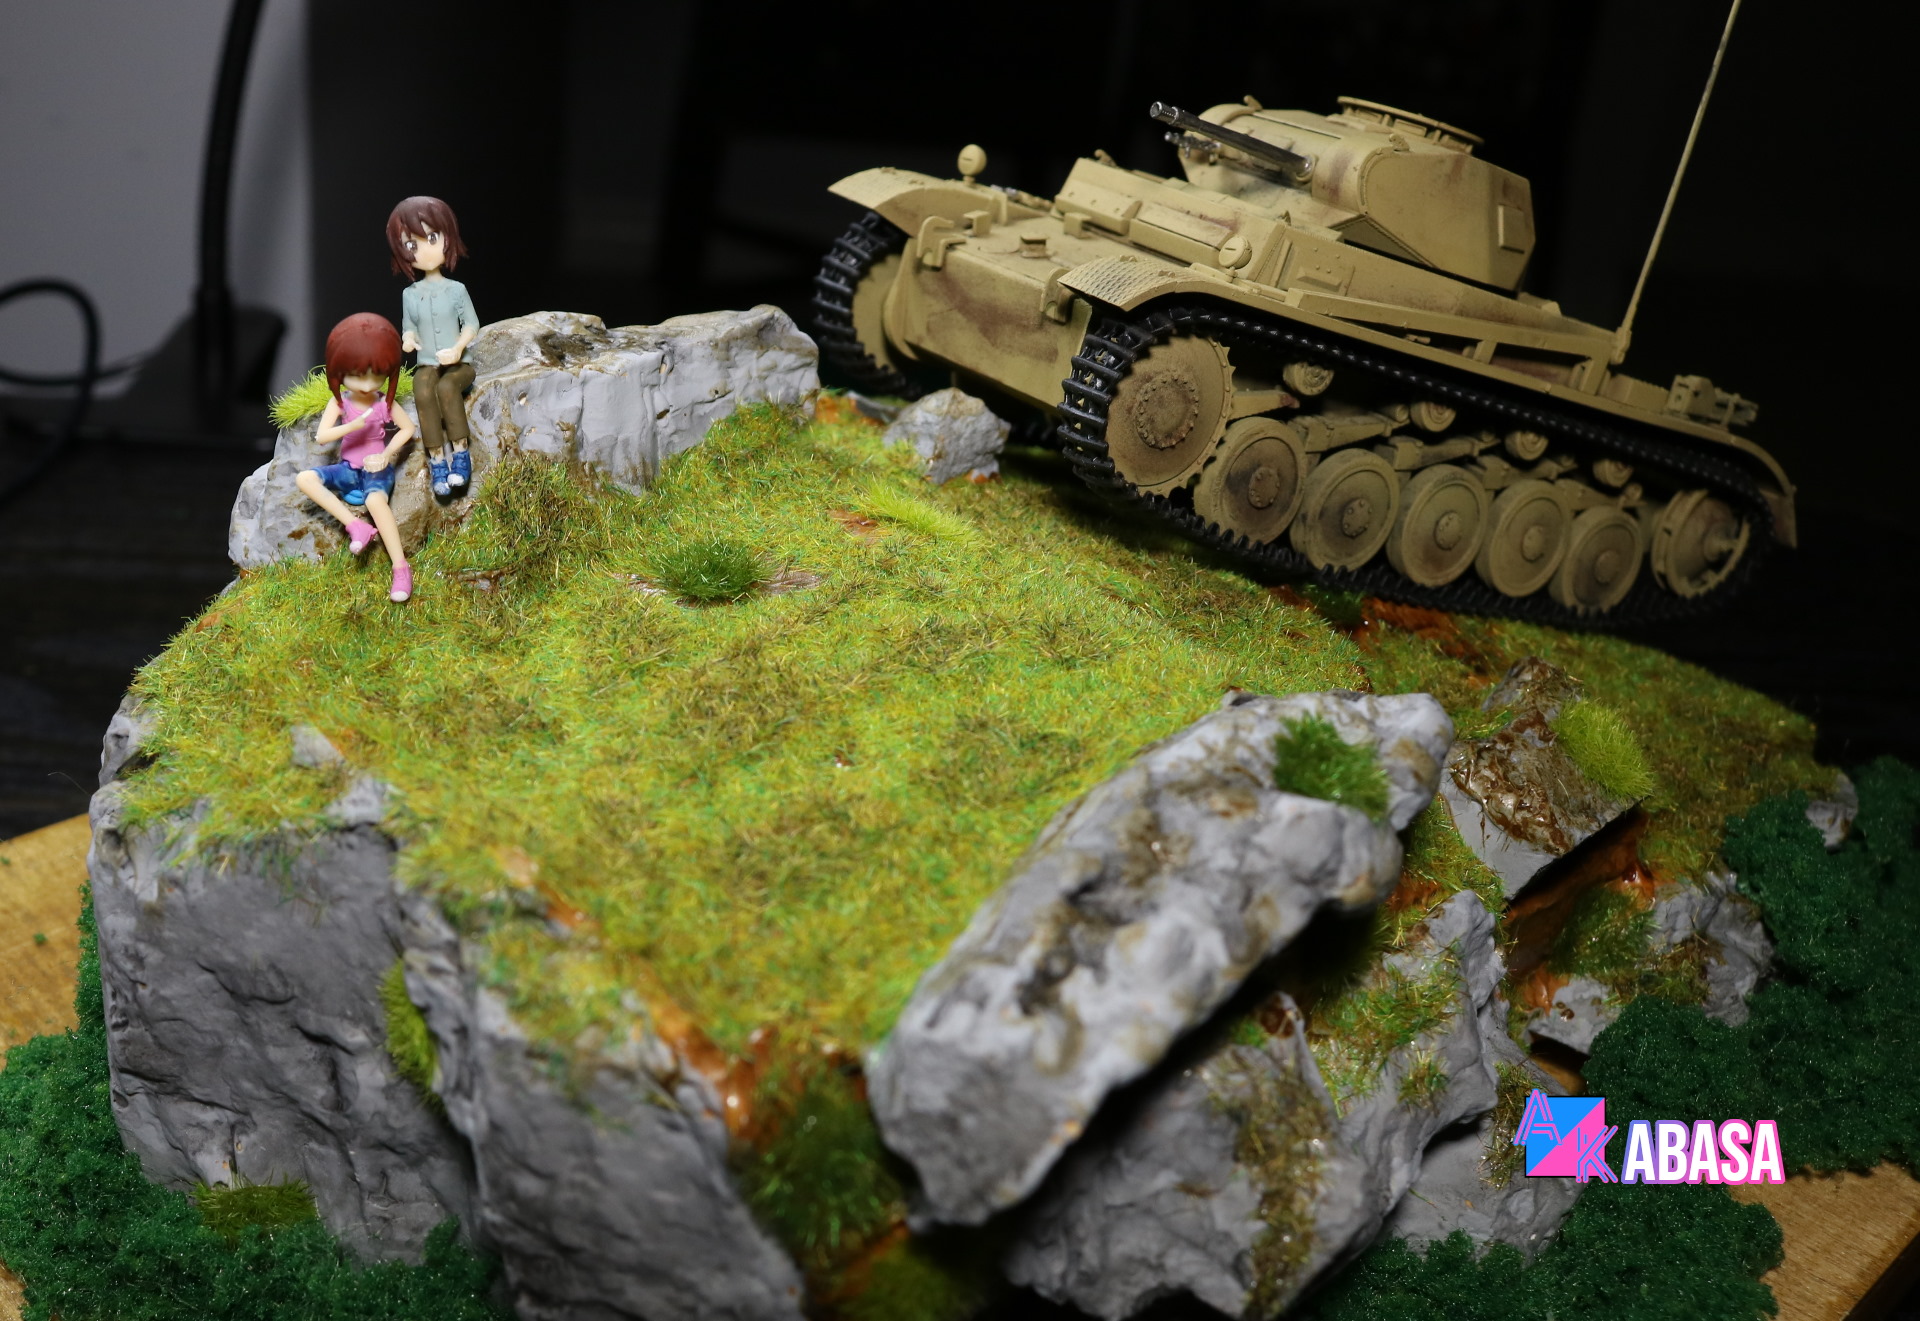
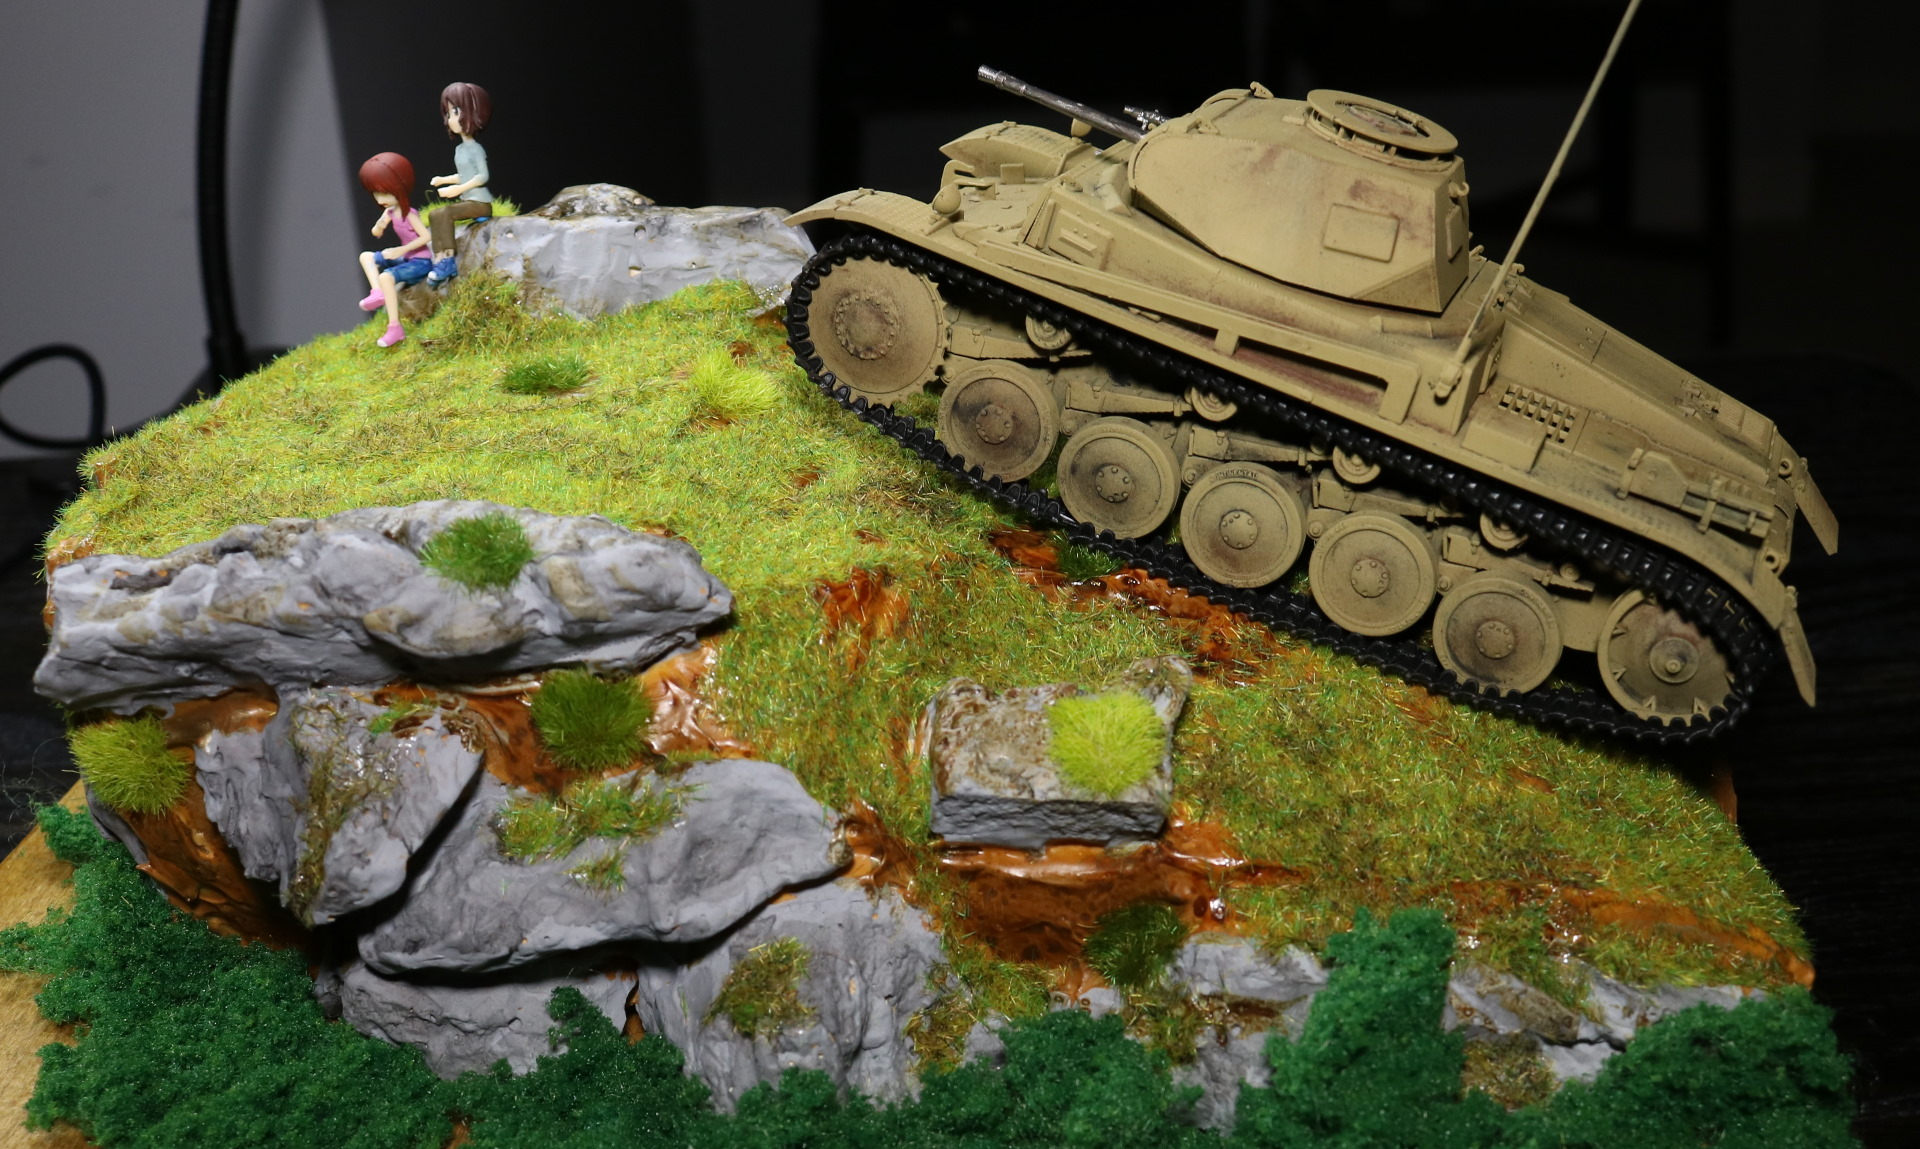
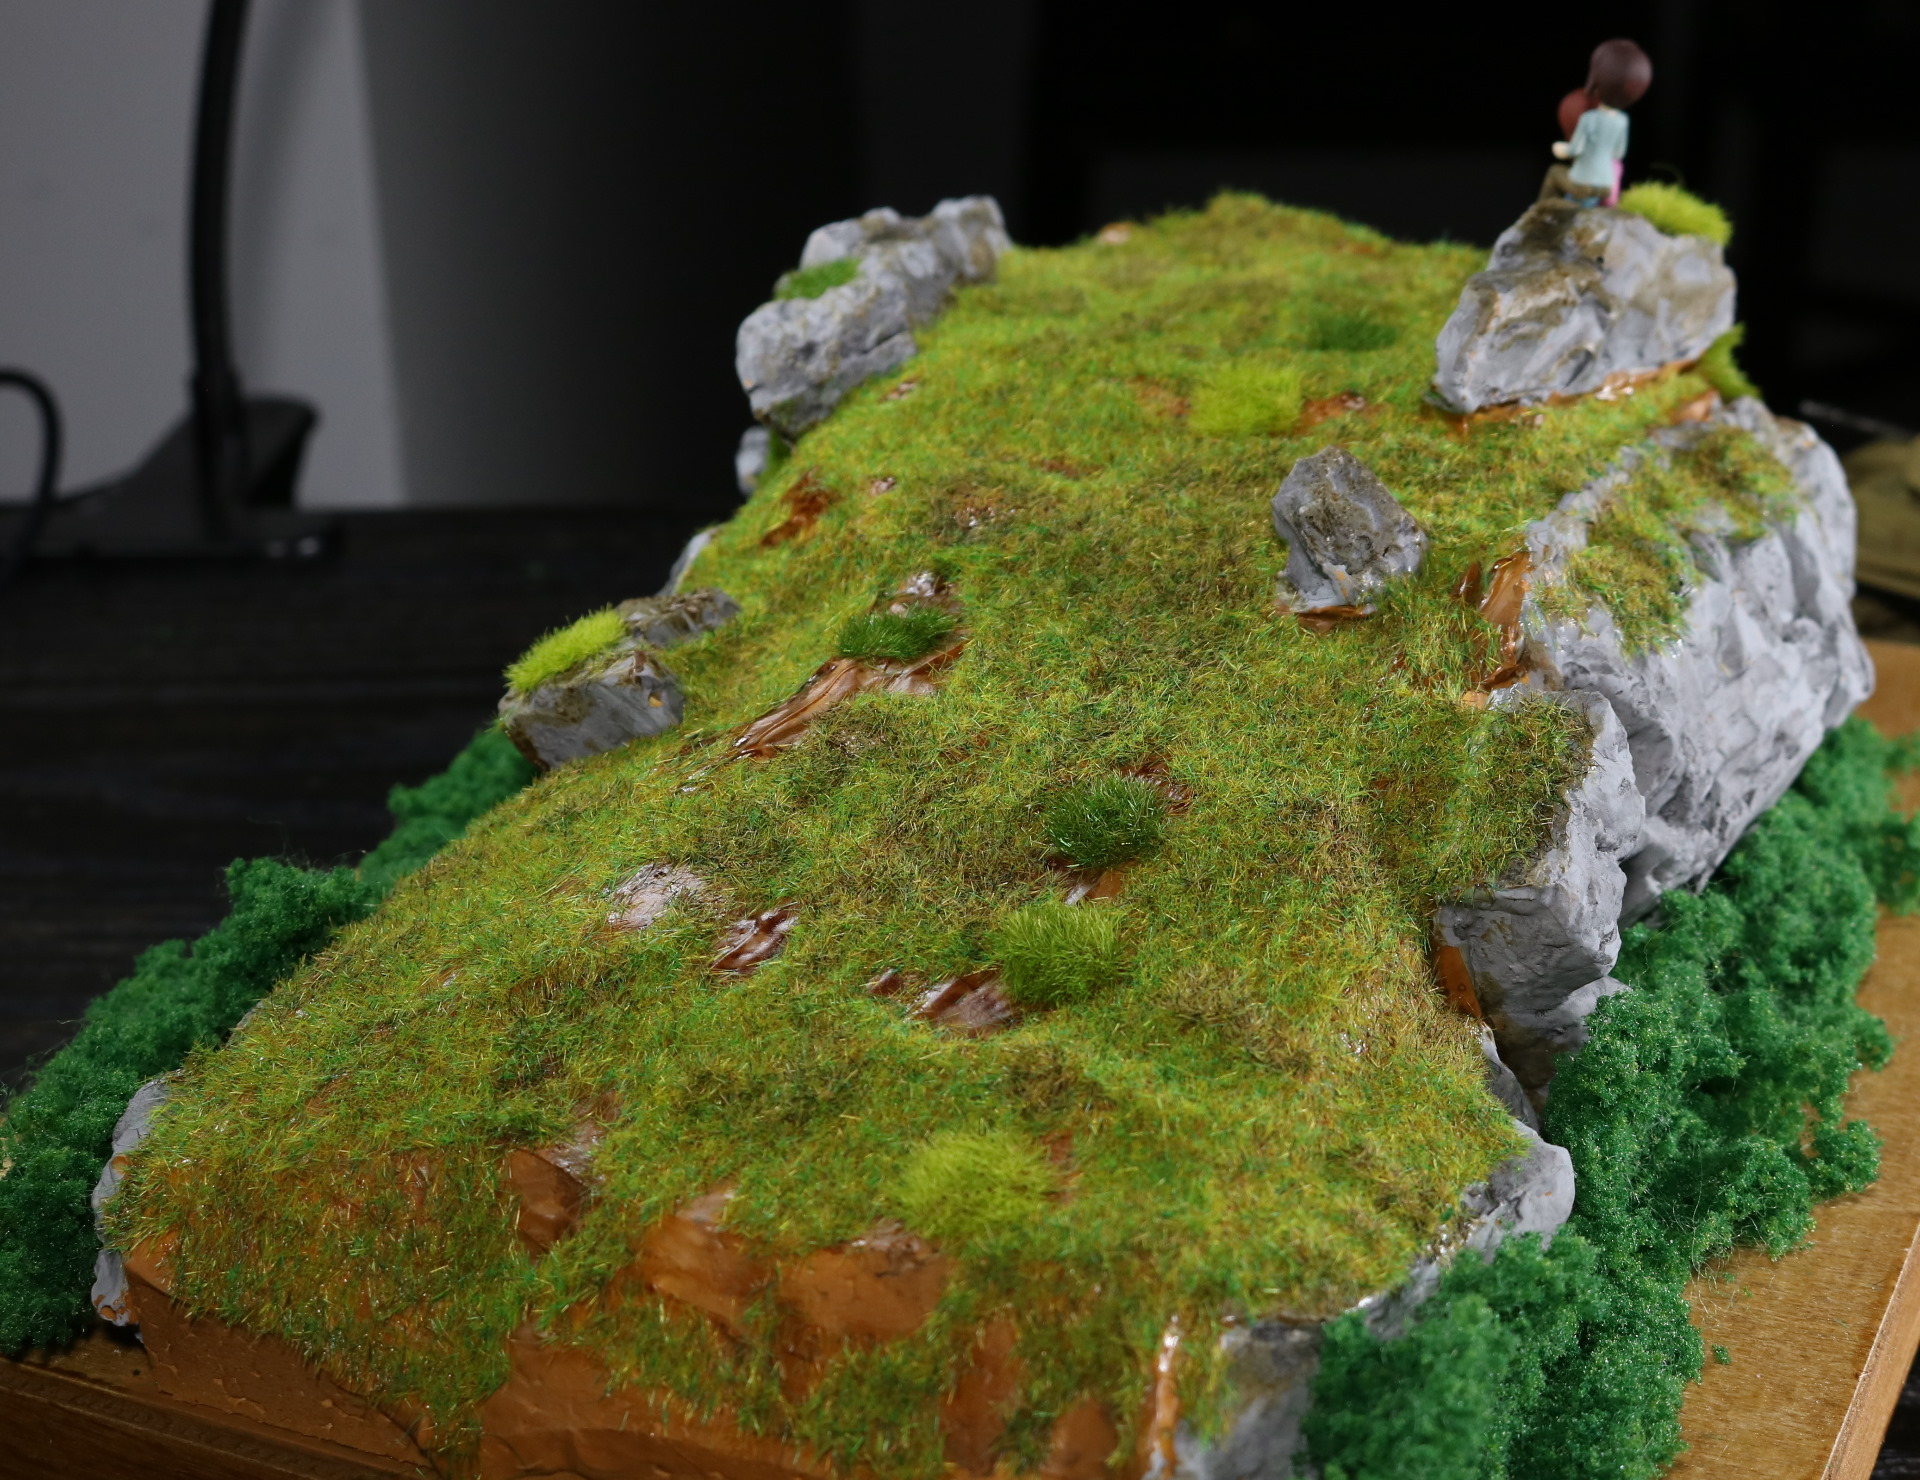
So, this is it.
This diorama itself took only 4 days, but its planning took about 2 months. These sort of projects are really fun for those who are willing. For me, a fair amount of improvisations comes into the play.
Originally, what I was really planning was a taller cliff with sea on the bottom on a bigger wooden platform. However, after realizing that the size of the project was getting out of the hand, I shrunk it, removed the sea aspect, and lowered the height of the cliff.
The original vision would have been awesome if it came out alright but I had doubts about my own abilities, especially the sea part because I haven’t done any sea/water diorama before.
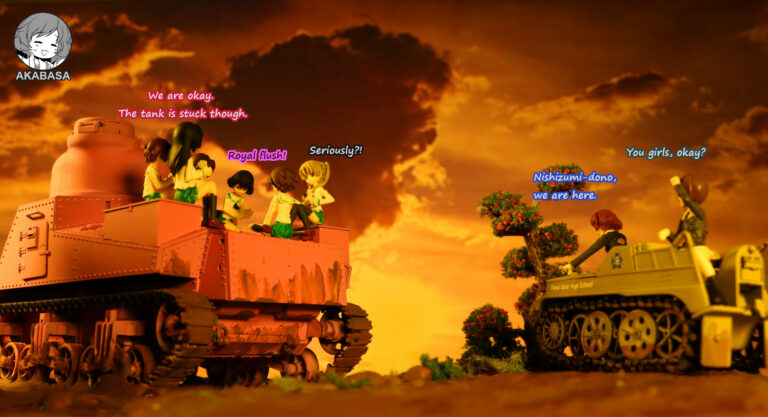
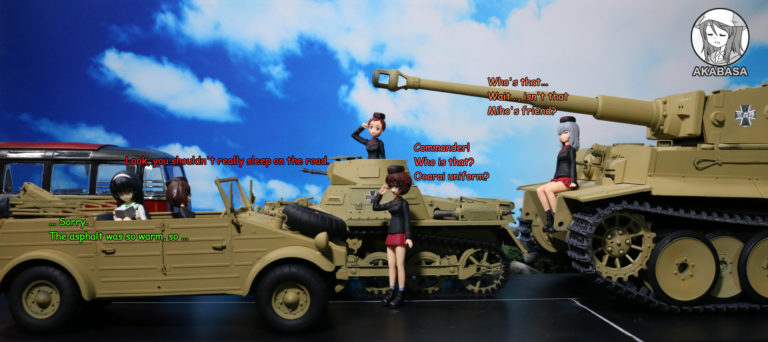
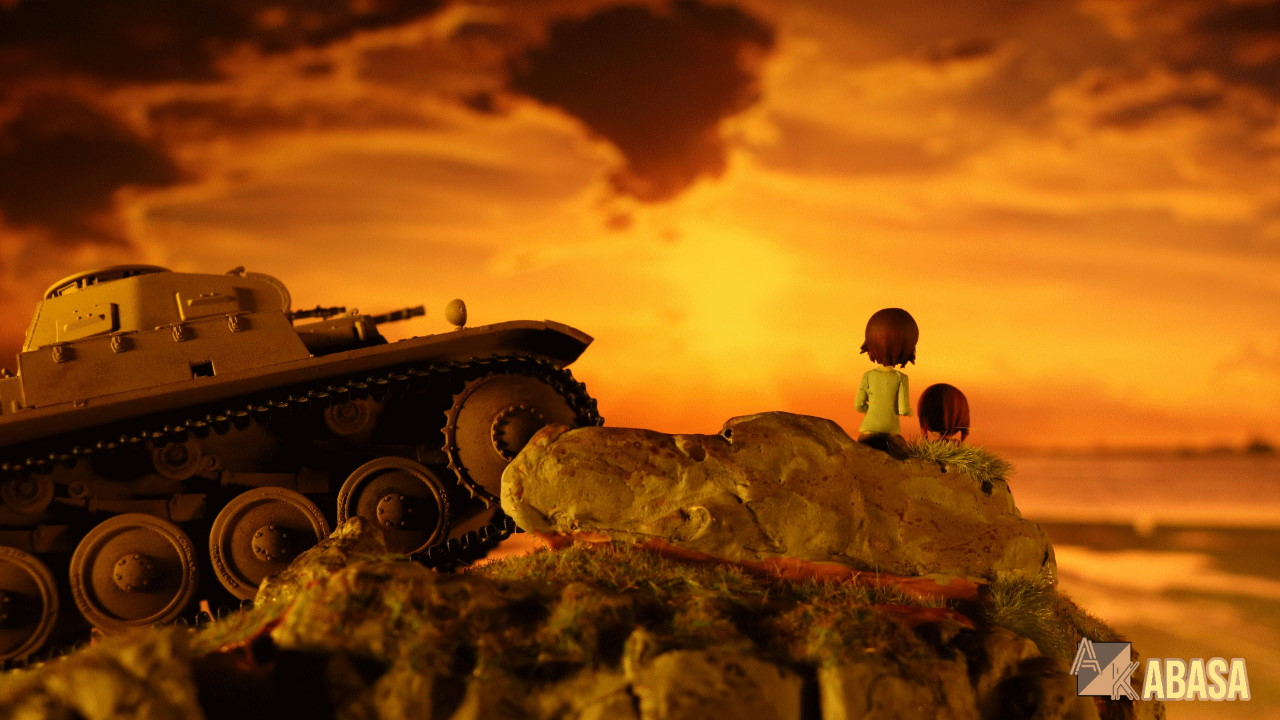
Finally, this diorama was specifically created to make a photograph which is –
Until next time.