Delicious in dungeon diorama
I wasn’t originally planning to do this. However, as I got my hands on Volks Laios kit, a scene just popped in my mind.
In the end, I had to do this.
Before I begin, allow me to list links to the individual figures.
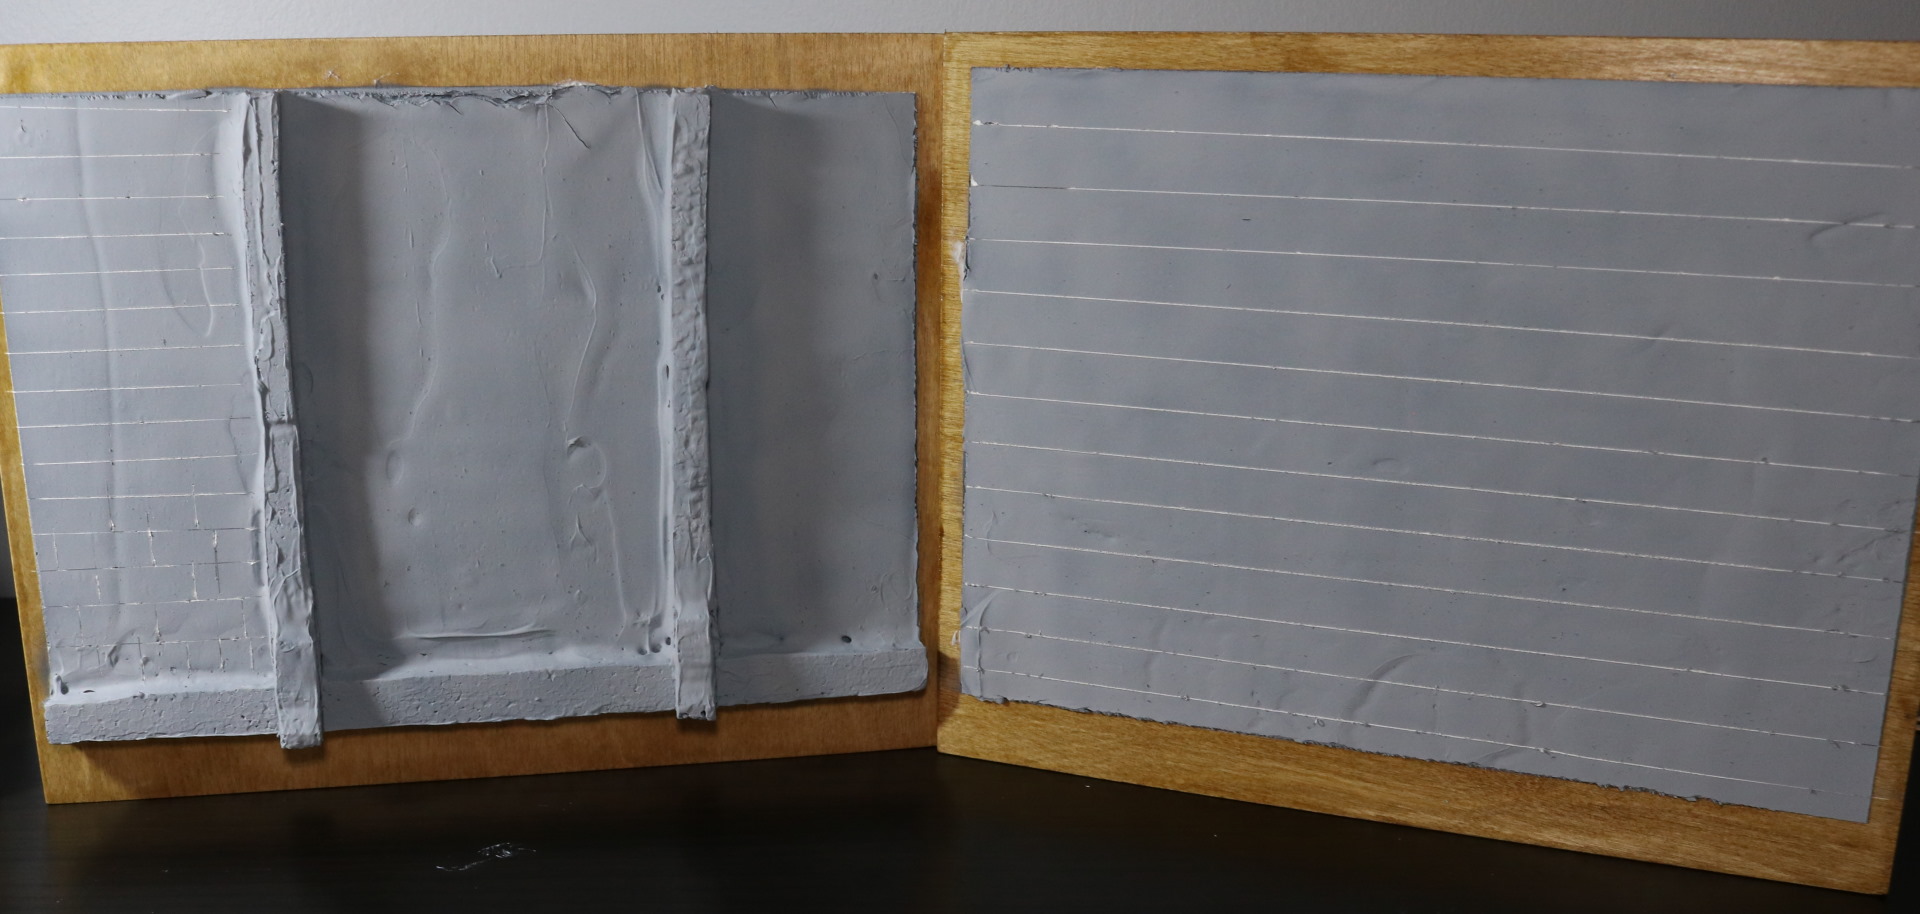
Now, the floor which is the heart of the diorama. It wasn’t easy.
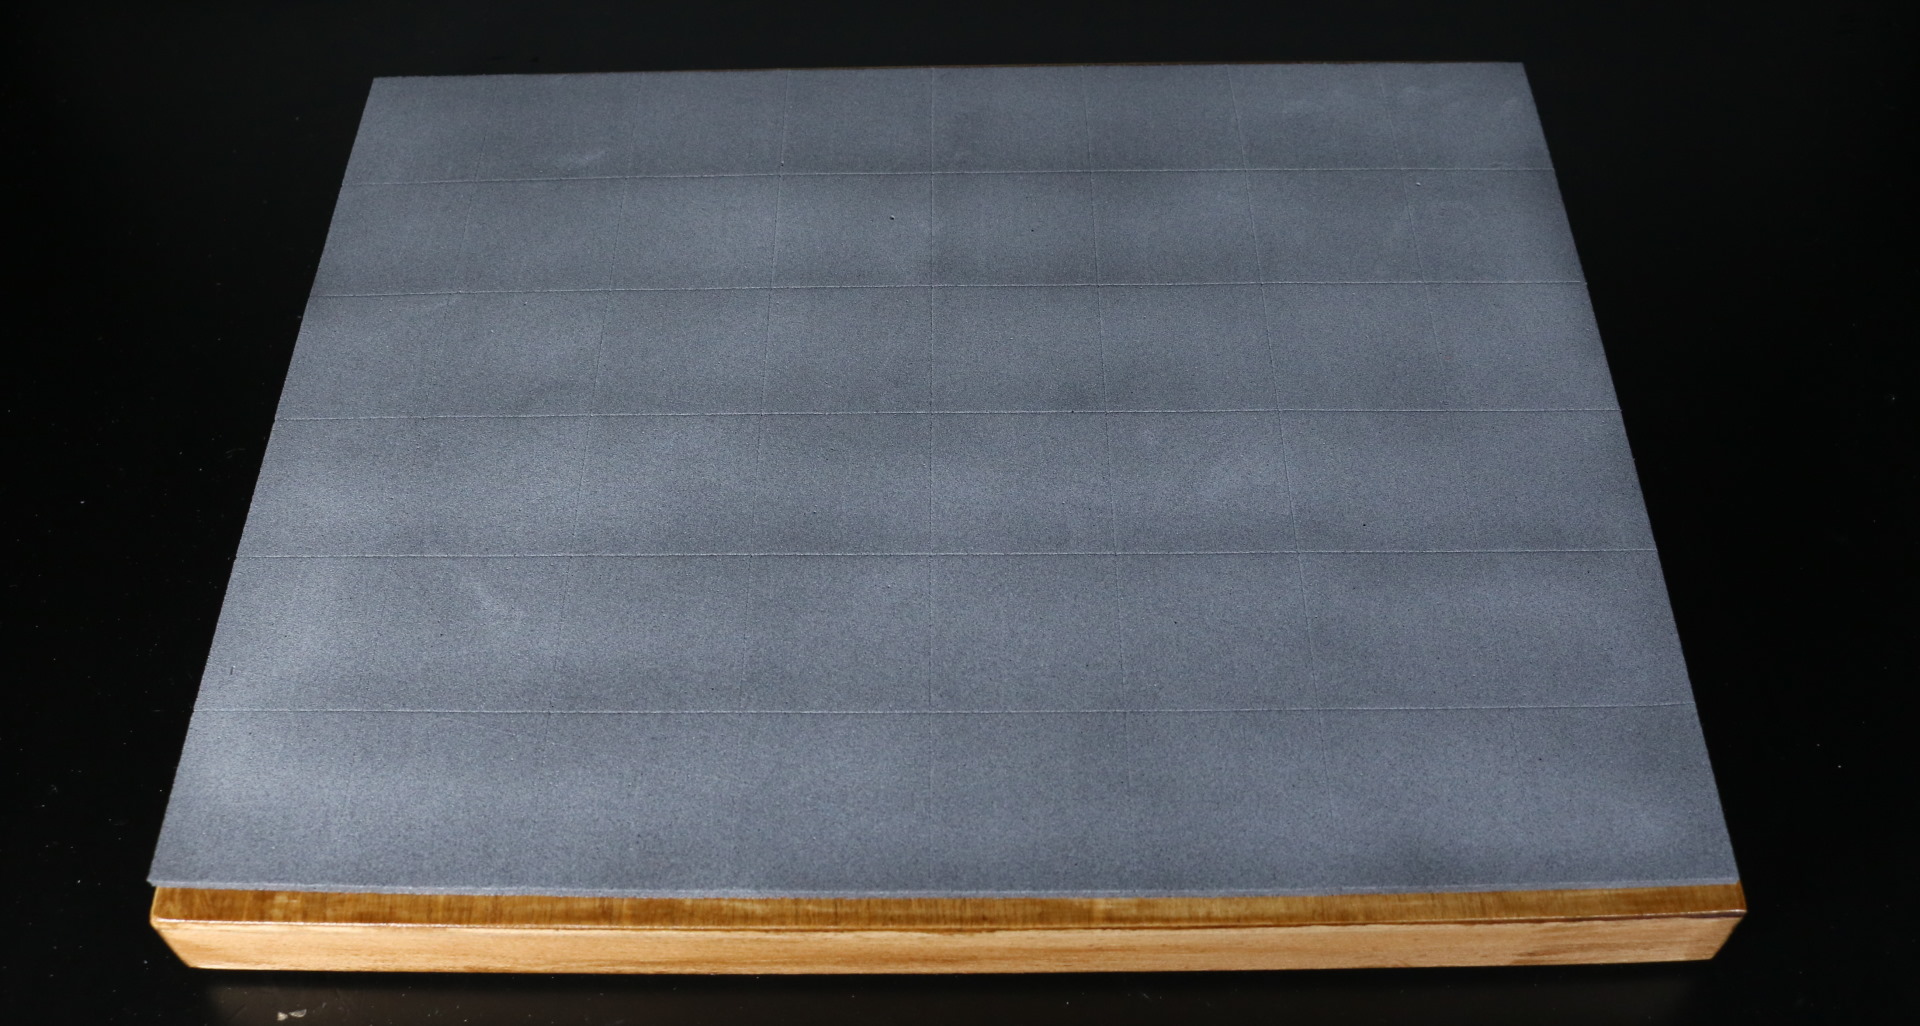
I wanted a stone tile floor. I wanted it to heavily corroded and weathered. At first, after some consideration, I chose to go with EVA foam sheet. Using a knife, I made loose cuts to simulate tiles.
It looks acceptable at first. However, weathering and corroding proved to be a challenge because, again, it’s a foam. My attempts at weathering it didn’t go too well.
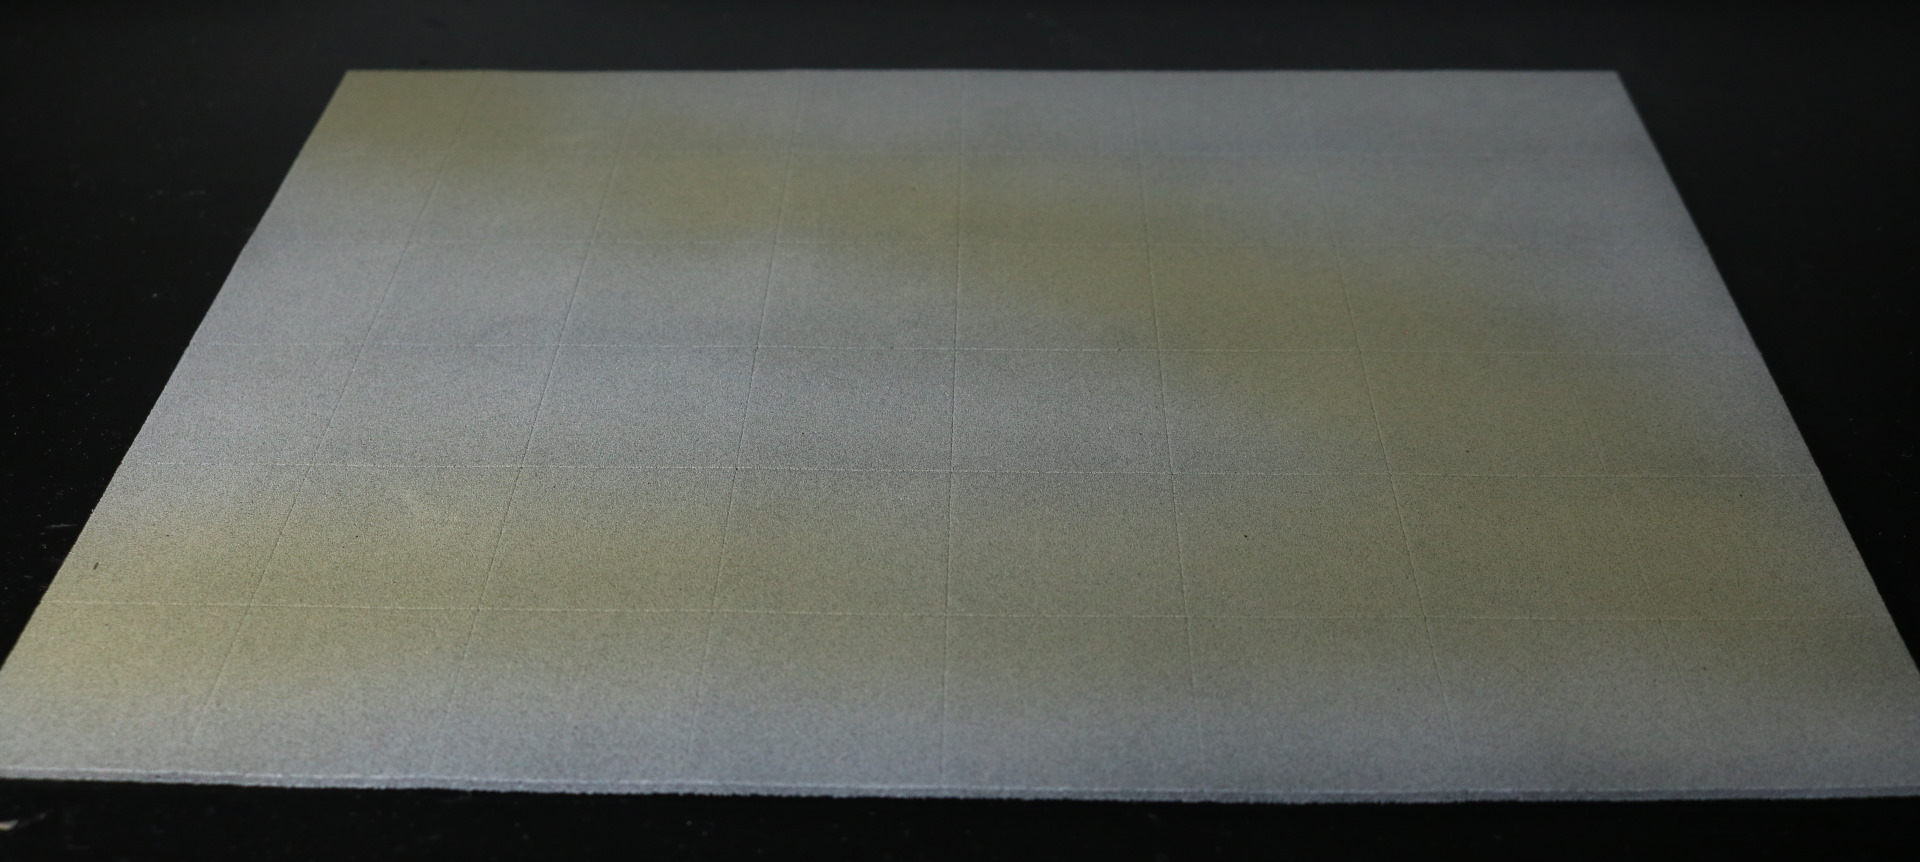
Above is a second sheet actually because I managed to completely destroy the first one while trying to corrode it with fire.
In the end, I accepted that EVA foam was a bad idea. Now, there is a difference between EVA foam and styrofoam. EVA foam acts a lot like vinyl and does not crumble like styrofoam.
Then why not go for styrofoam in the first place? I’ve indeed considered using styrofoam after EVA foam failure. However, styrofoam has its own issue in my usage. It is the texture. Styrofoam is basically a loosely glued piece of thousands of small plastic balls. Its surface would not look like and feel a stone surface.
The only way to make styrofoam work is if I would paint a thin layer of paste on top of it.
Well, if I am going to use paste, why not just use paste only? I would need to apply thicker though.
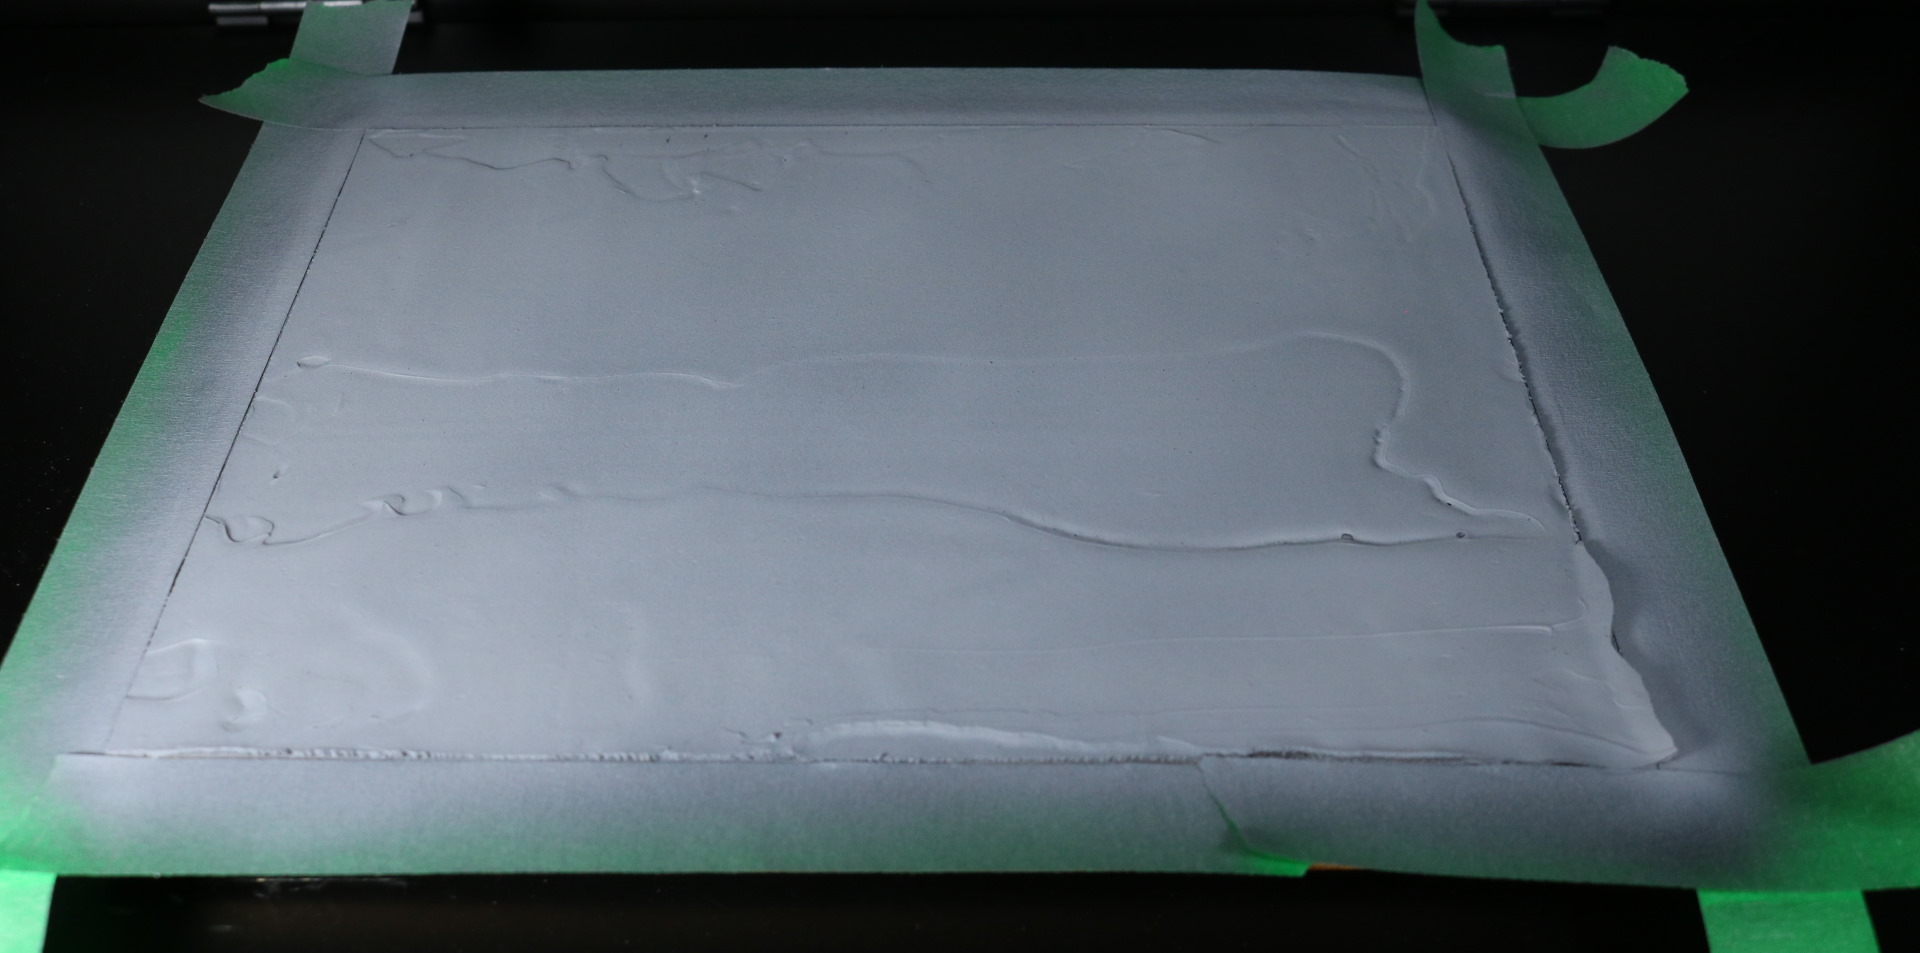
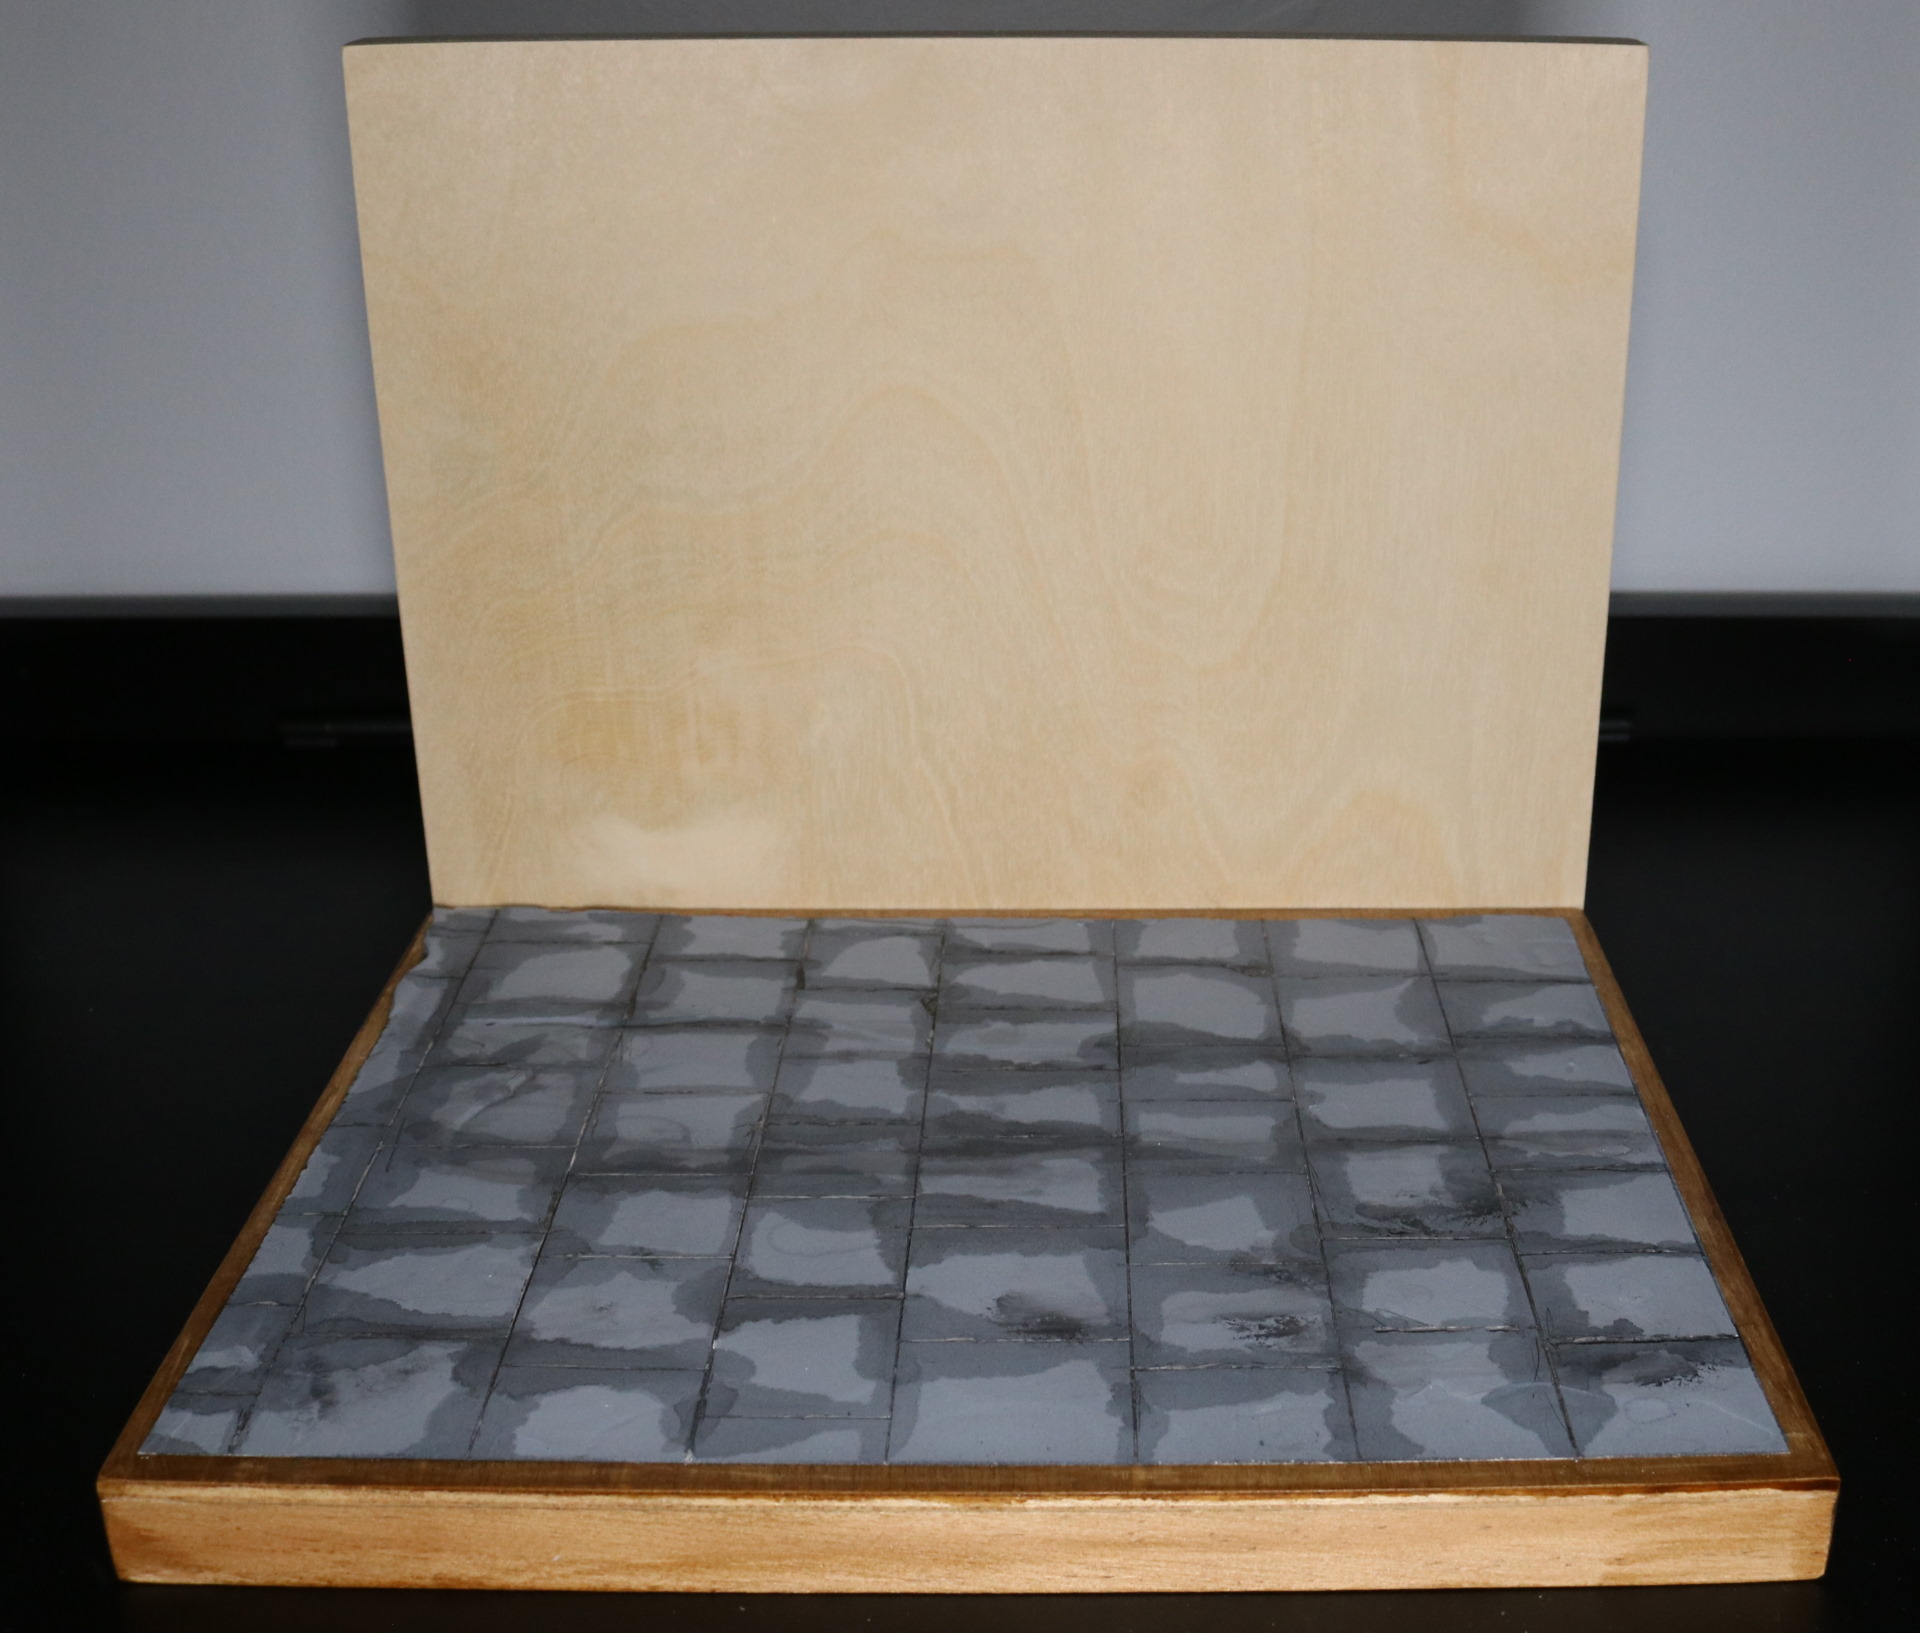
So, that is what I’ve done here. I’ve applied about 0.2cm thickness of paste on top of the wooden base. Left it dry for 2 days and then airbrushed black and then applied gray second coat.
The imperfect surface is done intentionally. You will see why shortly. This would have not been possible with styrofoam or EVA foam for that matter.
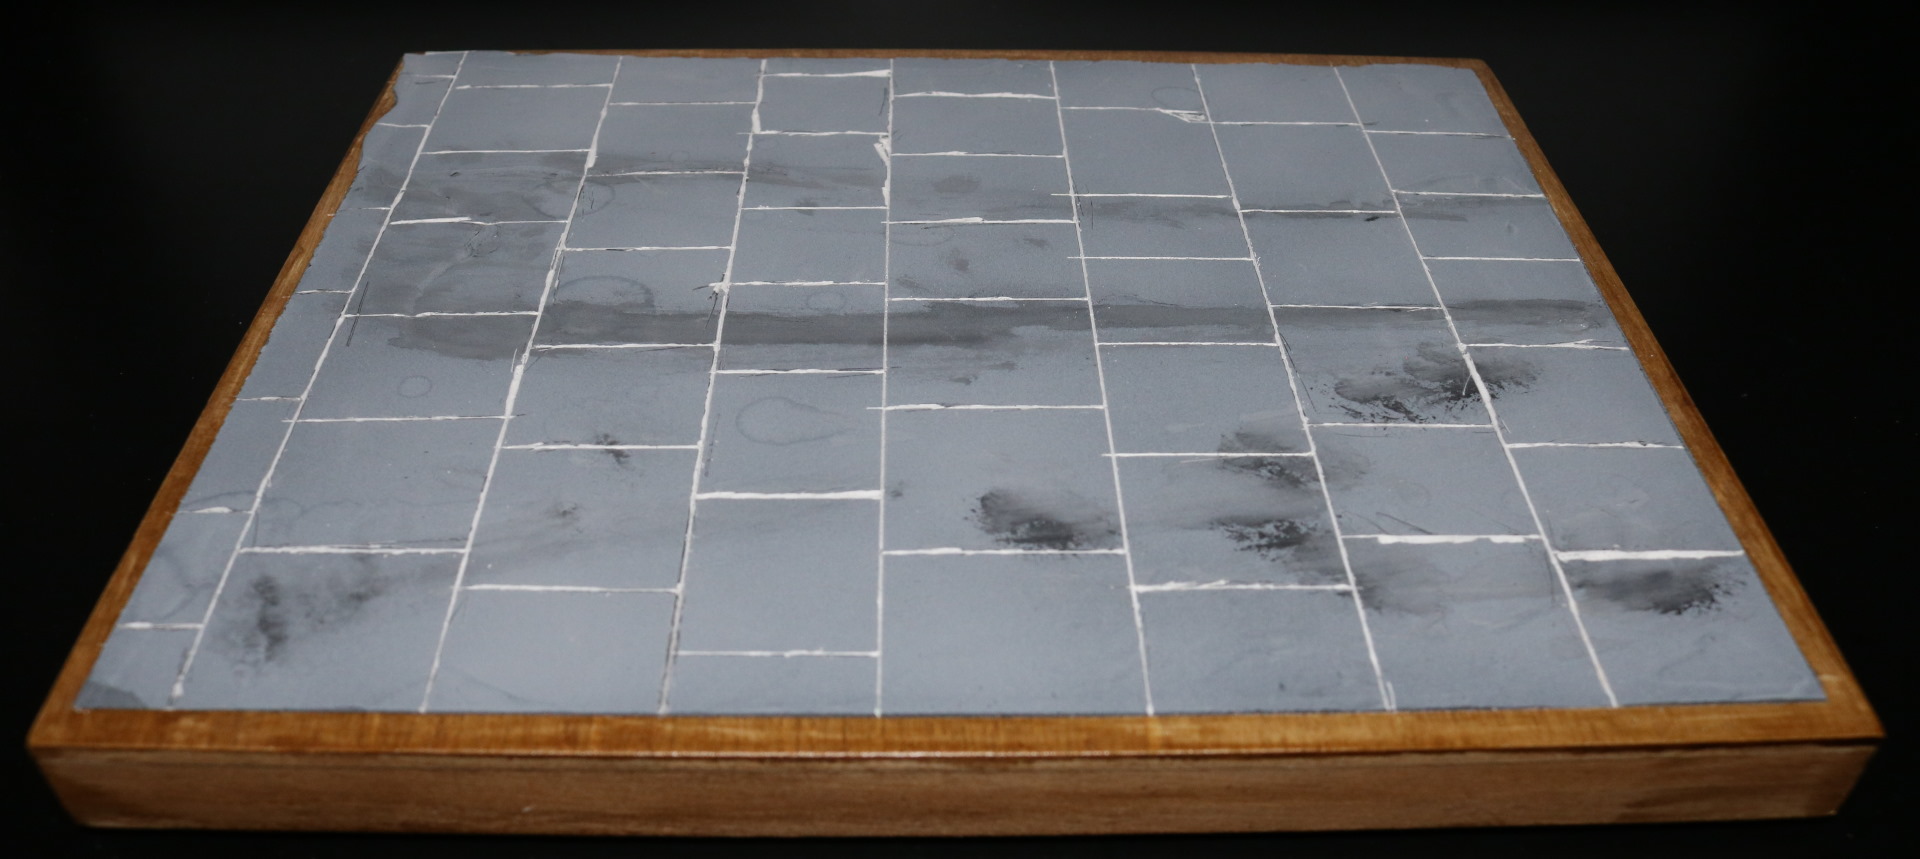
Once fully dried, I simply used a tiny flat screwdriver to draw lines to mimic stone tiles. Once lines were drawn, I then aggressively widened the lines, creating pseudo corrosion effect.
Once I felt it was good enough, I thinned black paint by one to ten and simply let liquid flow through the gap.
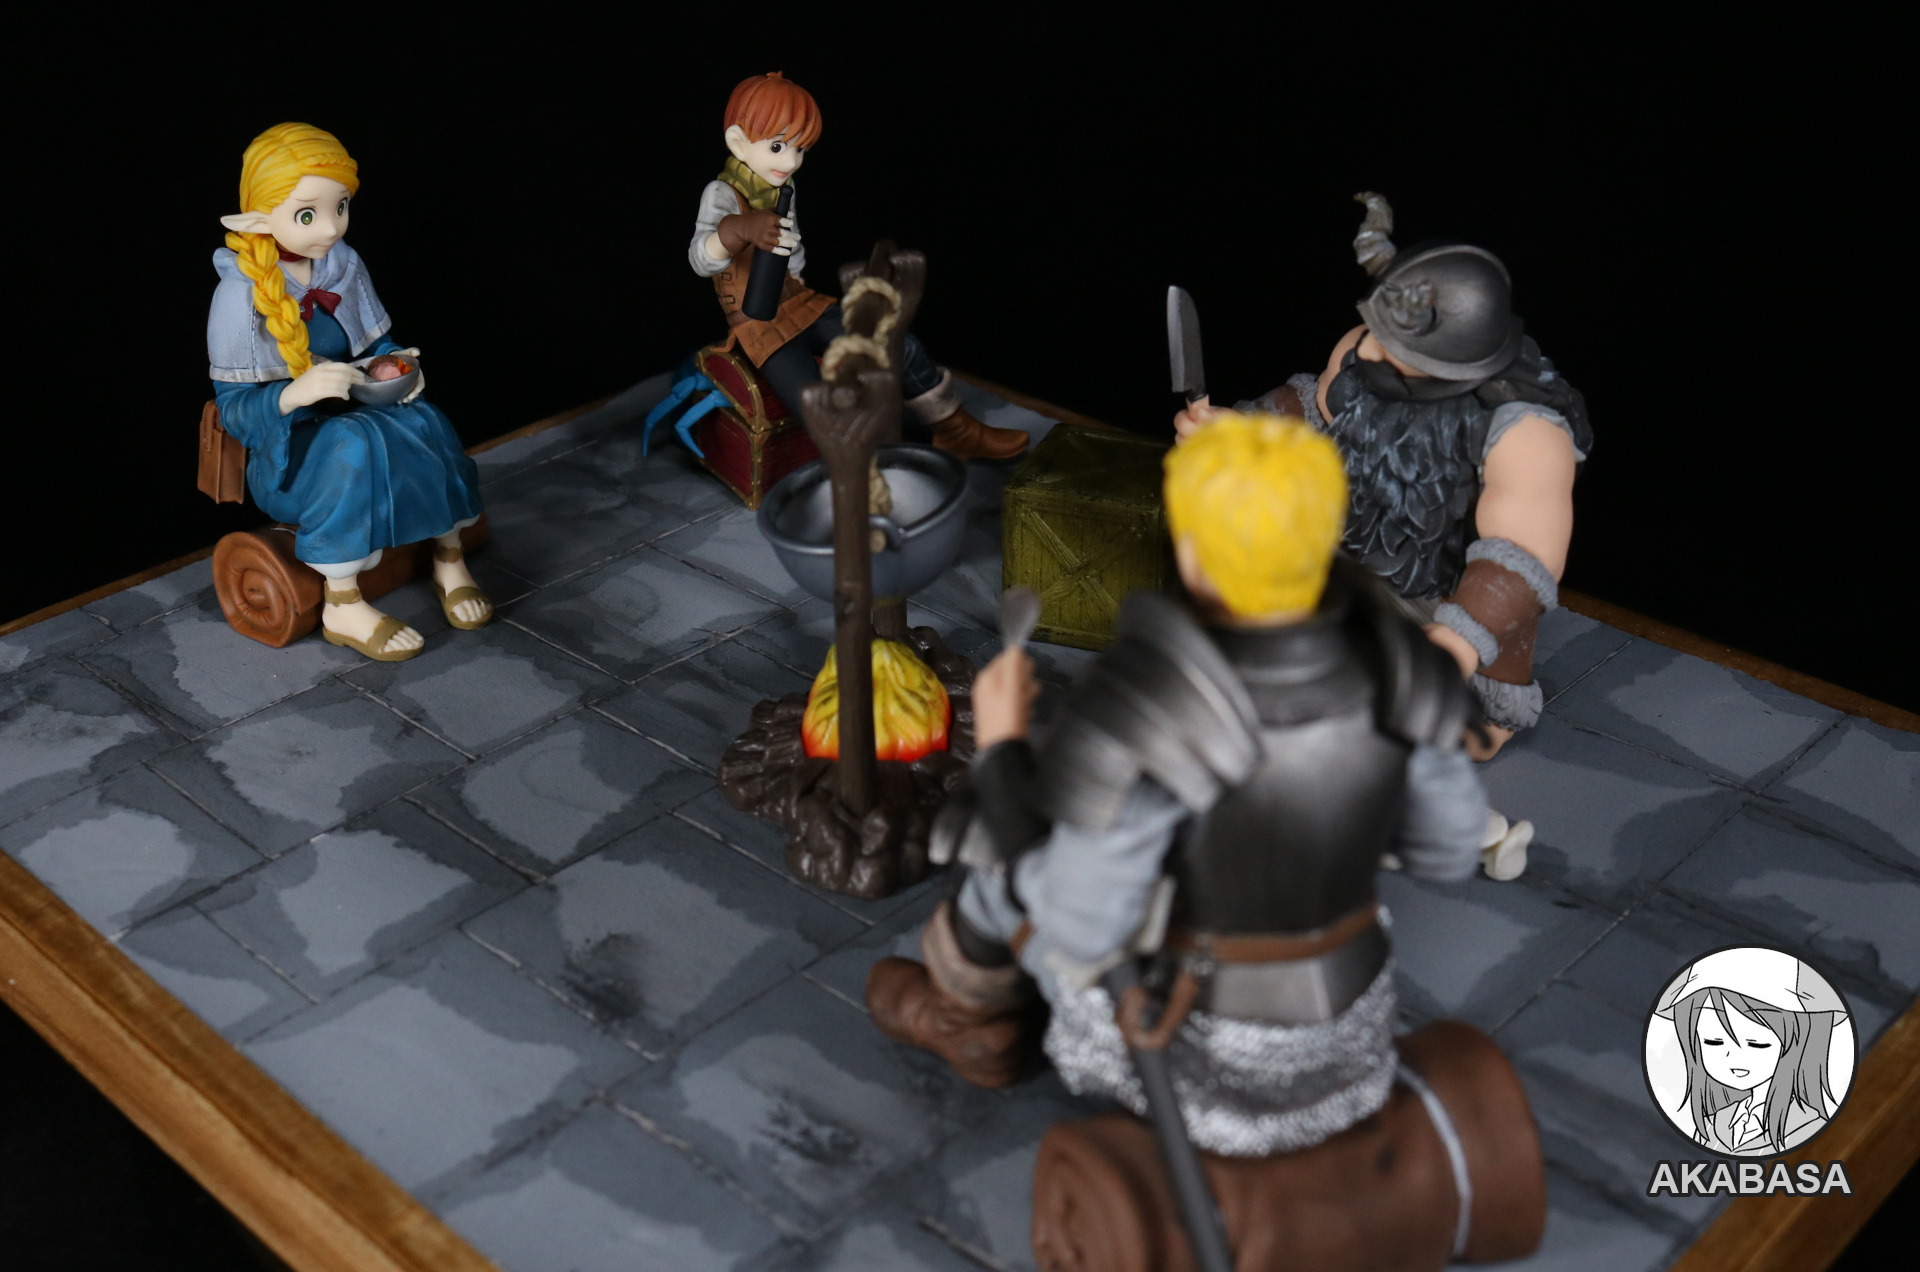
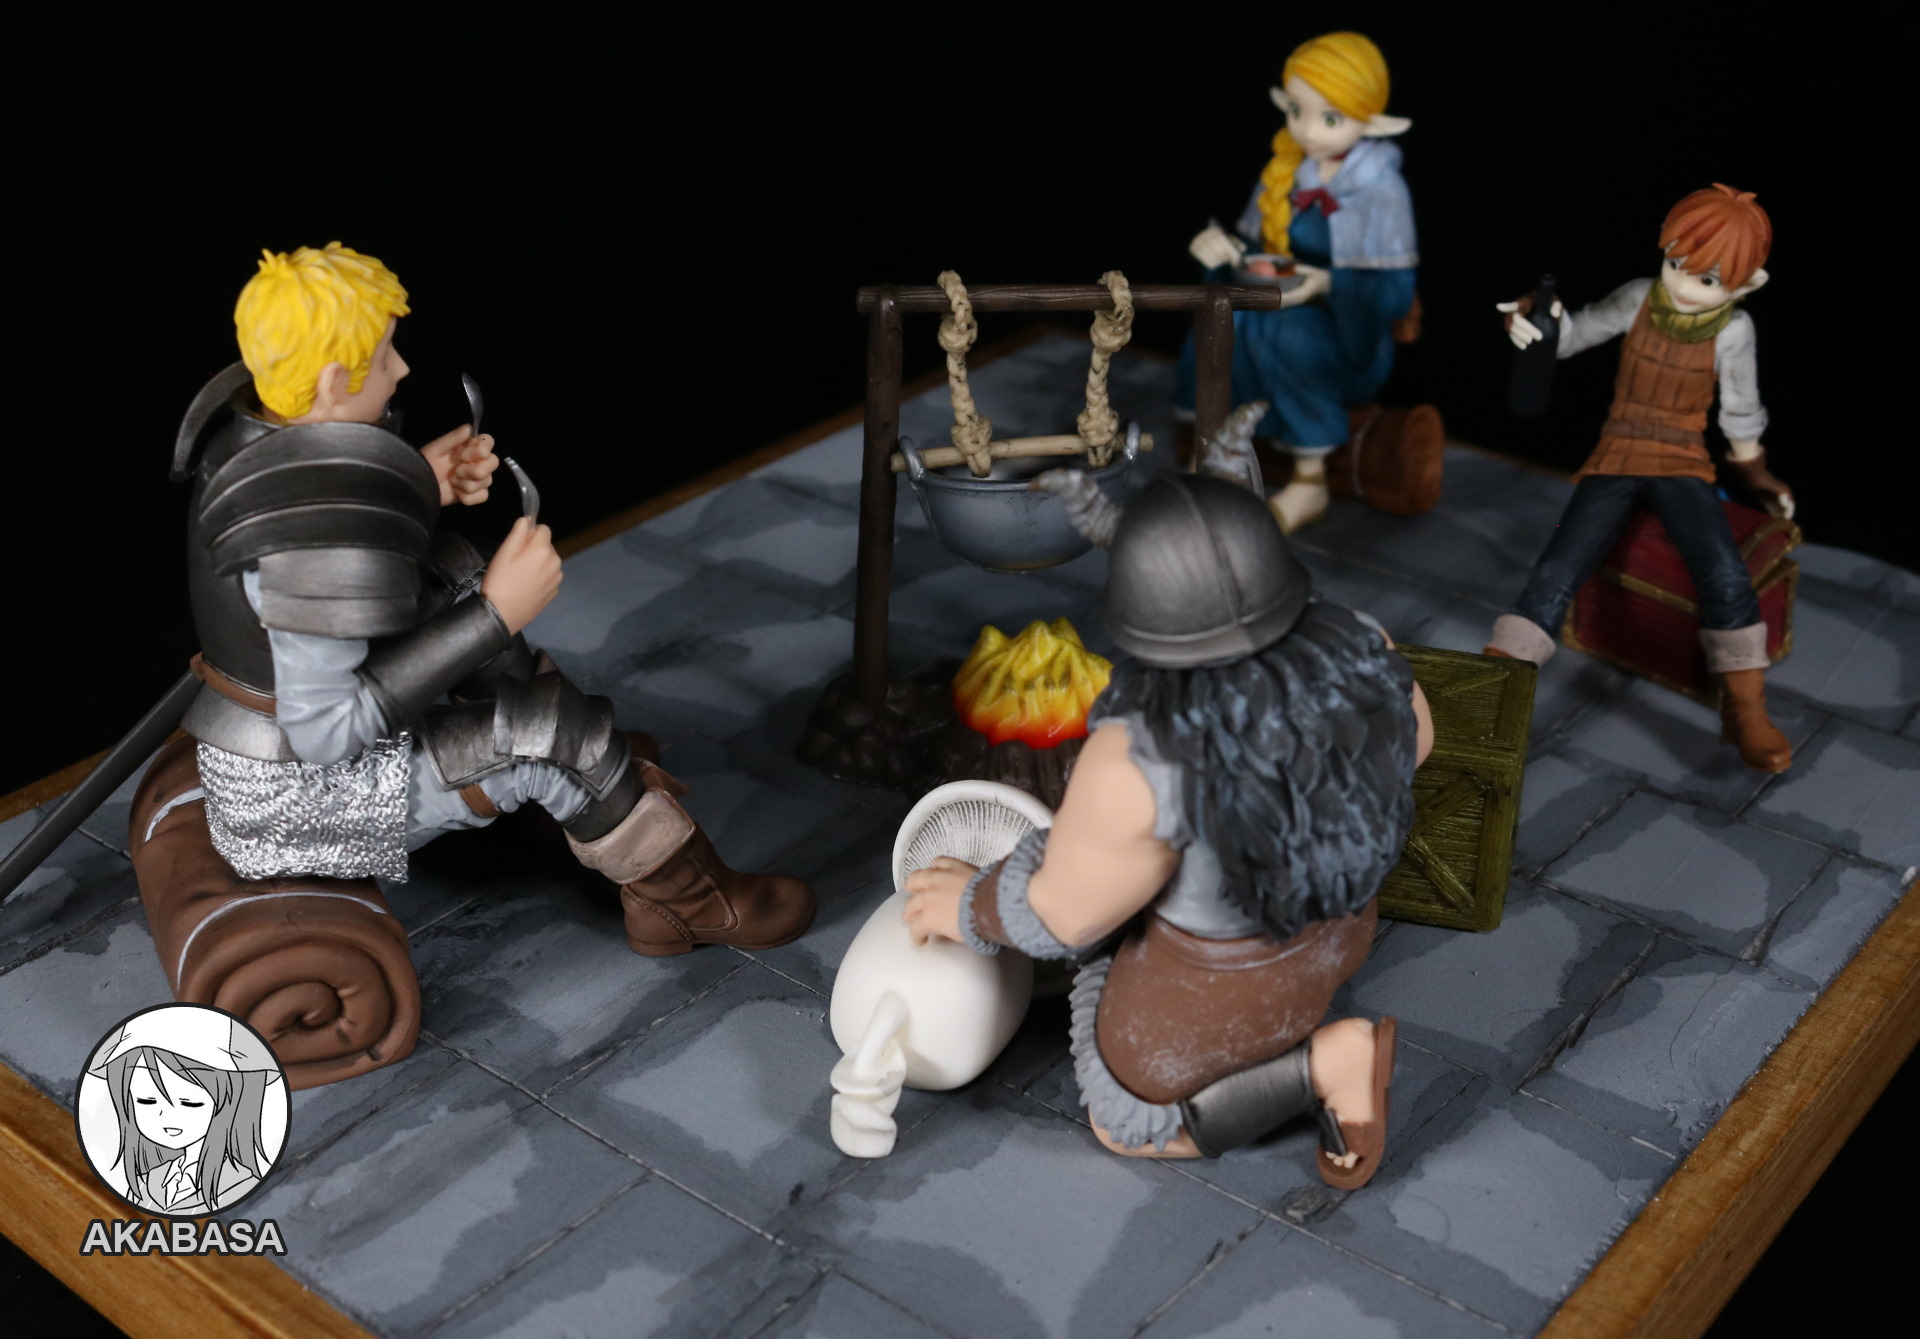
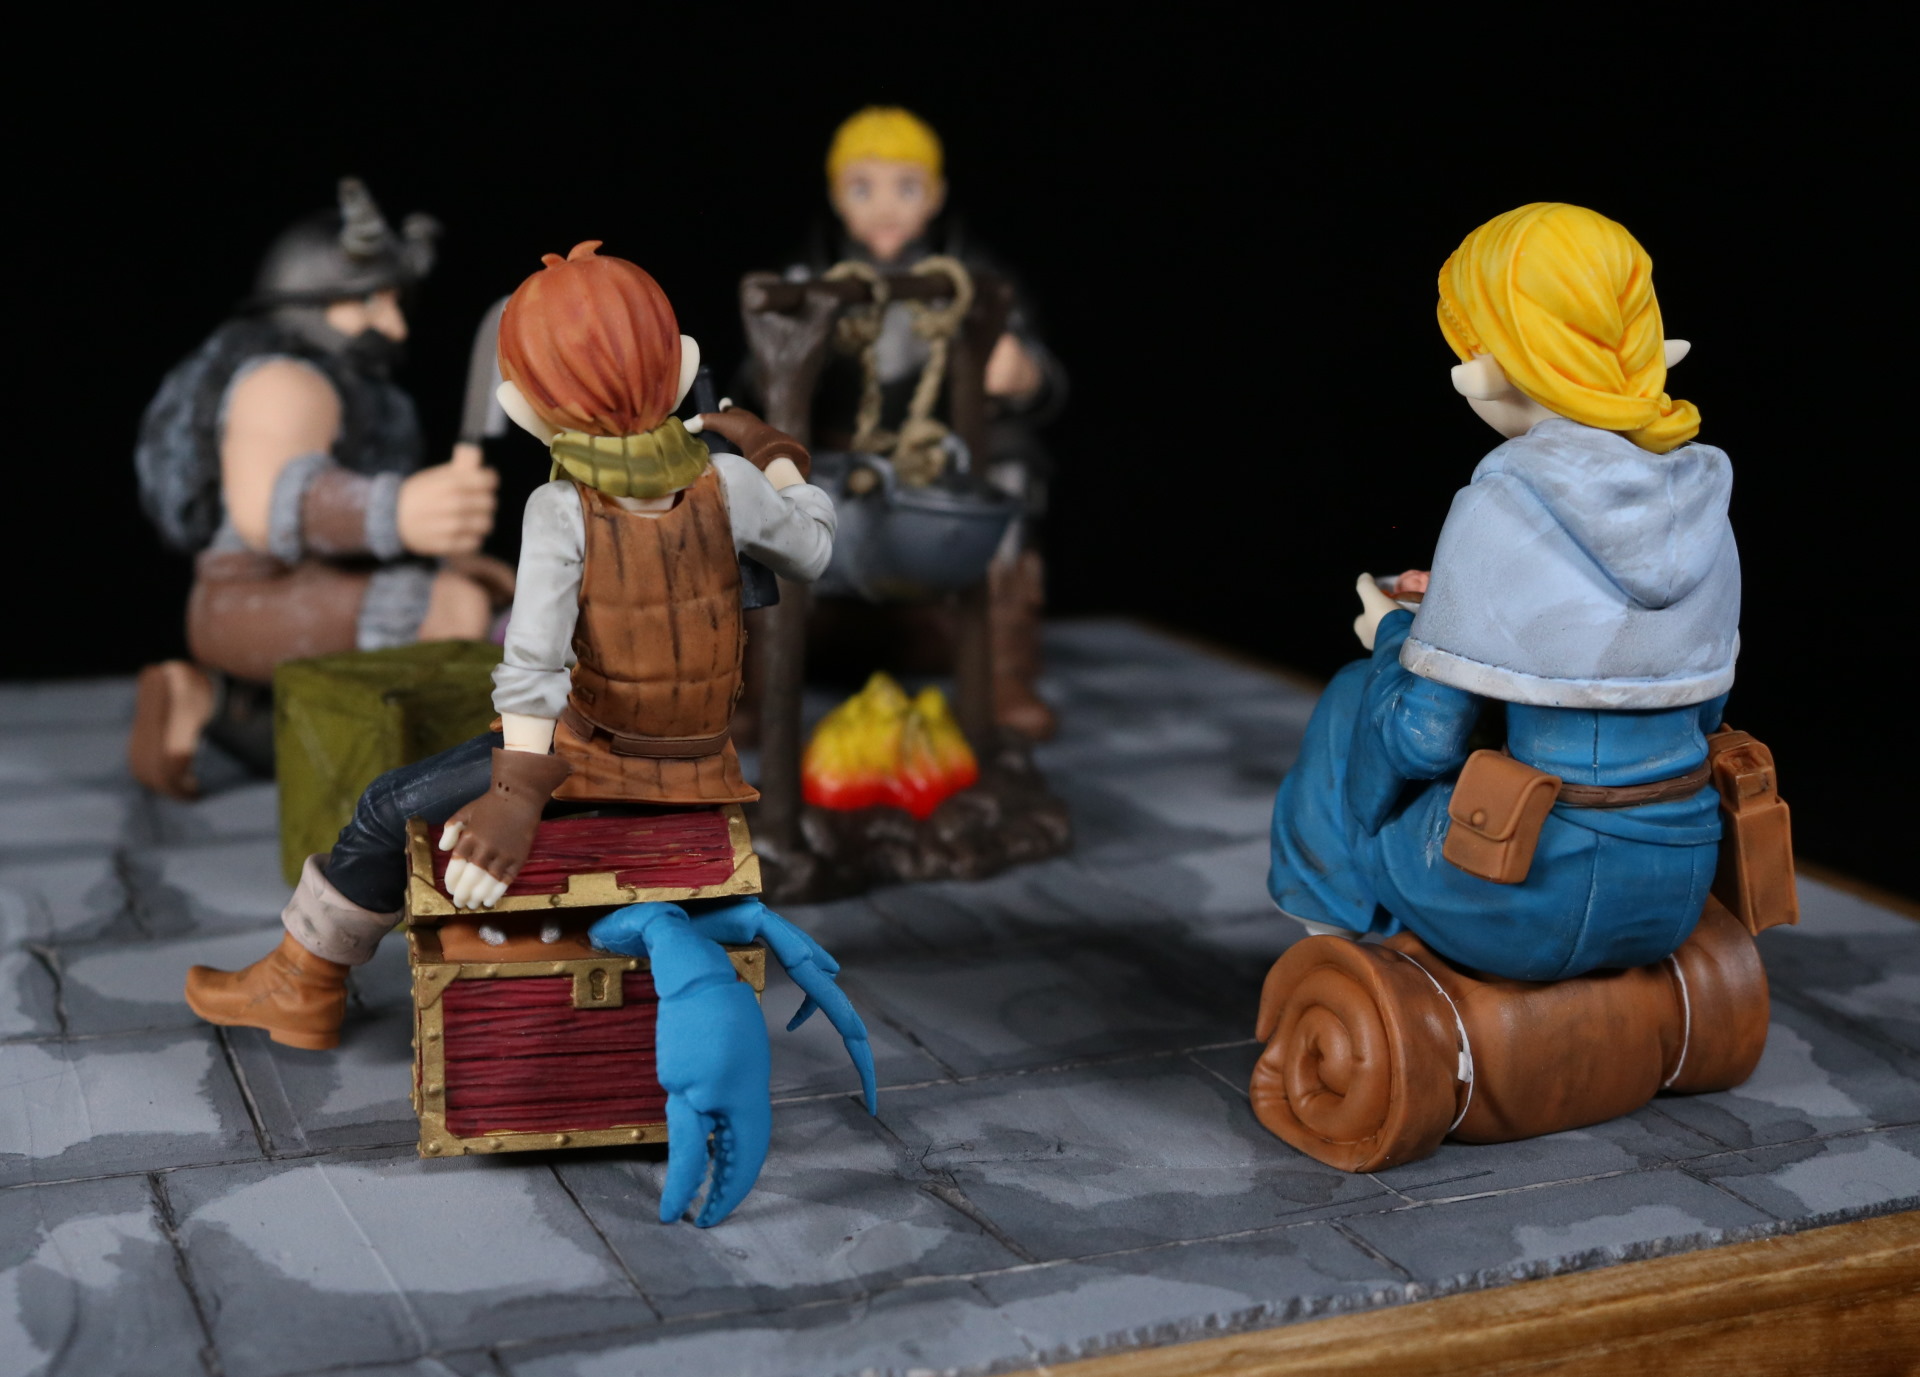
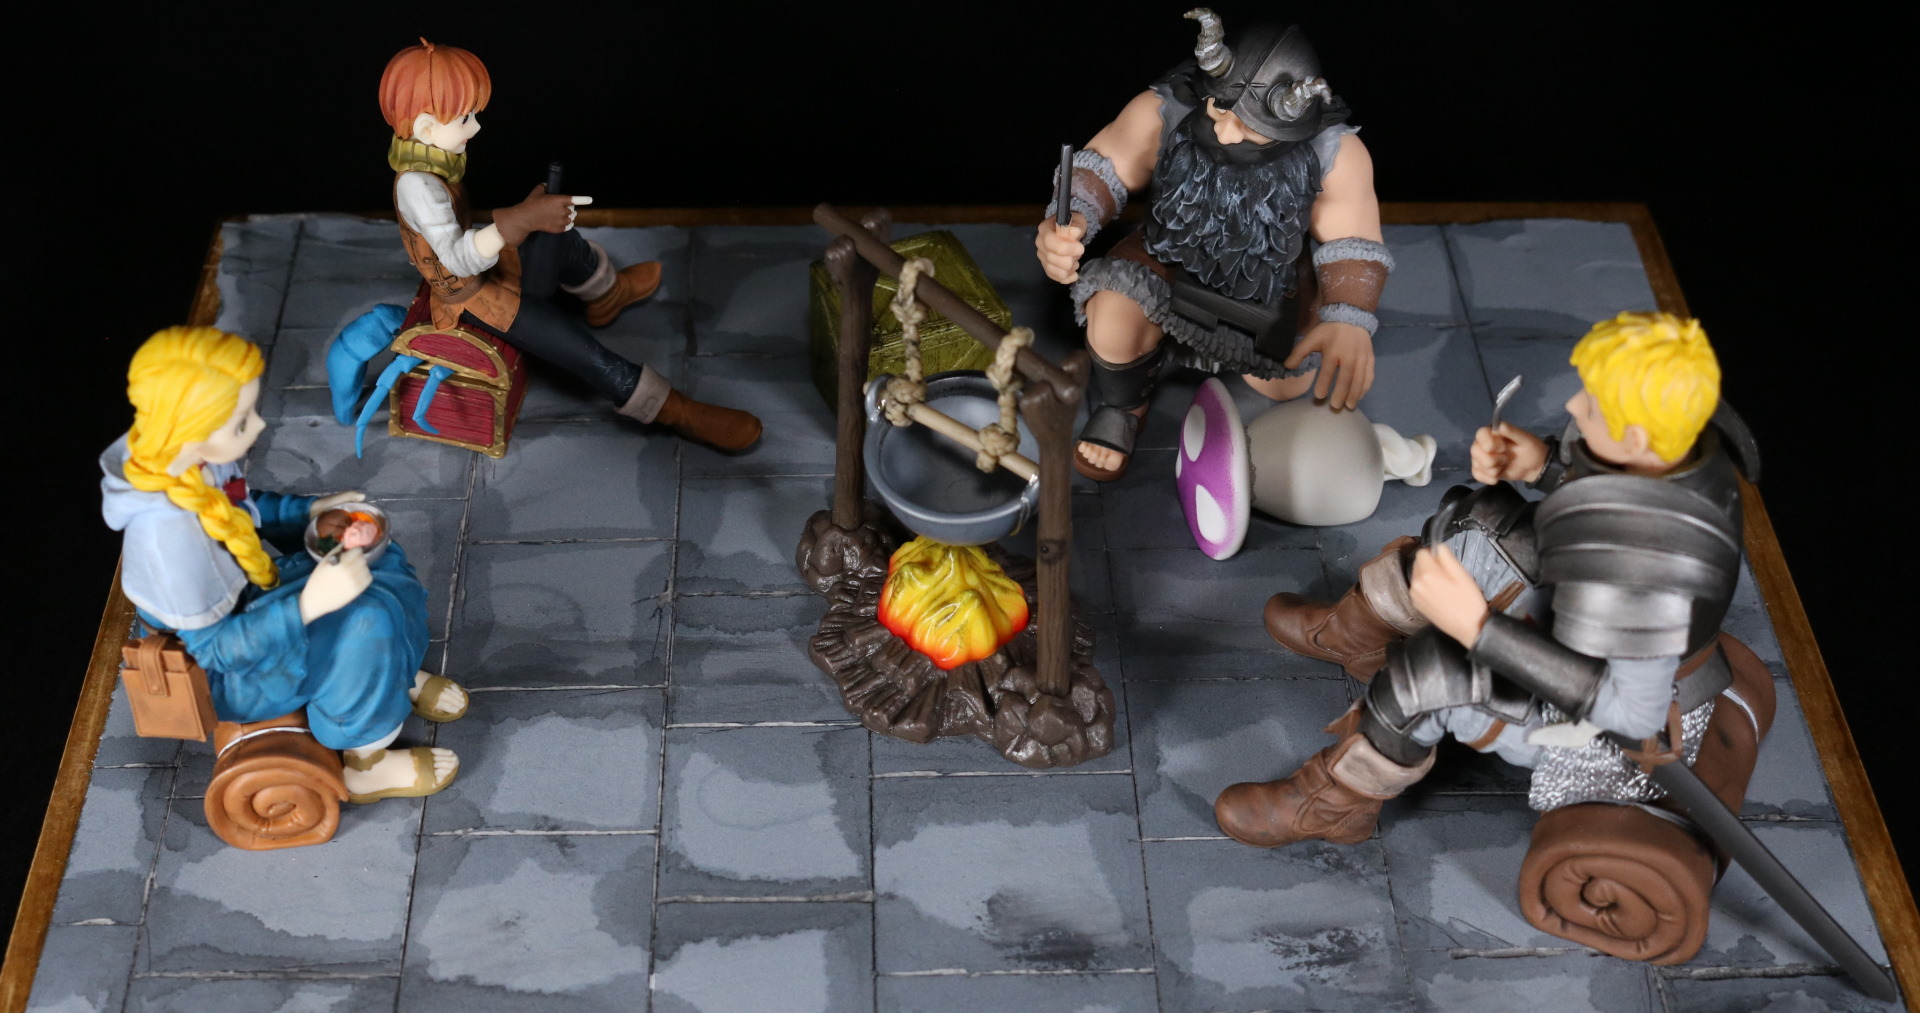
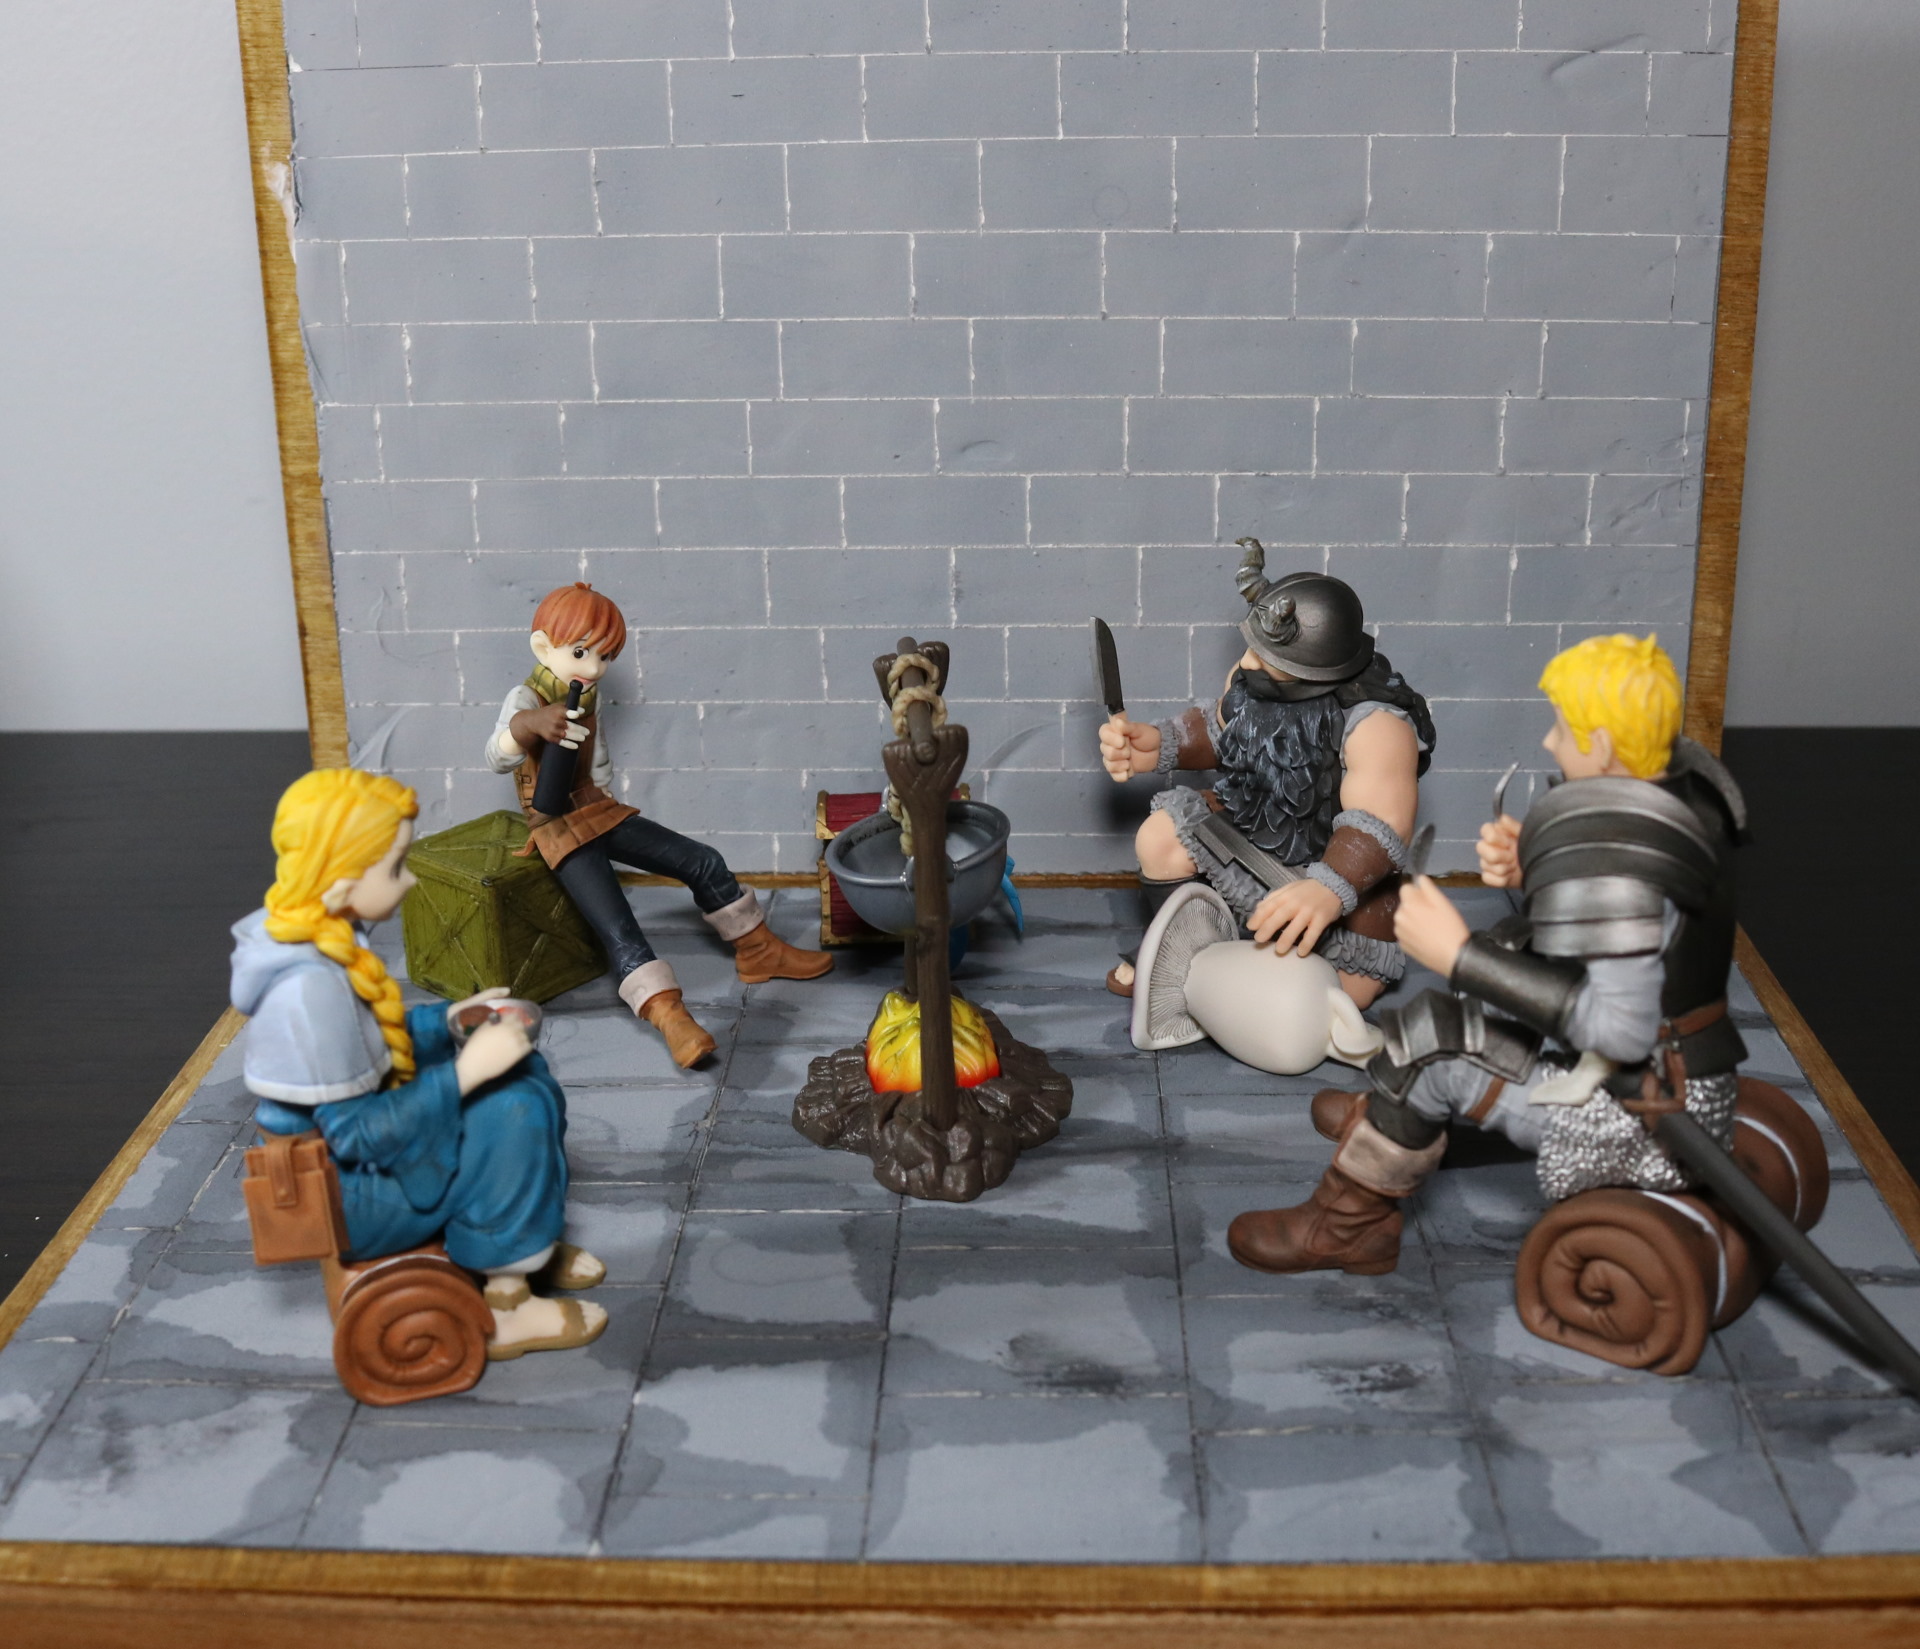
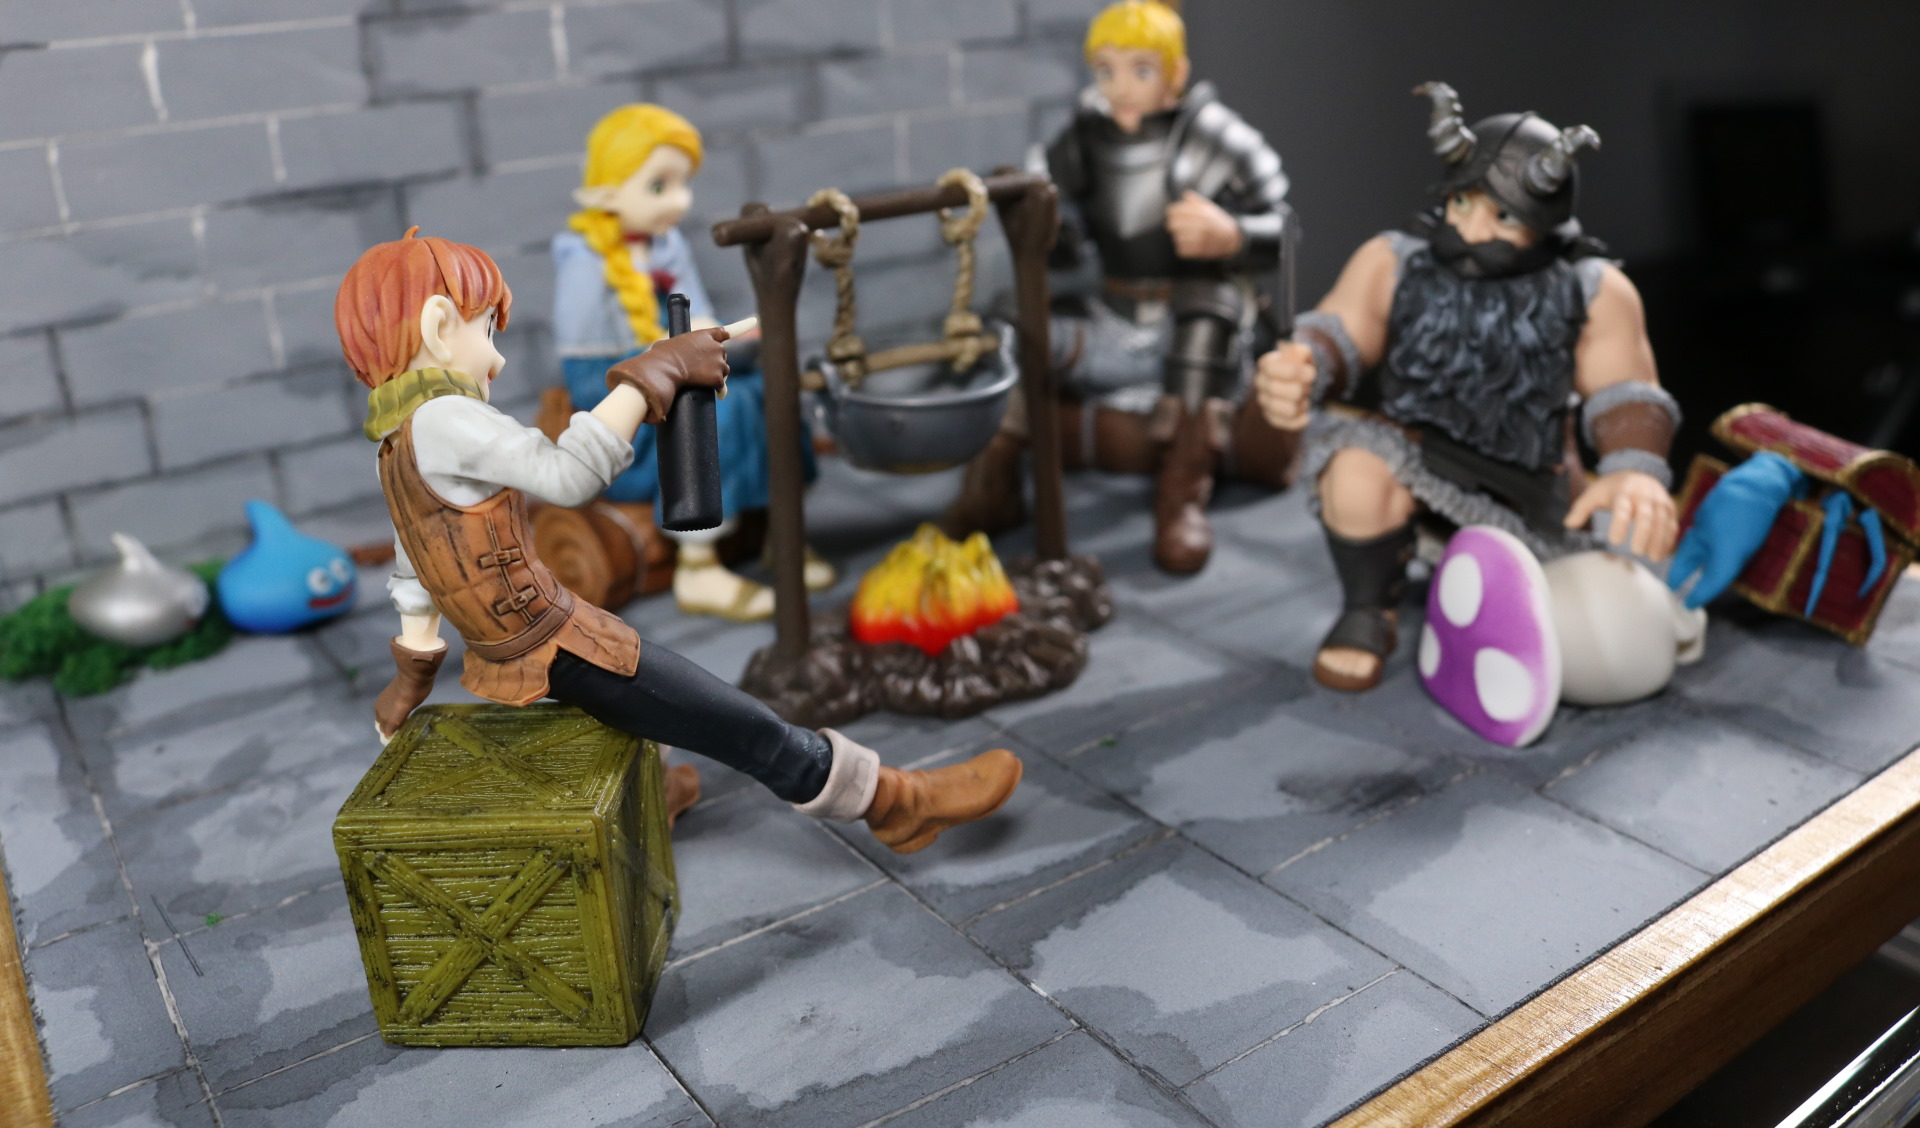
And there you have it: A stone tile floor that has seen better days. Because the black paint was thinned a lot, it came out dark gray instead of pure black.
I am pretty satisfied with the result. But it is not over. Oh, no. Far from over.
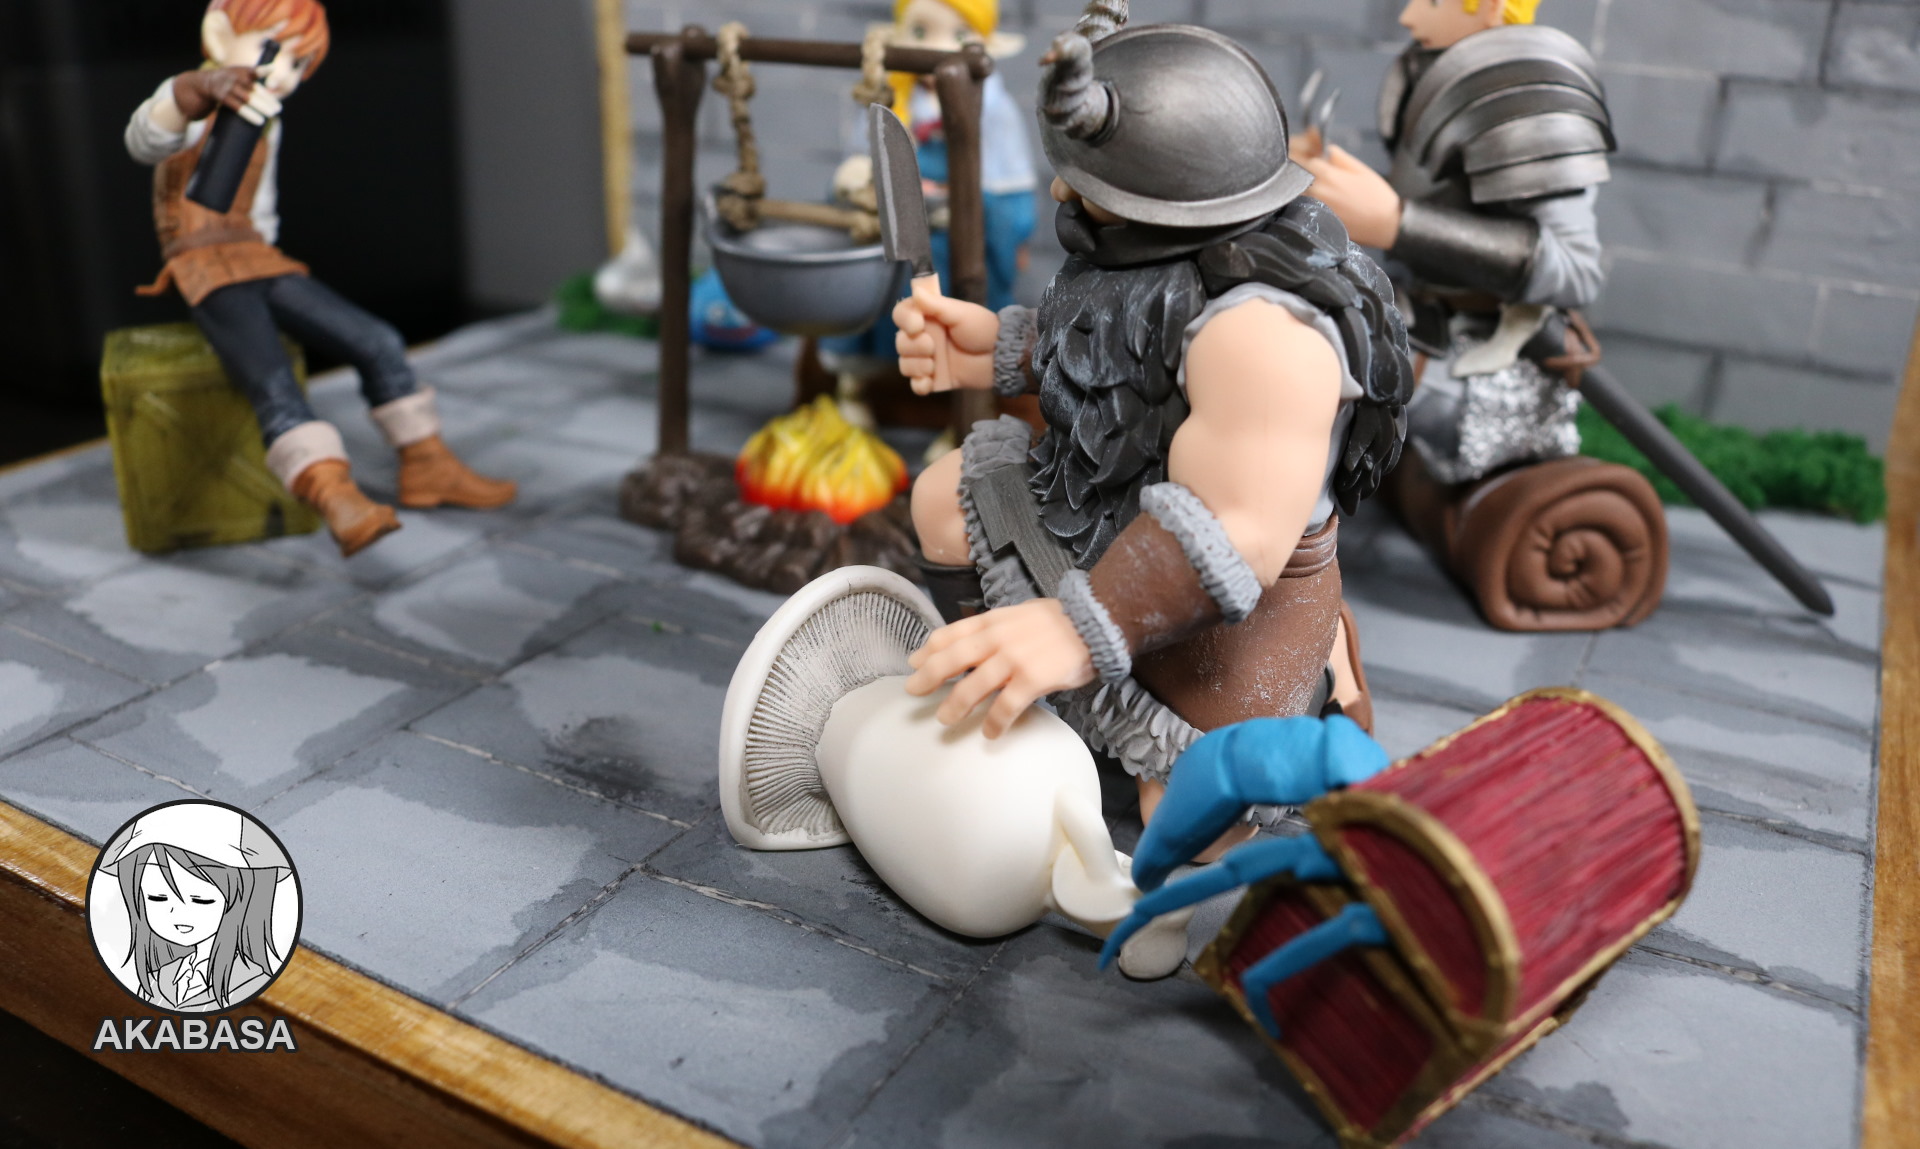
Remember that they are in a dungeon. What is missing is a wall, a dungeon wall which I have very little idea on how to proceed.
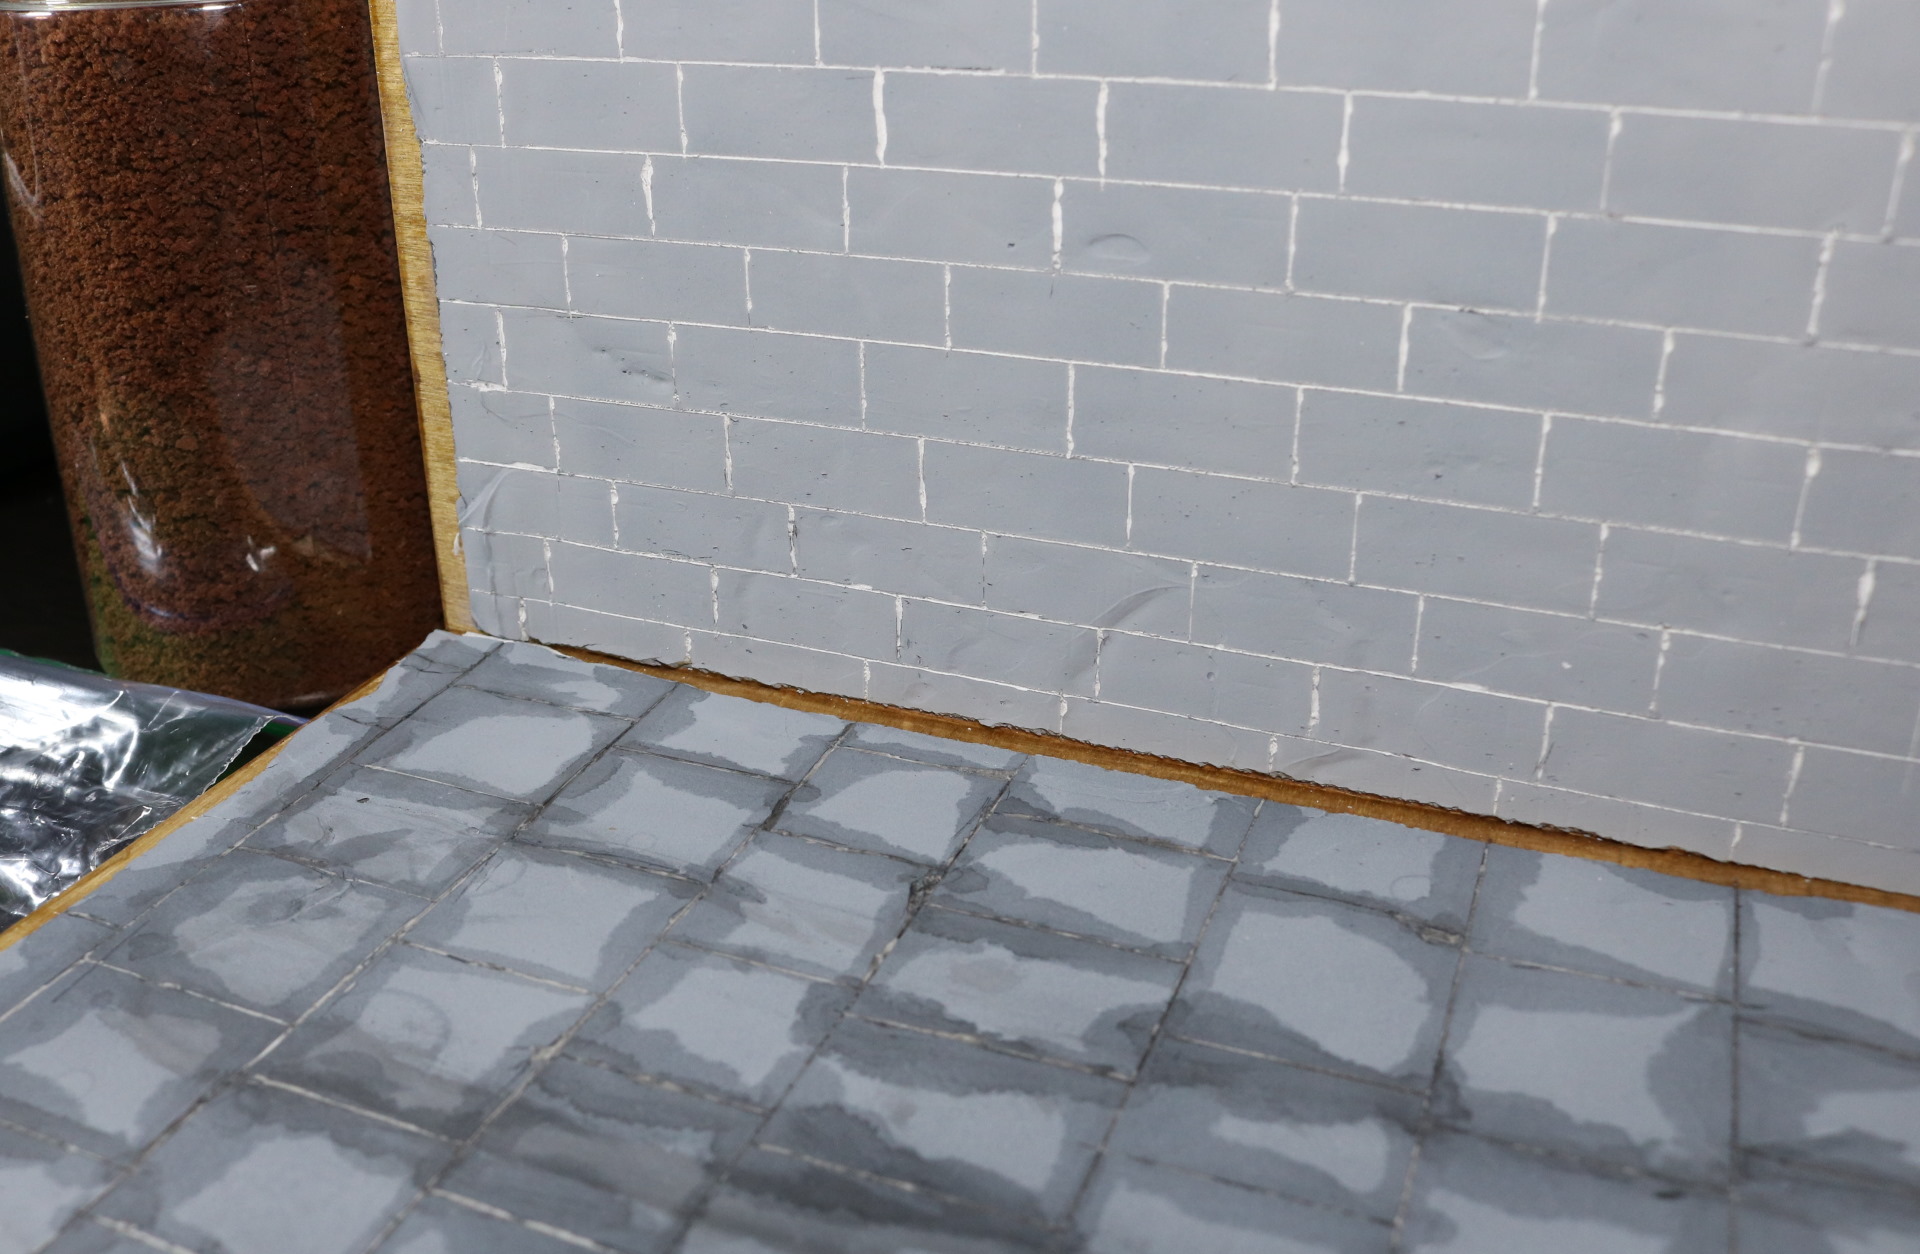
The first task is, of course, getting a proper wall base which I am using the exact same wooden base for the flooor. I mean the size fits, so why not.
Now, I wanted something different from the wall setup and tried to be smart about it.

By cutting a styrofoam block, I attempted to mimic some sort of architectural structure. It was also to hide the gap between the floor and the wall.
Then I applied a layer of paste, let it, dry, airbursh in black and then gray. Remember to use primer paints instead of regular ones. Primer paints are a lot tougher and will not scratch or peel off easily.
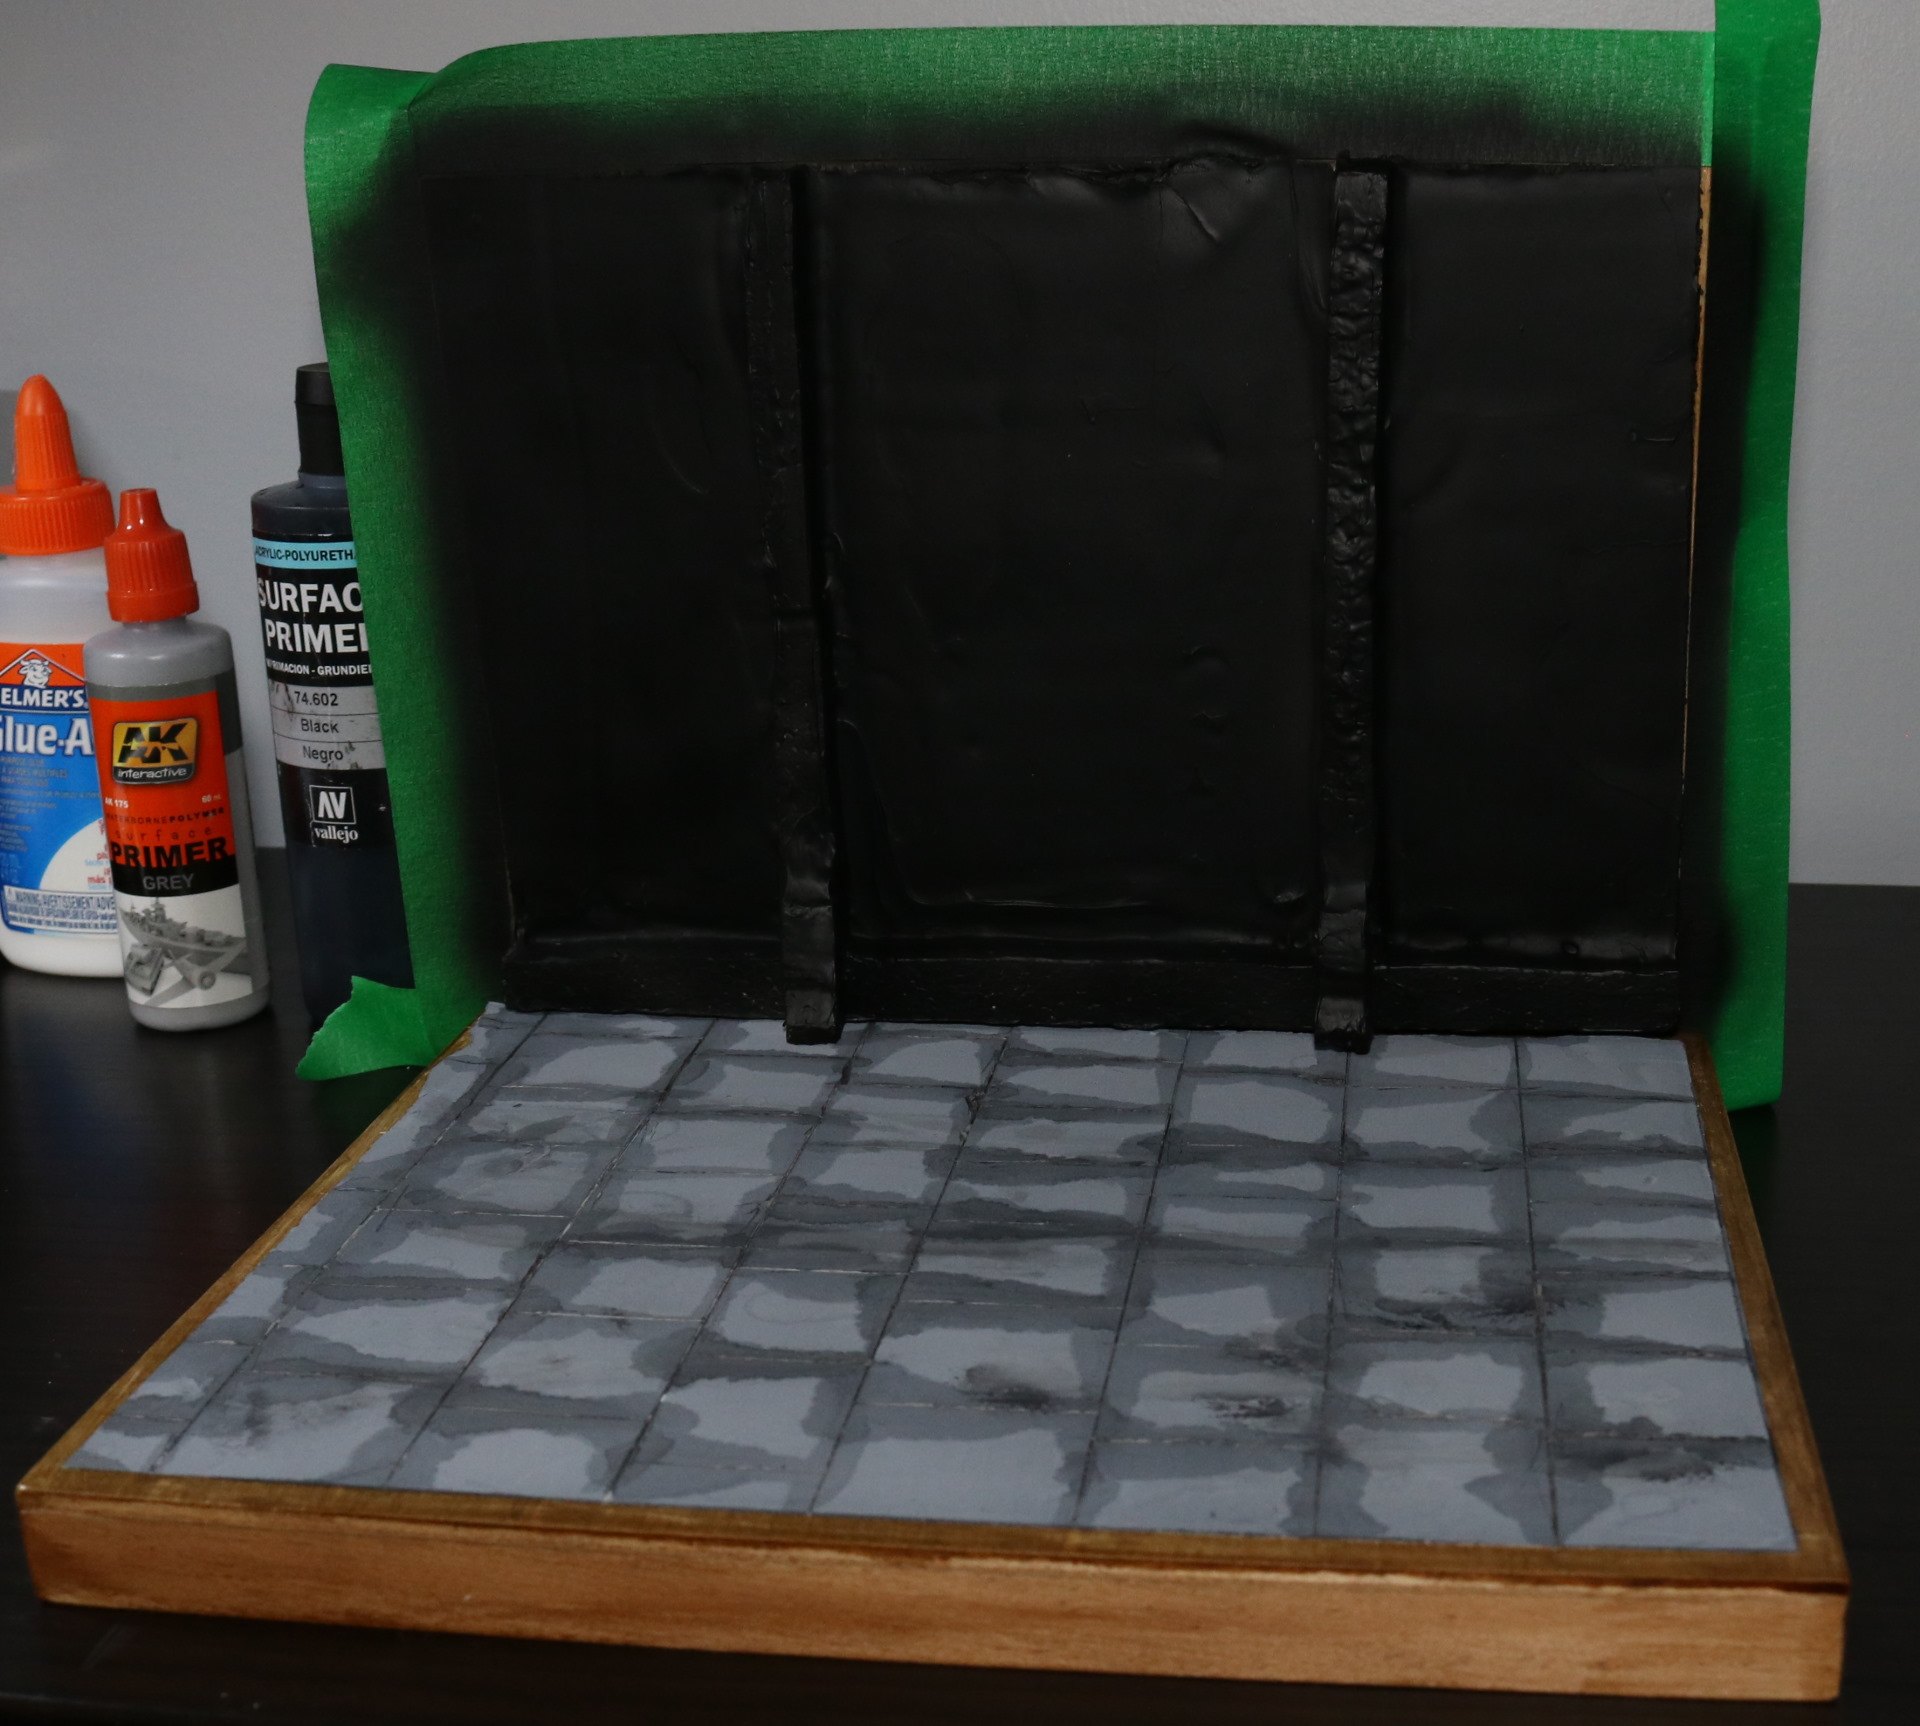
This was when I realized something was amiss. It didn’t look quite good as what I thought it’d be. Additionally, this wall had an issue when I attempted to draw lines to mimic bricks.
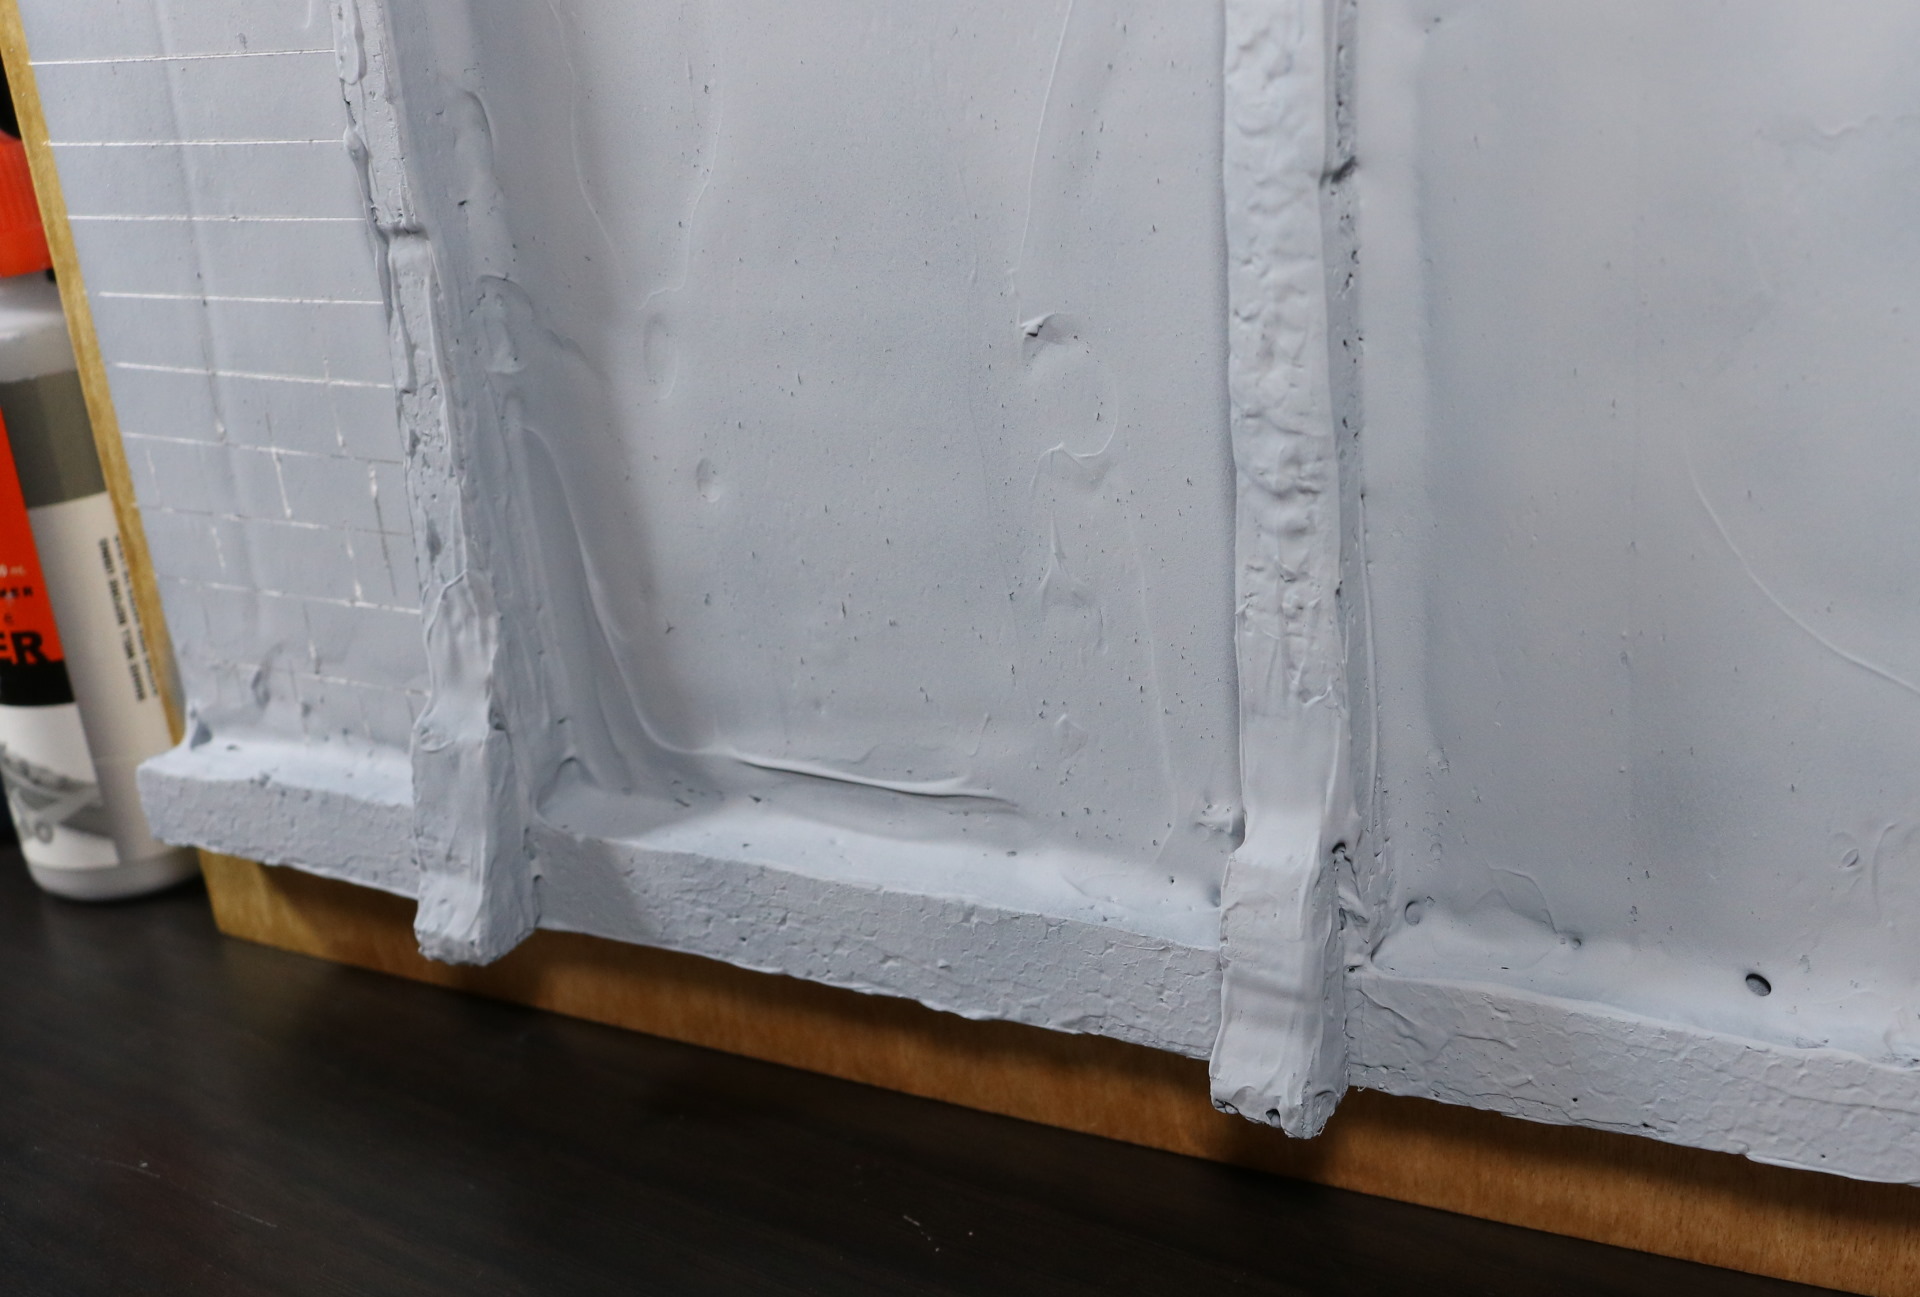
Where the wall meets the structure, it’s not clean. There was no sure way to clean this up without very likely damaging everything, not to mention I would also damage paint.
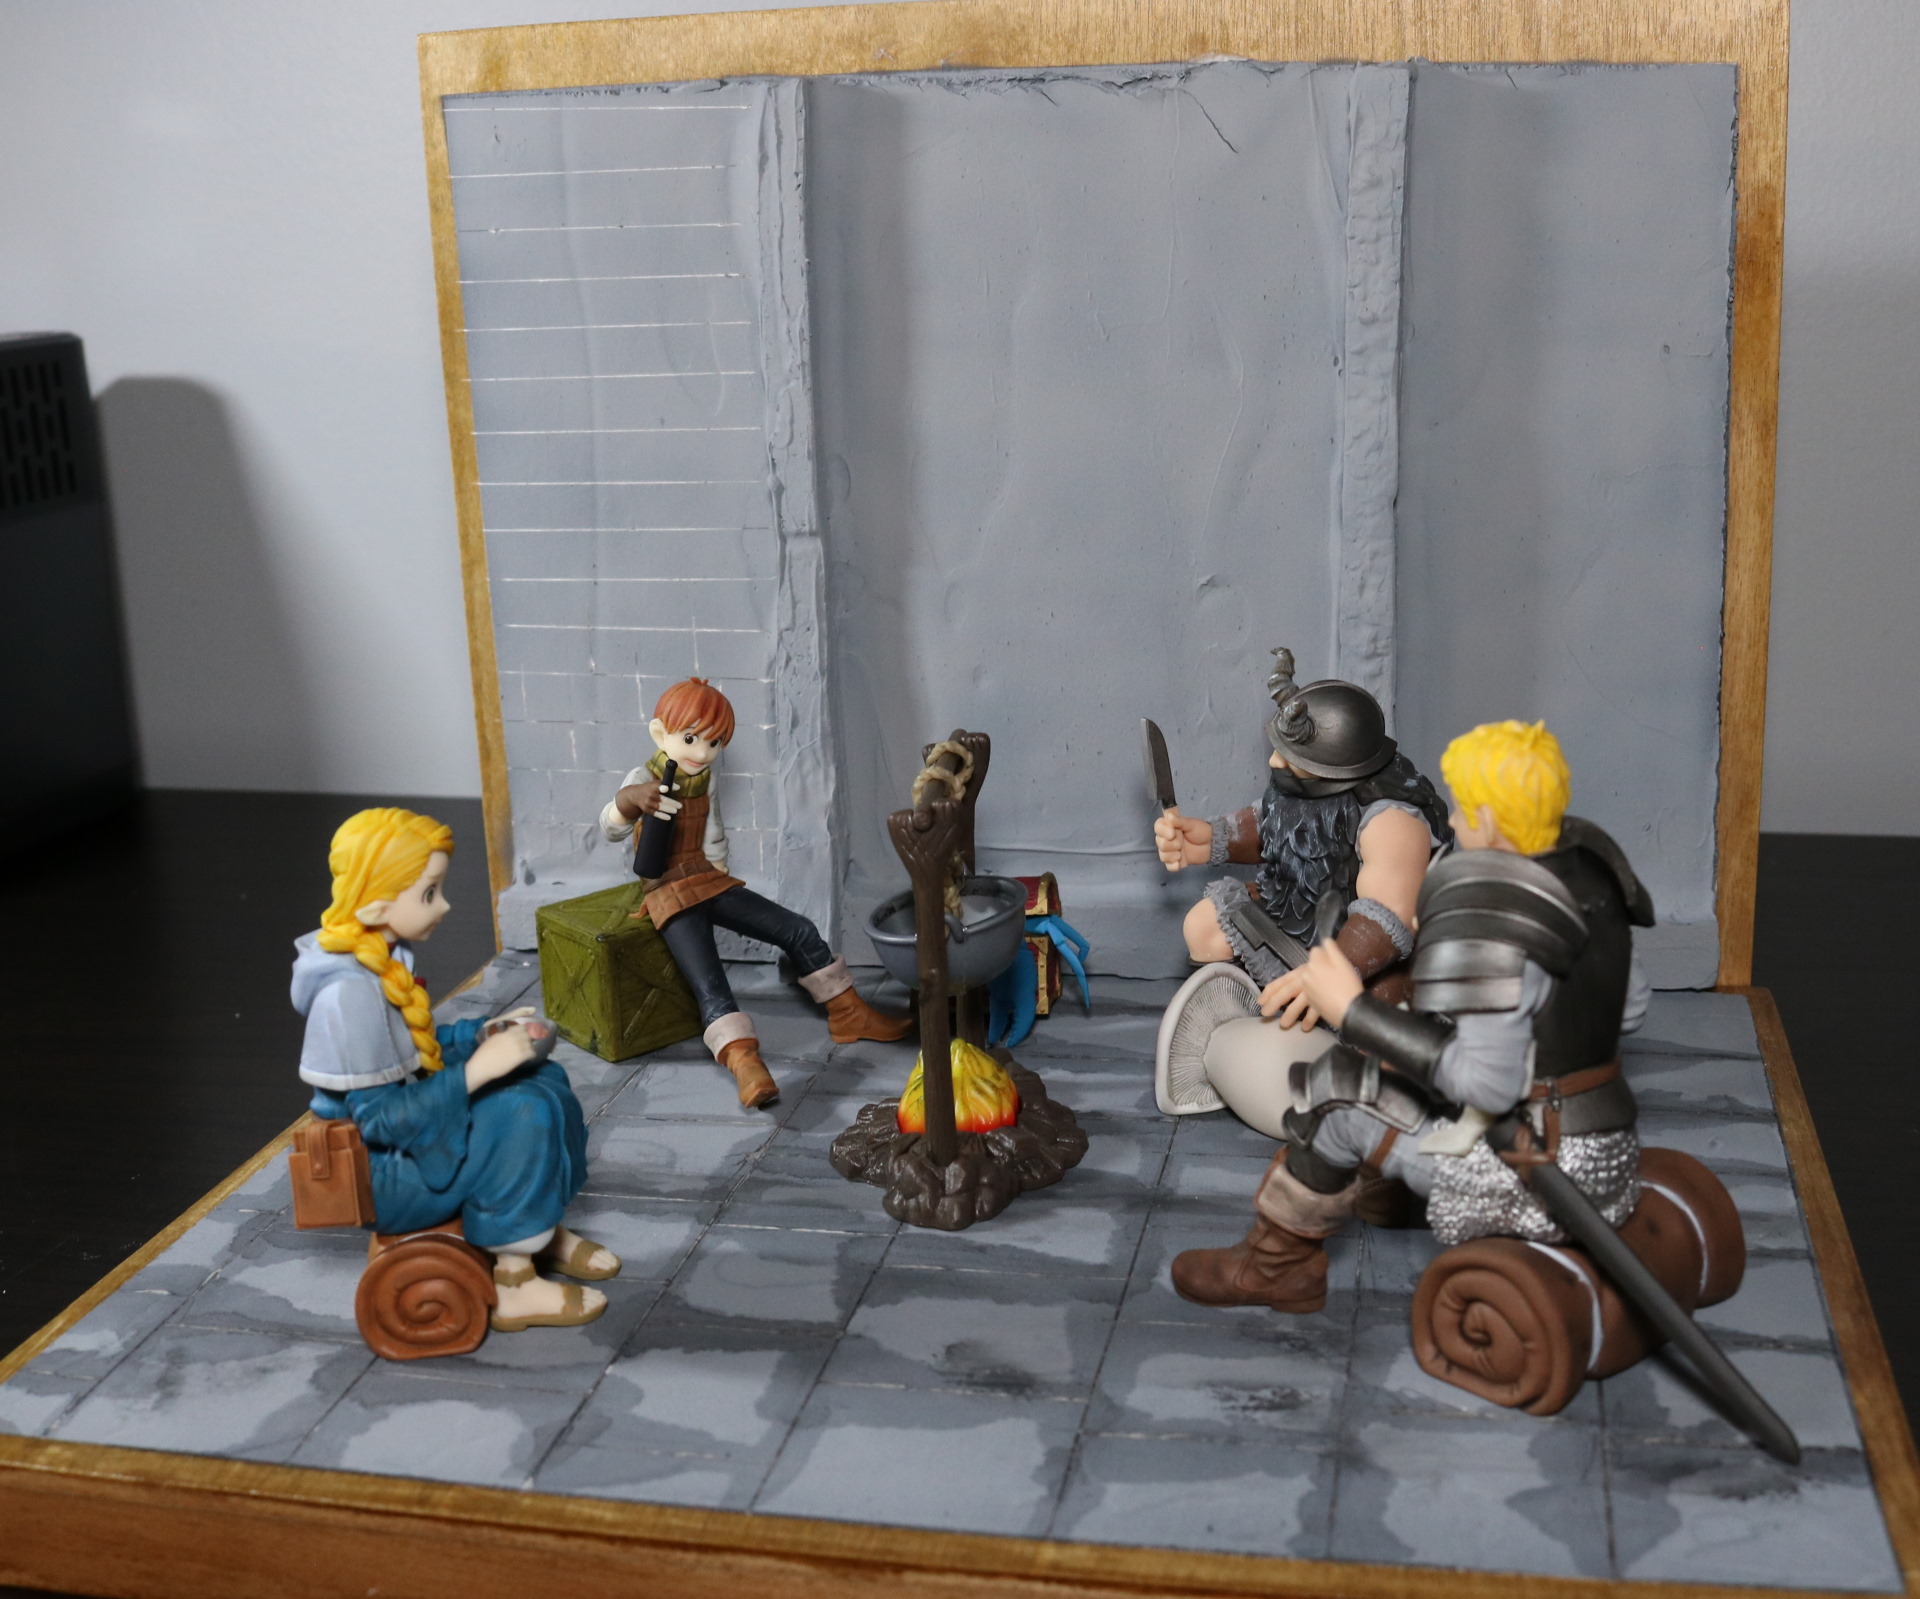
I could have found a way to do this but chose to make another wall. This time, I went for a clean wall.
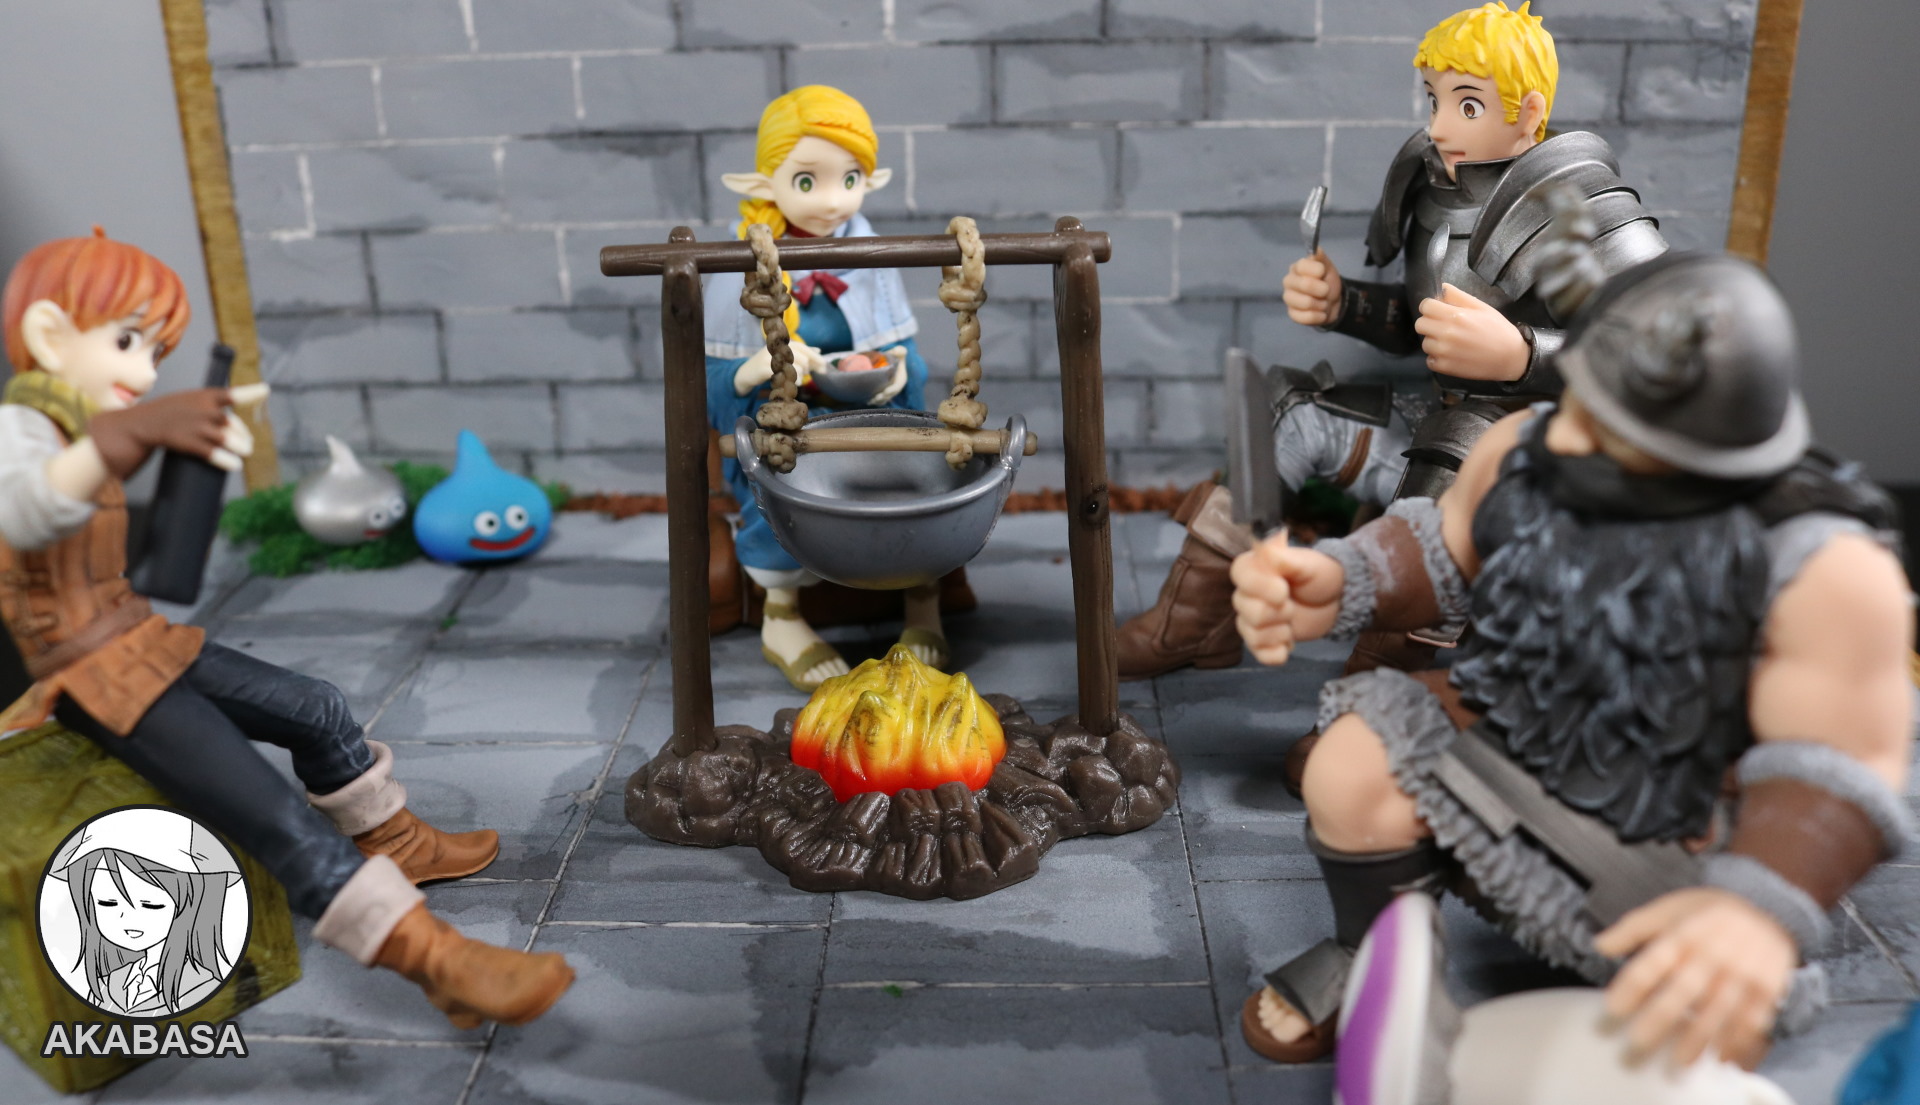
Hmm, okay. Better.
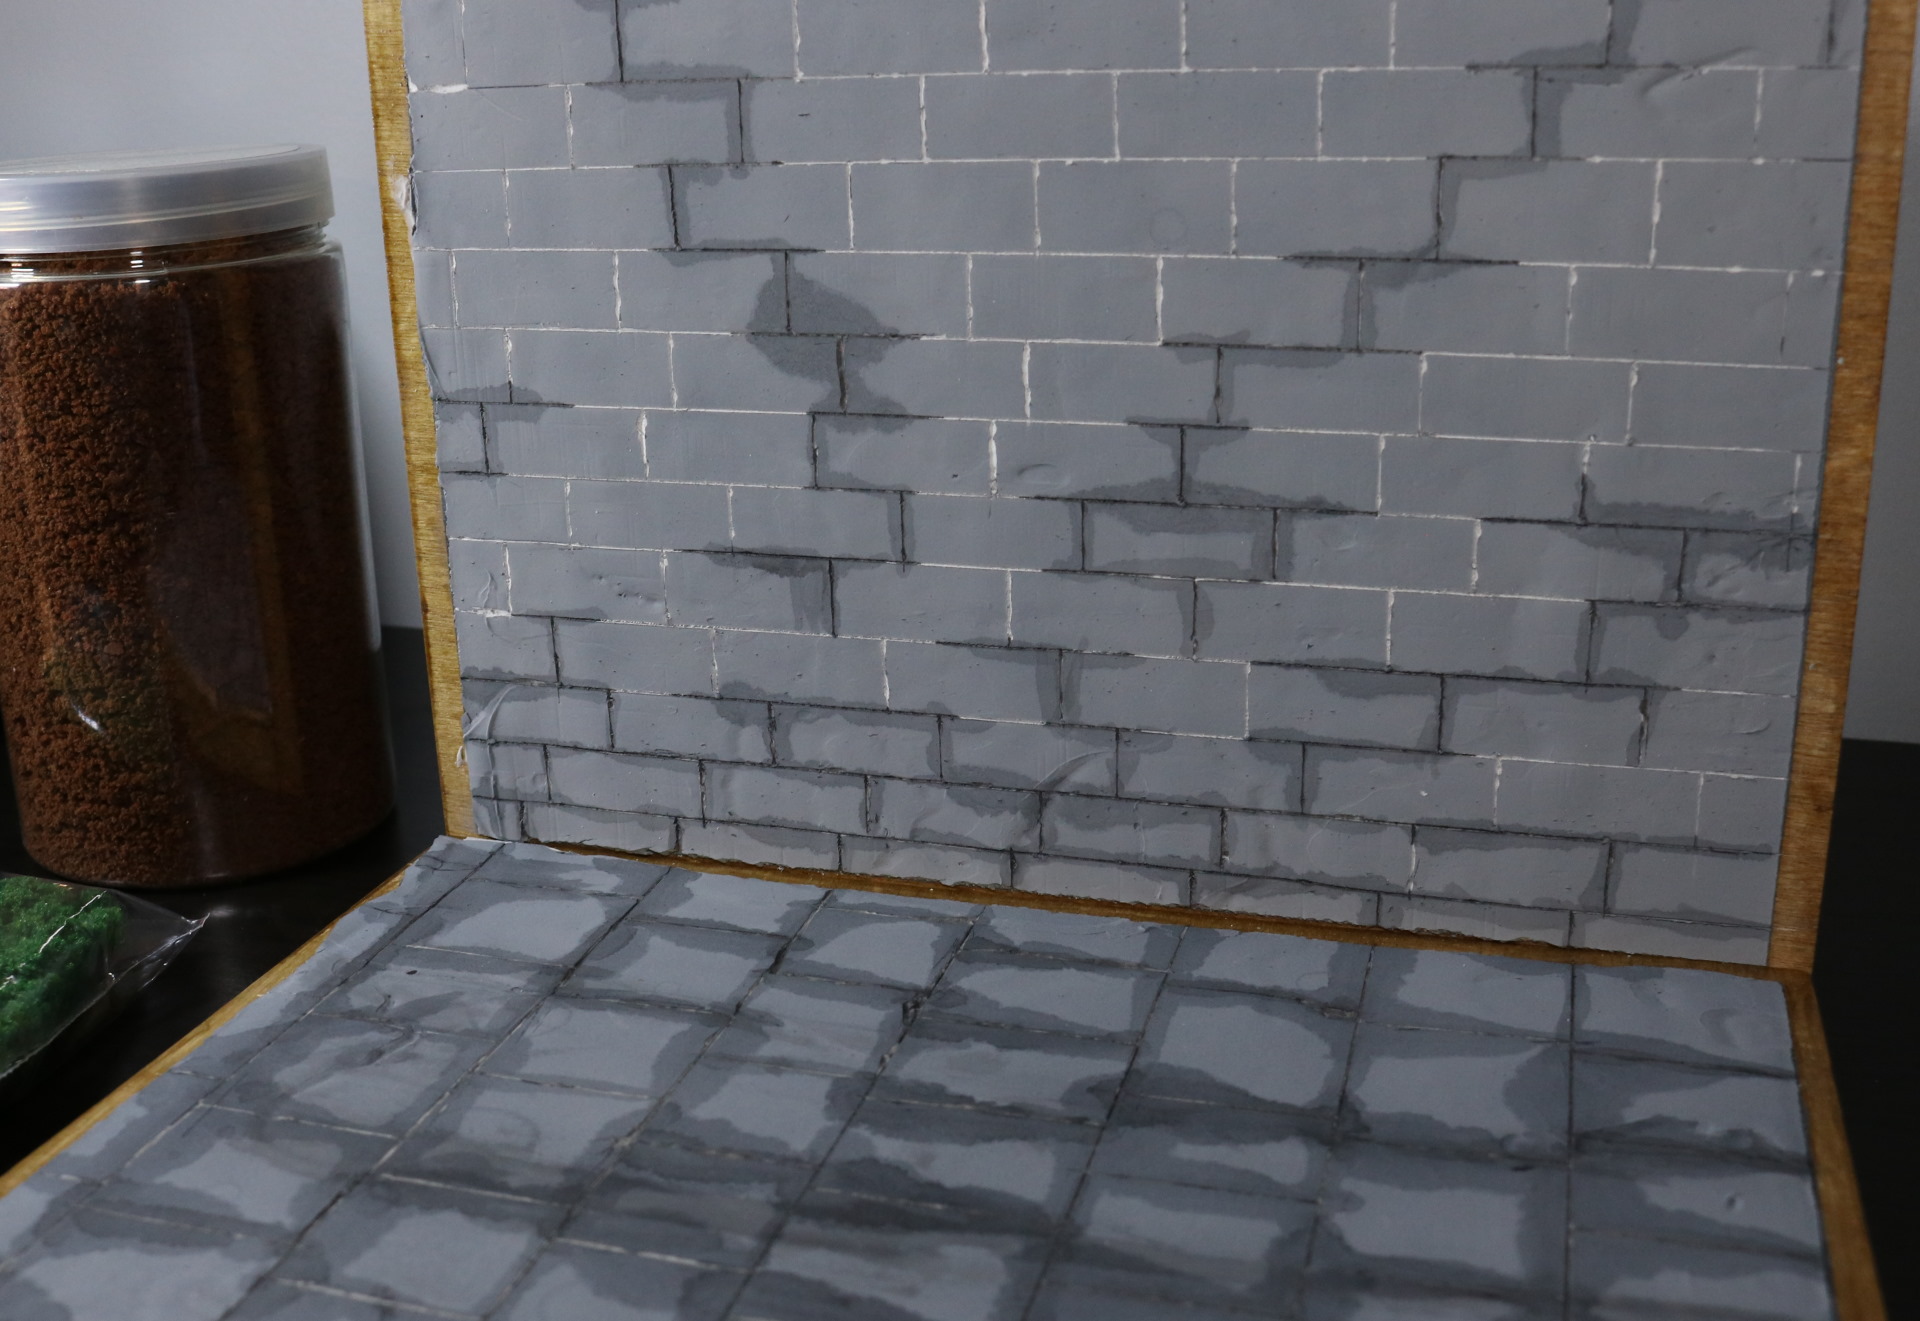
An underground tunnel often has some sort of water slipping into the system, and that is what I’ve done here. I’ve also chosen to leave the white gap as is.
Now it’s time to close the gap between the floor and the wall. The first wall was supposed to close the gap automatically with a bar but that didn’t go too well. So, I am going to simply glue on some moss props and dirt particles.

It is done. I feel pretty satisfied with the outcome. It hasn’t been as smooth as I would have like it to be but it could have been worse.
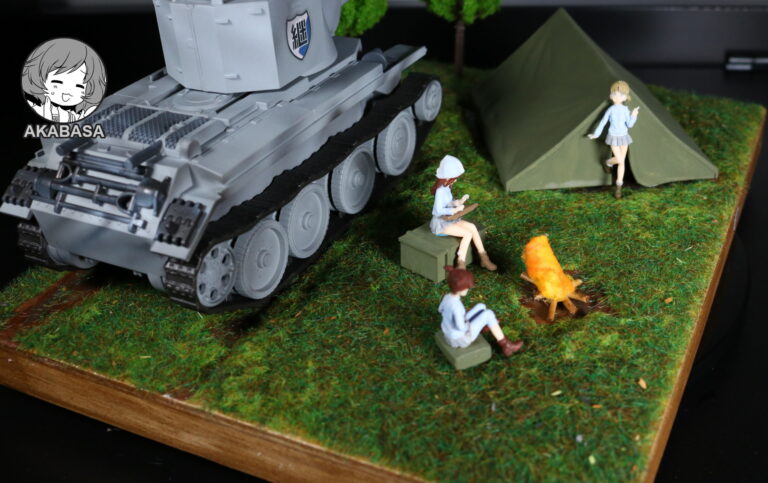
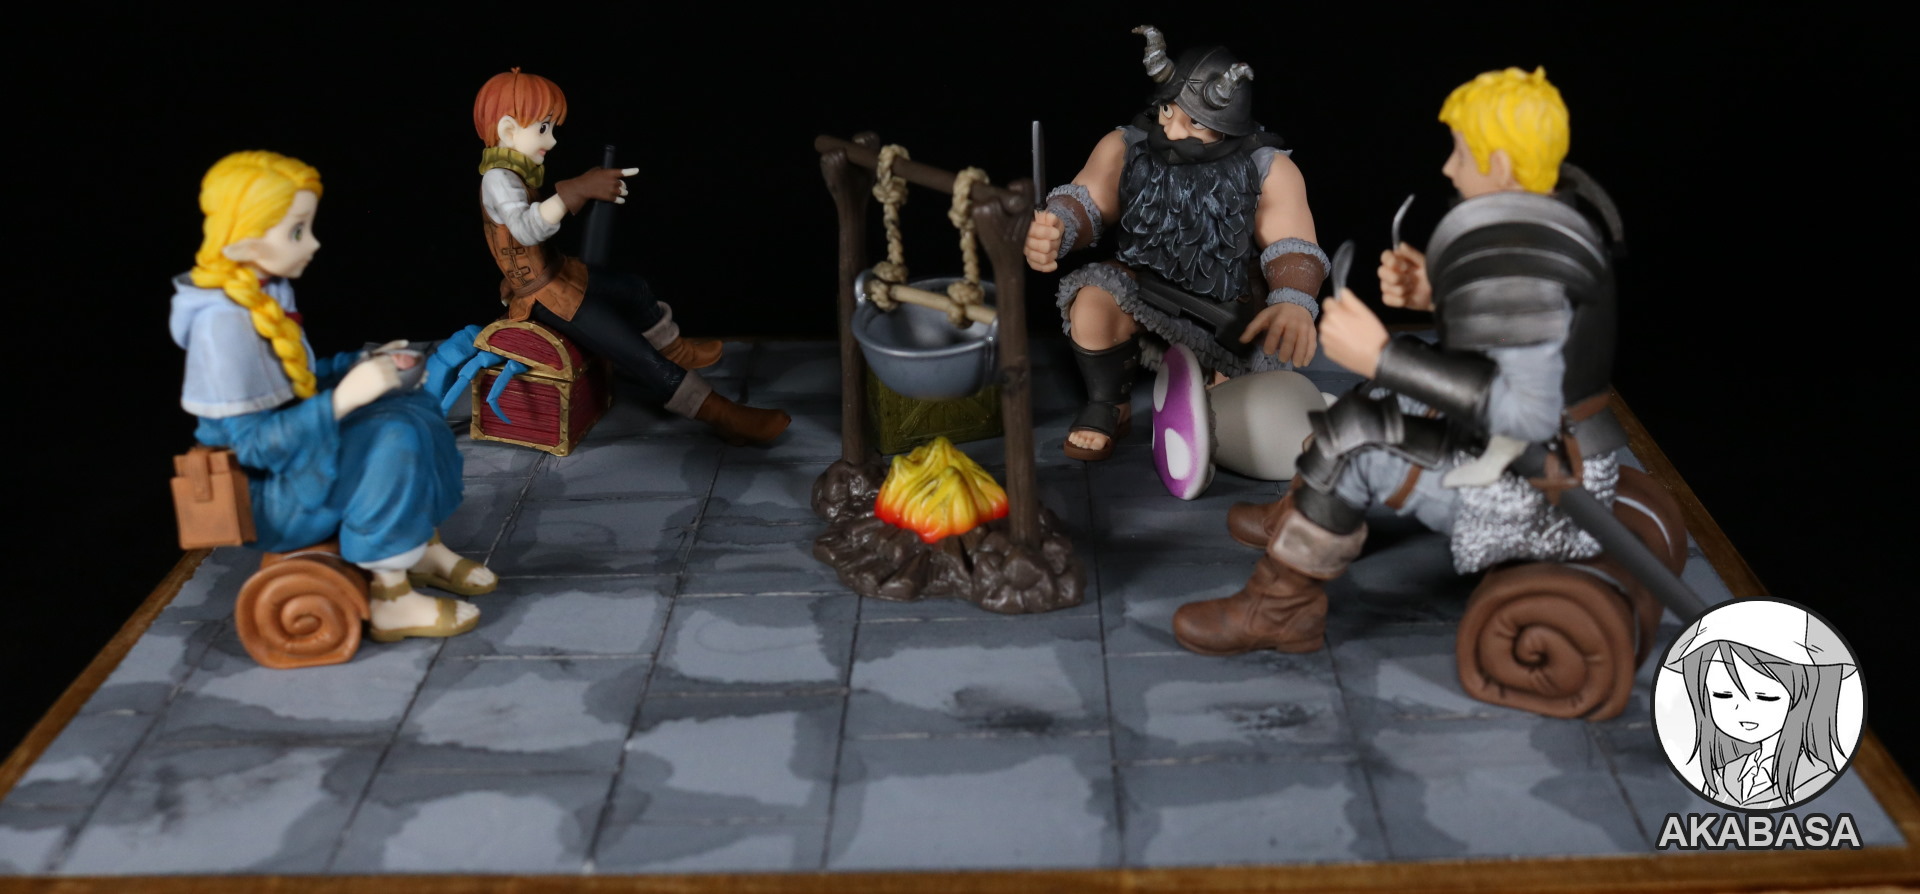
FYI, the camping prop and the wooden crate are from “Click N’ Play Military Life Camping Set 12 Piece Play Set with Accessories”. Google it and you will see what it is. I originally purchased it for the tent but saved the props for a future usage.
Now, it’s not over, yet. What I need is a display case to put it then. I don’t normally place diorama in a protective case but I say this one is an exception because its size is perfect for a display case I already have.
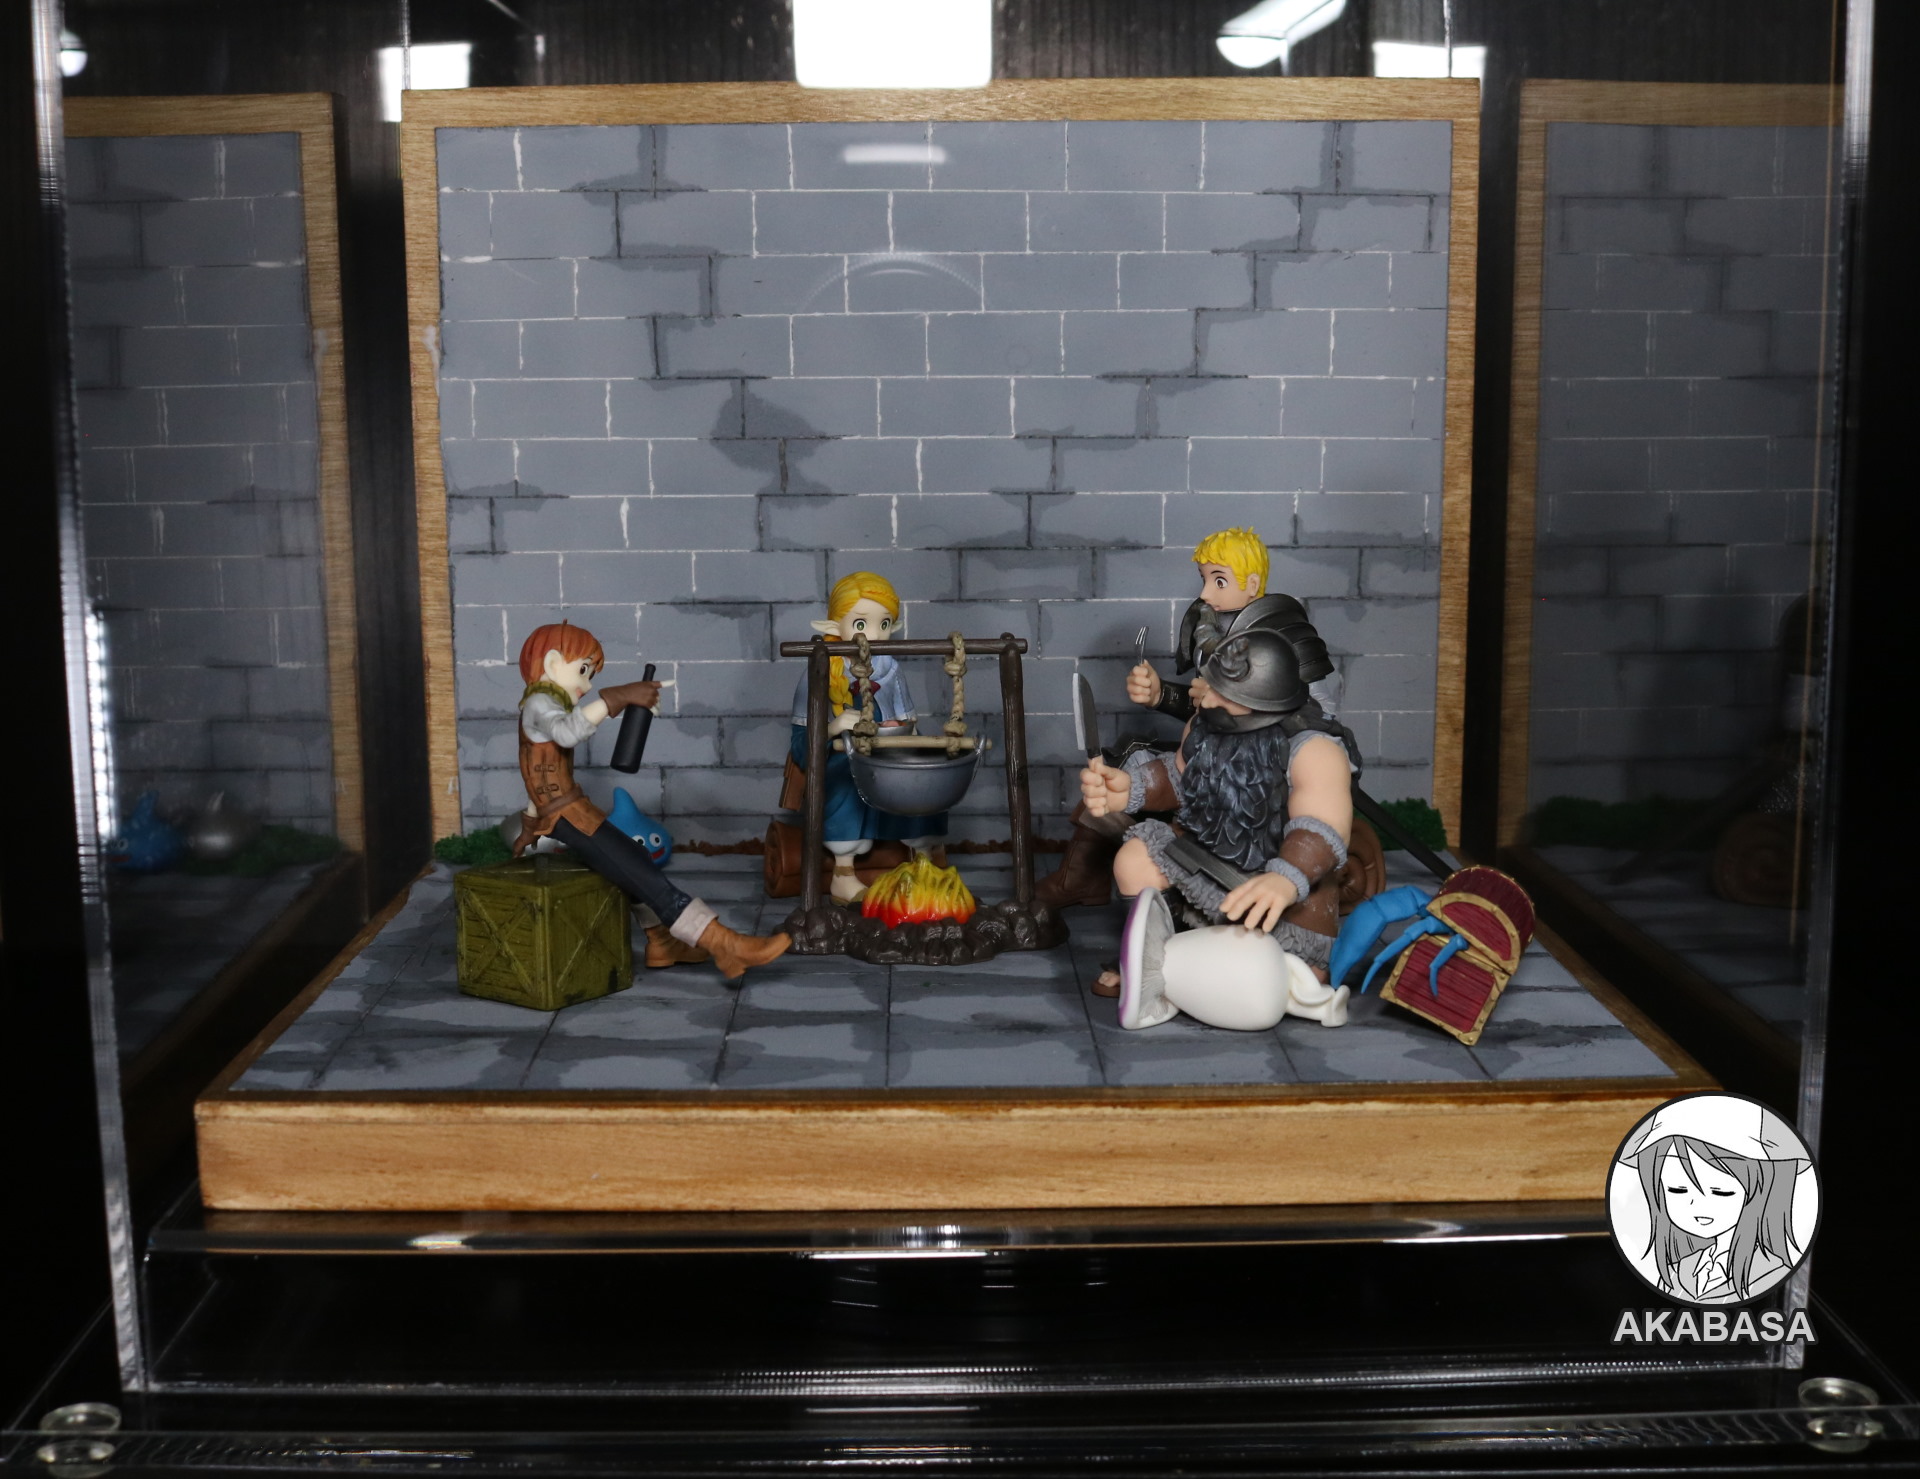
The case is a high quality acrylic football display case by a company called “A Team Plastics”. They are actually a local Canadian company near my location and I’ve purchased some acrylic cases from them previously. You can find them on Ebay also.
Their acrylic cases are far superior to what I generally find on Amazon. 99% of acrylic display cases on Amazon are from China, and clarity of those acrylic panels is questionable.
A team plastic acrylic panels are really crystal clear. It’s as good as glass panels. Their products are not cheap though. The above case cost me 100 CAD.
So, this diorama project is finally complete.

![[Volks] CharaGumin Senshi](https://akabasa.com/wp-content/uploads/2021/09/volks_senshi_1-768x432.jpg)